

Building an AI-Powered Web Application in 72 Hours

A few days ago I introduced Thirsty Bot, an AI-powered web application that helps you find cocktail recipes based on the ingredients you have at home. I built the app in 72 hours as part of a personal "hackathon", and I learned a lot in the process! In this post, I'll share some of what I learned, and do a deeper dive into how it all works.
If you haven't tried it out yet, I recommend you give it a go at thirsty.bot! You can use the code
KEEGANCODES10for 10 free credits, in addition to the 5 credits you get just for signing up.
In the first half of this post, I'll cover the app and its features, how long I spent building it, and what my process was for putting together a full-stack application in a weekend. In the second half, I'll dive deeper into the technical aspects of the project and how things work under the hood.
Application Design
I wanted the design to be reminiscent of an art-deco bar. I really like some bars around town that use deep green and gold, so that's what I went with:
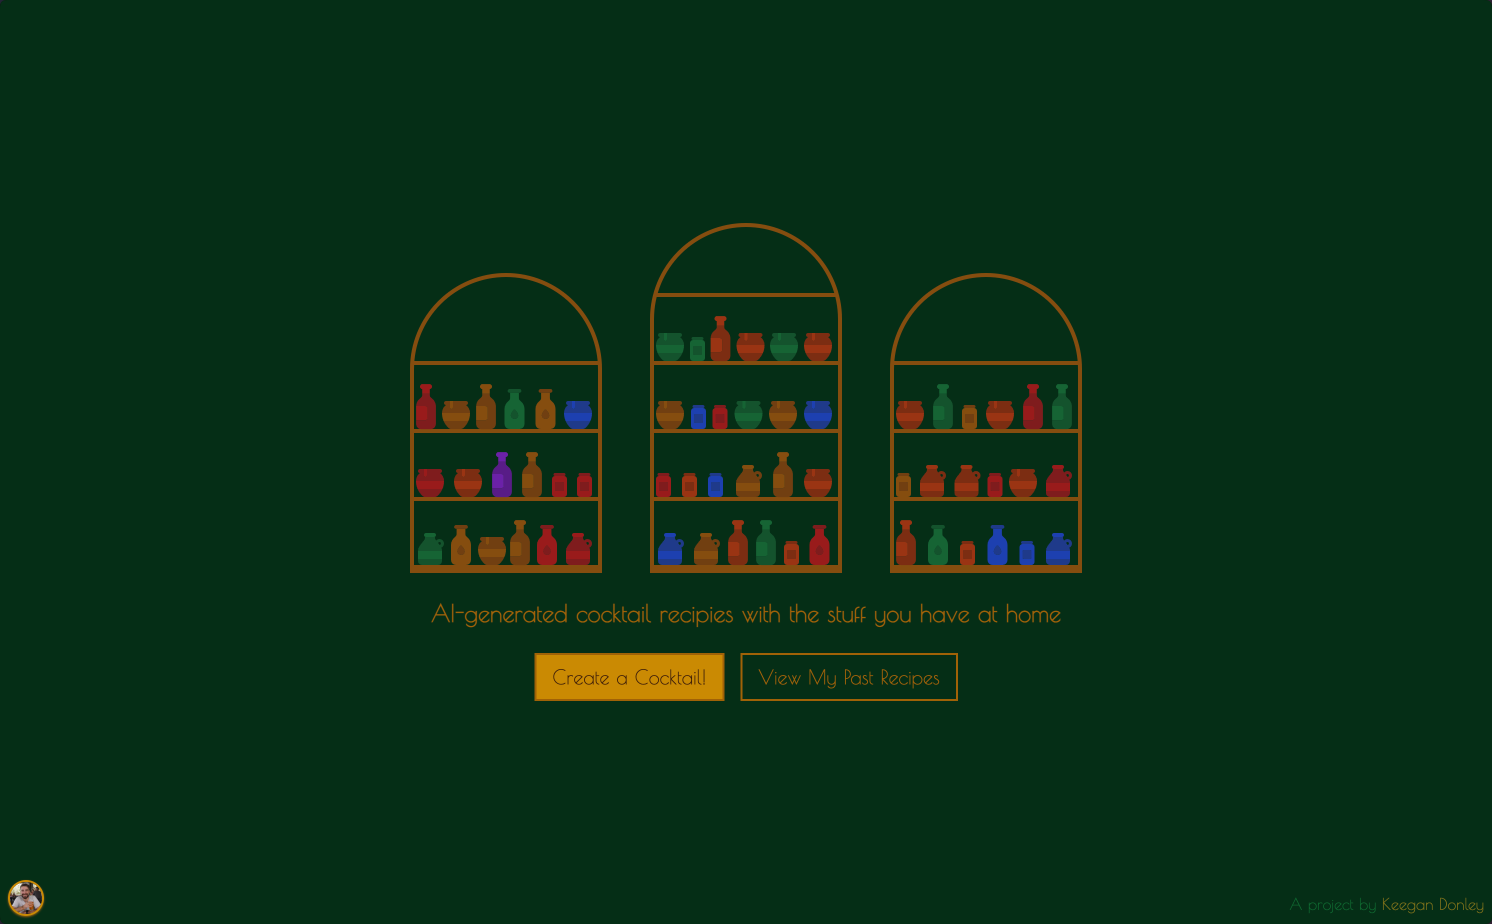
The hompage has a series of arched "bars" with various bottles on the shelves. They're randomly generated on each load for some variety
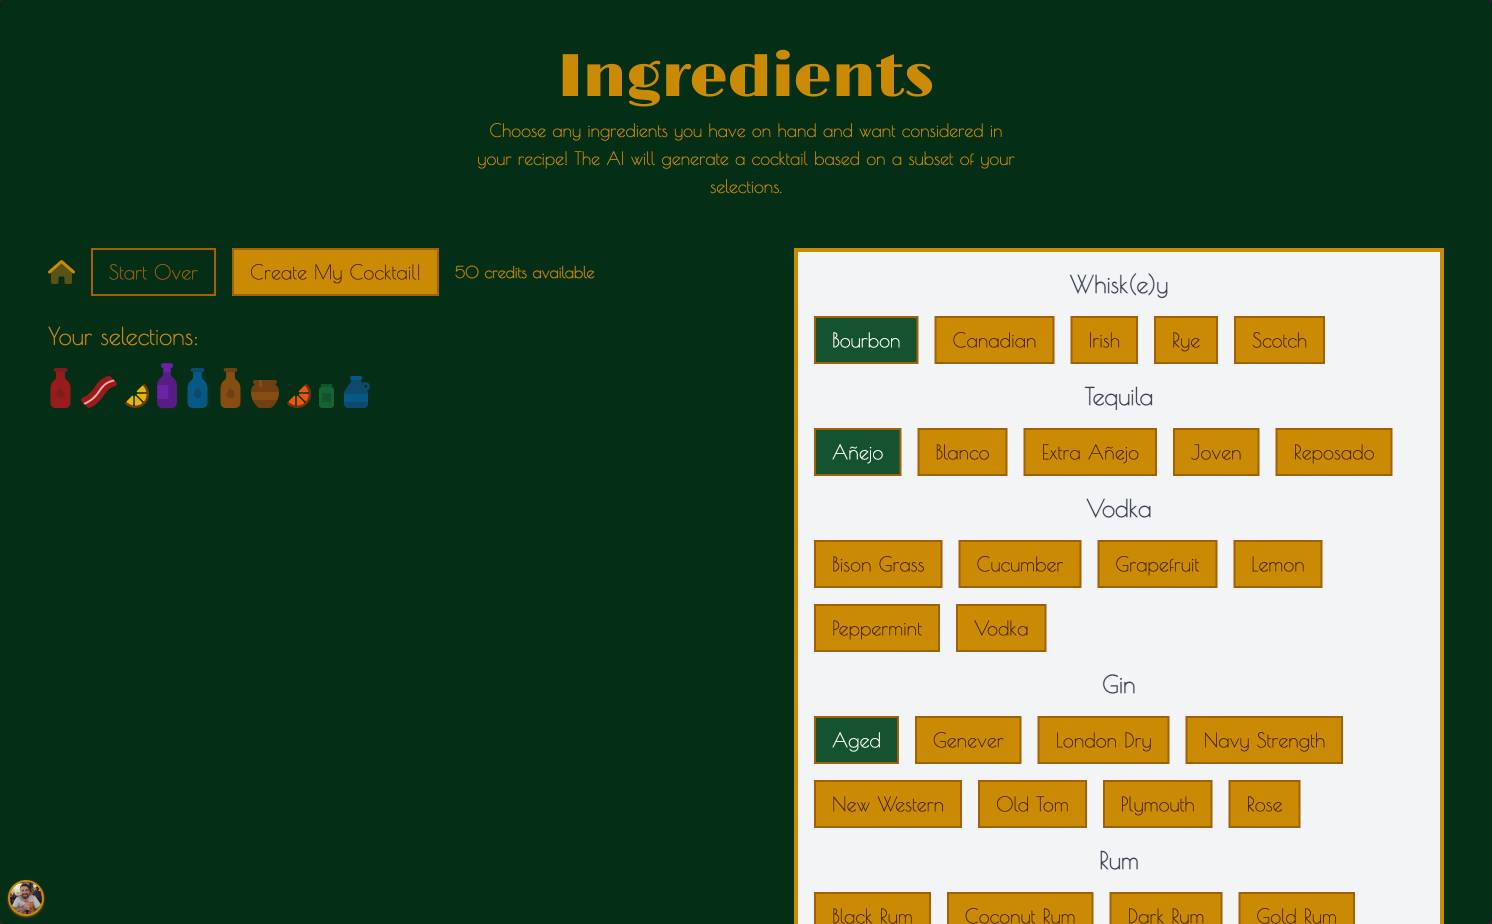
The builder has an ingredients list, and some icons to indicate your selections. Over time, I've added a few unique icons as fun easter eggs
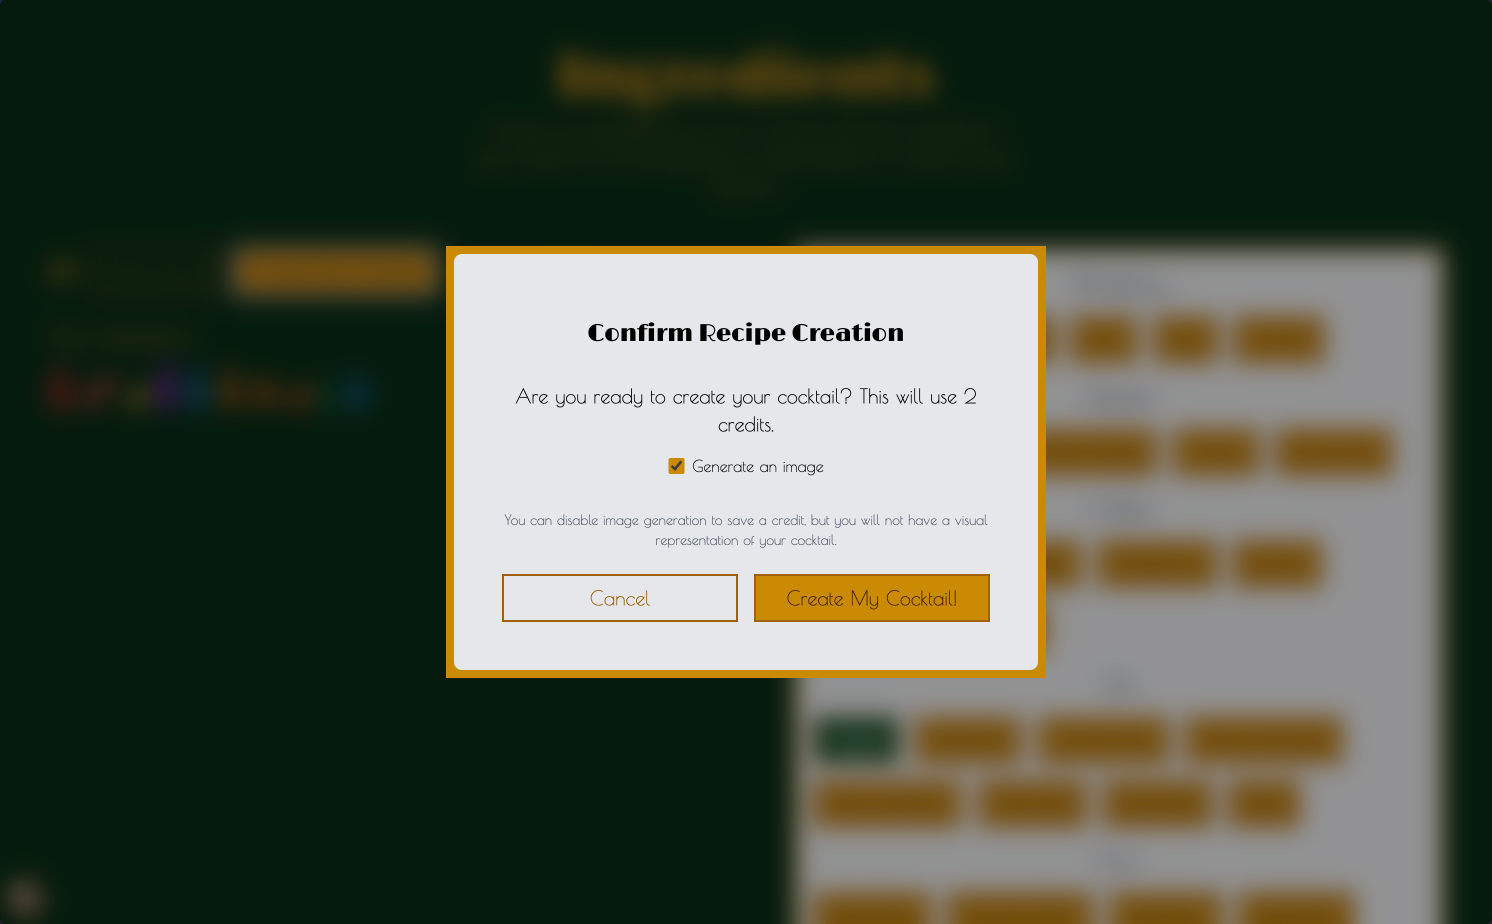
A few simple modals are used for status changes, modeled after menu cards you might see at a real bar
Main Features
The following was my list of features I wanted to build in the first weekend. I've indicated which ones I finished during the weekend (), which ones I finished after (), and which ones I haven't done yet ():
User Auth
Recipe Generation
Image Generation
Saved Creations
Credit System
Billing Integration
Mobile Design
Voucher System
Polished Design (Animations, etc)
Public Recipe Sharing
Custom Ingredients
Re-Generating A Cocktail for New Results
I'm still actively working on the application and improving it over time. This table is accurate as of April 8, 2024.
My Build Process
I built the app in a weekend, over approximately 72 hours. I wanted to treat this like my days participating in hackathons, but just a bit longer. Each day, I set myself some goals and tracked how much time I spent on the project. In total I spent 23 hours and 40 minutes of active coding time.
Day 1 - MVP and Proof of Concept
7h 40m development time
On the first day, I finished my day job around 4pm. During lunch, I had bootstrapped a Next.js app, so I hit the ground running and did some basic styling with Tailwind, and then started on auth. I wanted to build in auth early, so it wouldn't be a major lift later.
By the end of the day, I had an early iteration of my AI integration working, a backend that could store and return a recipe and an image, and the ability to see your finished product. No loading states yet, and the selection of available ingredients was tiny.
Here's a video demo of where things stood at the end of day 1
Day 2 - Mobile Support & Polish; Final Core Features
9h 39m development time
Day 2 was my main heads down day. I had the MVP/proof of concept done, and sent to a couple friends overnight to get some early testing done. The day was focused on details - adding a lot more ingredients to the database, supporting mobile screen sizes, adding loading states and intersitial modals, things like that. I also added the ability to see your list of past generations.
The second day is also when I cut over from the development instance of my authentication with Clerk. I also merged my development branch on Planetscale into production. "Going live" took a good chunk of my time on this day, and most of the afternoon was spent on wiring things back up.
The first half of my demo video below shows the progress on the desktop site, and the second half shows the new mobile experience:
Here's a video demo of where things stood at the end of day 2
Day 3 - Billing; Final Go-Live Plan
6h 21m development time
At the start of the third day, I had everything working smoothly, except no ability to add additional credits to your account. I spent the majority of the morning working on integrating with Stripe using payment links. I went with the no-code solution since I didn't need the integration to be very complex. Through Stripe, I was able to handle discount codes to act as vouchers for credits. I wanted to build a first-party voucher system, but didn't have the time to dedicate yet.
Follow-up Tasks
After the weekend, I launched the app on my Twitter, LinkedIn, and to some more friends and coworkers. I continued working on improvements, and completed a few of the important tasks that I didn't have time for during the original hack weekend.
I added a better first-party voucher system, so nobody has to go through Stripe in order to redeem a code. This system is more robust than what Stripe offers with payment links, and allows me to have more fine-grained control over how codes are created and redeemed. I also added some more visual polish over the following week, spending more time on small layout details and animations.
Finally, I continued to take feedback on my list of ingredients, adding more as people remind me of their favorite ingredients that I left off the list.
I'd like to eventually allow creating custom ingredients, so users aren't limited to the ones I've pre-defined. If you continue reading into my architecture discussion, I cover a bit about the challenges associated with that.
Here's a demo of the state of the application at the time of publishing!
Up Next: Application Architecture
This is going to be a long one, so if you need to take a break and use Thirsty Bot to recommend a cocktail, this is a good pause point! After the break, I'm going to get into the architectural details of the application. We'll look at some code, evaluate the tools I used, and go over what I learned. If that sounds interesting, keep reading!
Database
My database platform is Planetscale on the smallest plan, PS-10. I use Planetscale
for keegan.codes, so it made
sense to me to use it for Thirsty Bot as well since it was familiar and I could build quickly. I wanted
to leverage Planetscale's branching and safe
schema changes as well, since I knew I'd be adjusting the database schema a lot as I iterated quickly and
built in public.
The serverless driver from Planetscale is important and a big selling point for me, because it means I can execute queries using the fetch API over an HTTP connection. Connecting to the database from either an API route or a server component is super easy, and I don't need to worry about sharing database connections:
const dbConfig = {
  host: process.env.DATABASE_HOST,
  username: process.env.DATABASE_USERNAME,
  password: process.env.DATABASE_PASSWORD,
};

const conn = connect(dbConfig);

await conn.execute('SHOW TABLES');
javascript
I learned a lot about how branching works on Planetscale. At first, I forgot to think about moving data from a branch to the production database, so I had to spend some time migrating data after I set up all the categories and options. Note to self: don't accidentally create a ton of data on a branch instead of the production database.
AI Recipe Generation
I tried quite a few different models and platforms in order to settle on how I could generate the recipes. They all had their strengths and weaknesses, but here is some of what I discovered:
- GPT-3.5-turbo: The biggest problem I had with gpt-3.5-turbo is that it would make a drink with literally anything, no matter how much I adjusted the prompt. If I told it I had eggs, soy sauce, and water, it would tell me I could make an egg, soy sauce, and water martini. Not a great representation of what a cocktail should be. I needed it to respond that certain combinations of ingredients just aren't possible.
- Llama-2-70b-chat: I tried this one out through Replicate. Llama-2-70b solved my problem of creating drinks with weird ingredients, but I could not coerce this model into only using the ingredients provided. It continually added ingredients that weren't provided. That's no good either.
- GPT-4: This got me the closest. Gpt-4 mostly respected my rules in initial tests, and would reliably return a token "IMPOSSIBLE" when it decided the ingredients couldn't go together. It also only very rarely added ingredients. Sometimes it would add simple syrup or other small additions when they weren't included, but that was rare. The biggest problem I had was that it would make things that were non-cocktails. For example, if I provided coffee beans as garnish, irish cream, vodka, cinnamon, and espresso, it would tell me to grind the beans, brew a cup of coffee, and add cinnamon. Not quite what I was going for:
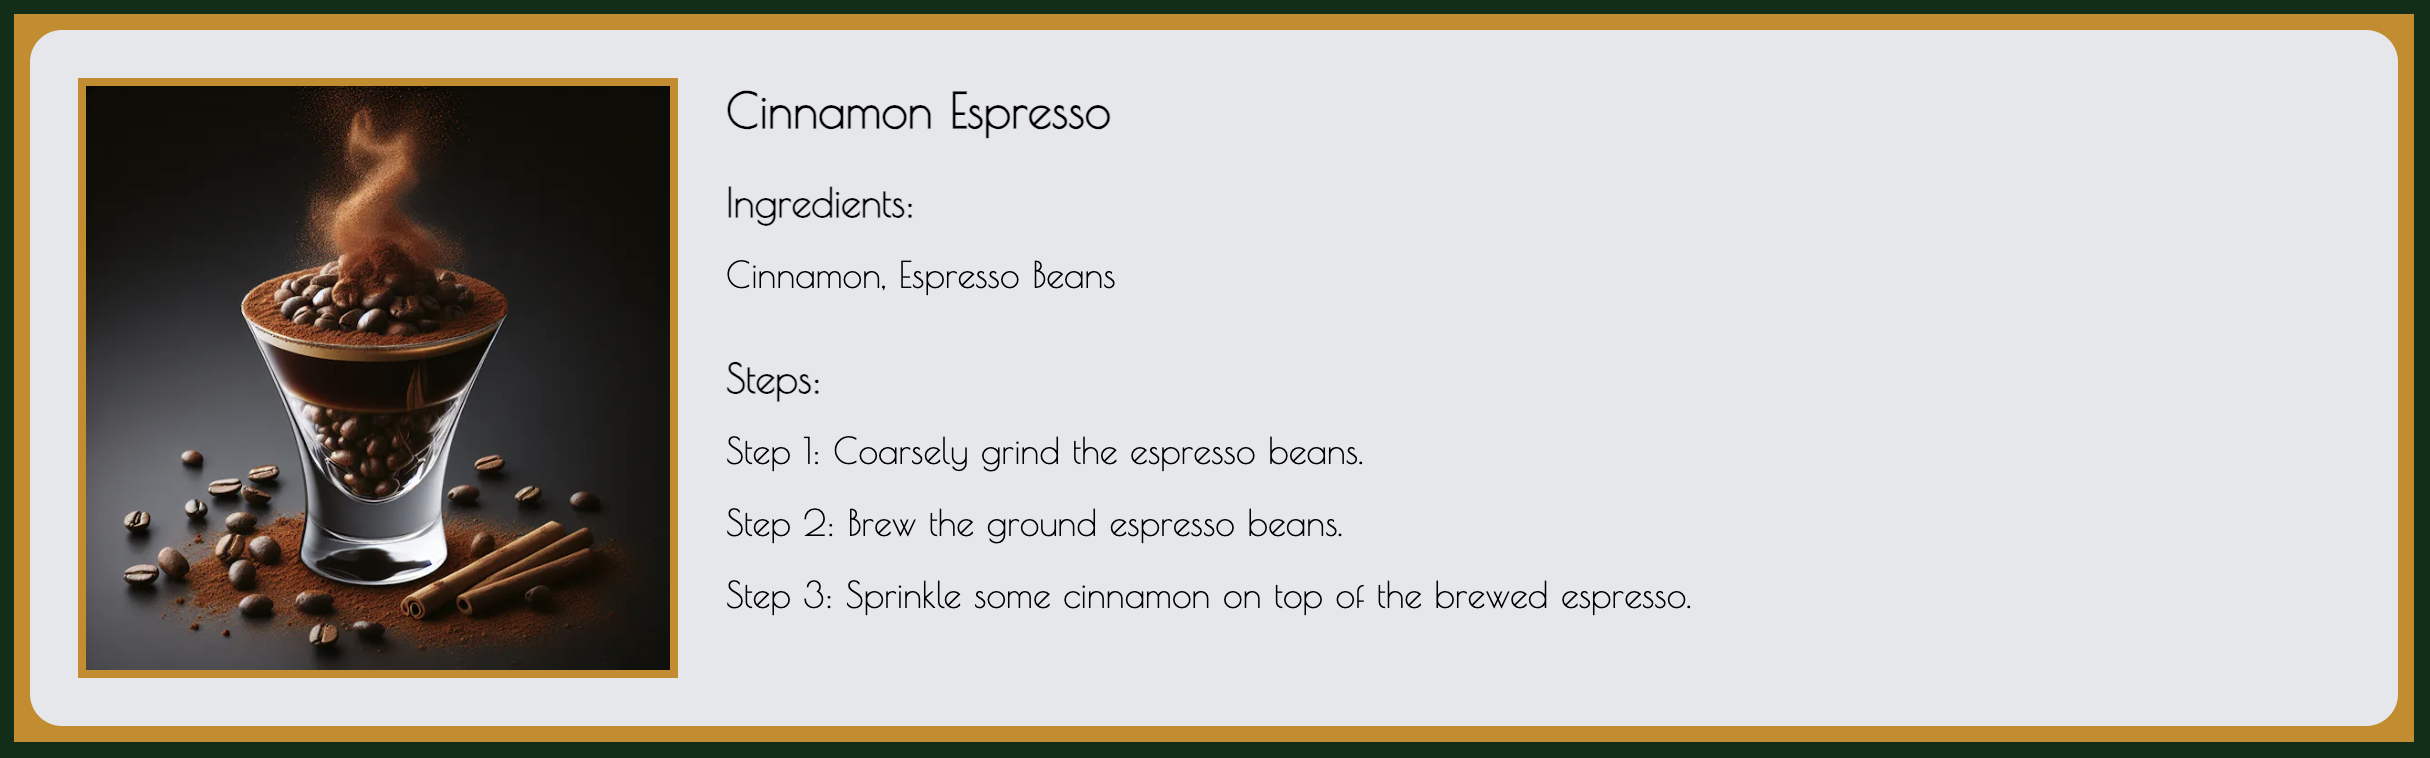
Cinnamon Espresso: Cool image; not a good cocktail
I tried a few other models as well in my initial investigation, but they performed the task poorly. All had some of the issues presented here, and didn't make the final list. In the end, I narrowed it down to these three, and did more extensive testing and iteration to choose one.
I settled on gpt-4, which at the time of writing is still what Thirsty Bot uses. It's a bit more expensive, but it seemed best suited for my task. With a lot of iteration on my prompt with the instructions, I was able to get reliable results. I had to change my input format a lot, and write a pretty long set of instructions, but I was able to stop getting non-provided ingredients, stopped getting things that aren't cocktails, and was able to handle a set of ingredients that isn't possible.
Here's the format pass the chosen ingredients to GPT-4 in:
(Spirits: Vodka, Rye Whiskey, Tequila)
(Liqueurs: Triple Sec, Amaretto, Irish Cream)
(Garnish: Espresso Beans, Lemon, Mint)
(Mixer: Cola, Espresso, Tonic Water)
(Wine: Champagne Wine, Red Wine)text
I do still occasionally get drinks that seem correct, but are missing one or two key ingredients. That's an issue I'm still working on and actively improving. I track all generations and the version of the prompt that was used, so I can evaluate whether my tweaks are working or not.
In the future, I'd like to move to gpt-3.5-turbo. I'm fairly confident it could work, but it would take some fine tuning of the model, something I'm not familiar with how to do yet. I'm hoping to look into this down the road to save on cost, and make things faster. It'll be a learning journey, but seems like a good next step
Why a Pre-Defined Ingredients List?
This was a big change I made after the first few hours of testing. I decided to go with a pre-defined list of ingredients rather than my original plan to allow the user to input their own ingredients. I had two reasons behind this:
- Security: With free-form content, prompt injection is a risk. Users could construct the content of their ingredient list in such a way that the LLM responds in unexpected and unintended ways. There isn't a risk to customer data in the sense of a traditional security risk, but I still didn't want users trying to break out of the intended use-case of the system.
- Predictability/Simplicity: Having a list of ingredients means I have precise control over how content is passed to the LLM, and I don't have to worry about users adding too weird of ingredients (see my soy sauce example from my model investigation).
I'm still hopeful that I can get custom content working in a strightforward way, so users aren't limited to only the ingredients I've come up with. I might toy with the idea of pre-processing the custom ingredients with a model that's cheaper to run, or make the system more flexible in how it returns drink recipes. Regardless, that's an improvement for another day and wasn't a part of my original hack weekend.
AI Image Generation
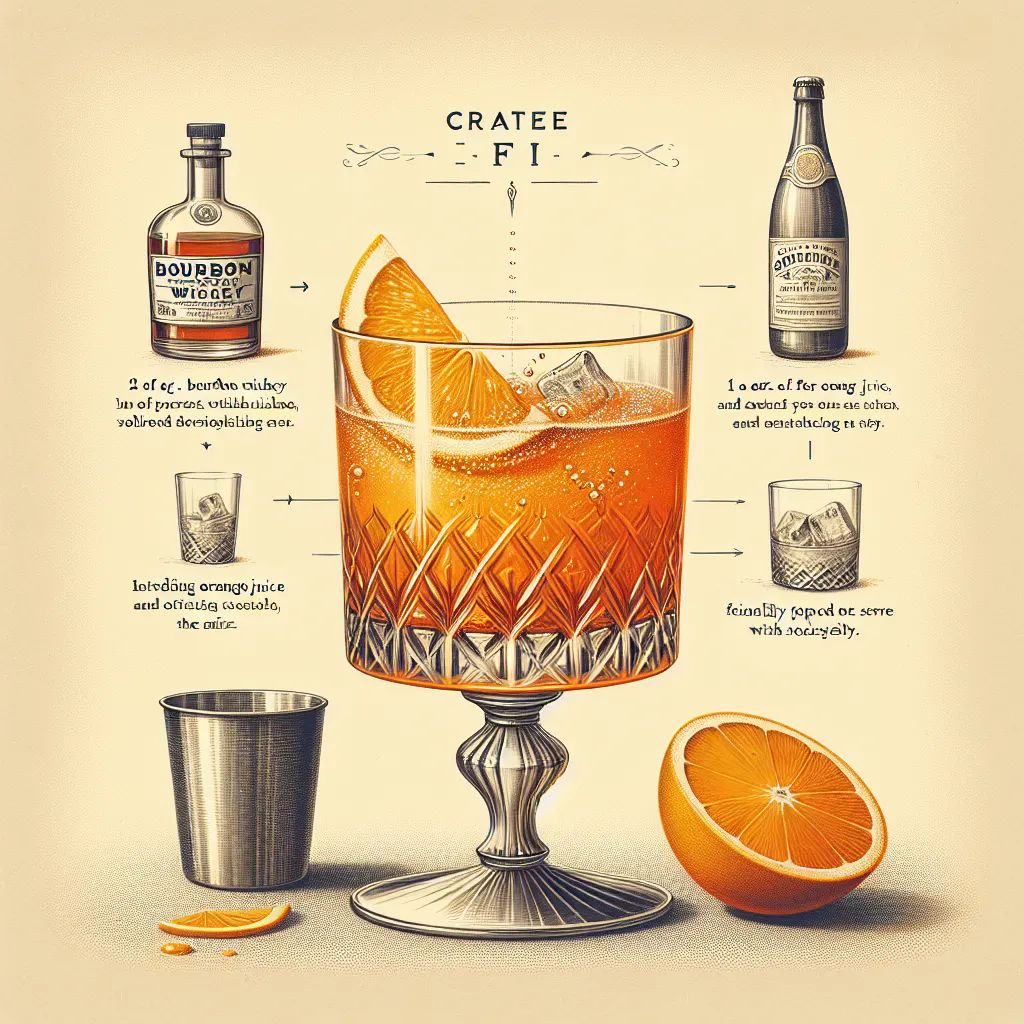
For the images to go with each recipe, I used DALL·E 3. I've been using its predecessor DALLE·2 since the beginning, and was excited to work with the improved DALL·E 3 for the first time. It was surprisingly easy to take the output from gpt-4, and use it to generate a prompt for an image. Here's one I really like:

Maple Old Fashioned
I'm still working on tuning how I direct DALL·E 3. My prompt right now includes the steps to make the drink, as well as the name and ingredients. I had better results getting a drink that matched the description in the recipe this way, however it's difficult to make DALL·E 3 leave off the text, and not show the steps themselves in the image:
Whiskey Smash
I learned that negative prompting doesn't work well with these models - saying something like "Do not include any steps or instructions" resulted in almost always having steps or instructions in the image. I needed to avoid the words "steps", "instructions", etc. entirely!
Application Framework
I built the application with Next.js server components. This was my second project with the app router
and React server components (the first was this blog).
This time around, I definitely understood the concepts
better, so things went a lot faster. I used some form actions and learned how to use the useFormStatus
hook for the first time.
It's well-documented that I don't like useEffect and try to avoid it entirely. With server components and form actions, I didn't have to use
useEffectanywhere in the application! That's a big win in my book.
Thirsty Bot has a form to redeem vouchers for free credits. This way, I can give them away to friends and family who are testing it for me, and also on social media and product hunt, for example:

This uses a server action to submit your code, validate it, and give you the credits.
No need for any client-side fetching logic!
The button itself is a client component that uses the useFormState hook in order to show the
disabled state while it's pending:.
Here's the form component:
const handleRedeemAction = async (data: FormData) => {
  'use server';
  const voucher: string = data.get('voucher');

  // Handle the form data
};

const Redeem = () => {
  return (
    <form className="mx-auto flex gap-x-2" action={handleRedeemAction}>
      <RedeemForm />
    </form>
  );
};
tsx
And the client component, RedeemForm:
const RedeemForm = () => {
  const { pending } = useFormStatus();

  return (
    <>
      <input type="text" placeholder="Enter Voucher Code" name="voucher" />
      <button type="submit" disabled={pending}>
        Redeem
      </button>
    </>
  );
};
tsx
Form actions eliminate the need for local form state. It's an entirely native, uncontrolled form. I learned to really like this pattern and get back to the basics of using form data how it was originally intended.
Thirsty Bot's API is also built with Next.js. I have APIs for the builder and fetching options, generating cocktails, and webhooks for handling Stripe billing events and Clerk user management events. The app is a combination of React server components that fetch their own data directly, and APIs that are called client-side.
I like building with Next.js API routes, however I did run into some trouble decoding and parsing Stripe webhook responses. There's not a lot of clear advice or information on how to do this with Next.js, so with a little trial and error I got it working:
const stripe = new Stripe(process.env.STRIPE_SECRET_KEY!, {
  apiVersion: '2023-10-16',
});

export const POST = async (req: NextRequest) => {
  // Get the signing signature so we can verify the event
  const sig = headers().get('Stripe-Signature') as string;

  // Get the body as a string.
  // This wasn't intuitive to me, since most documentation shows getting the body
  // as JSON. Doing req.json() got the event payload, but because of the Next.js
  // body parser, the stripe SDK couldn't parse it and verify the signature correcly.
  const bodyString = await req.text();

  const webhookSecret = process.env.STRIPE_BILLING_WEBHOOK_SECRET!;
  let event: Stripe.Event;

  try {
    if (!sig || !webhookSecret) {
      return new Response('Webhook Error: Invalid signature', { status: 500 });
    }

    // Use the Stripe SDK to get the event
    event = stripe.webhooks.constructEvent(bodyString, sig, webhookSecret);
  } catch (err: any) {
    return new Response(`Webhook Error: ${err.message}`, { status: 400 });
  }

  const { type, data } = event;

  // Handle the event
};
typescript
Everything else is pretty by the books for Next.js! Styling is all done with Tailwind (and a small amount of plain CSS for animations). I moved some utilities and styles into a new foundations library of shared code I use on many of my projects. This has been a big time saver for bootstrapping new projects!
Authentication
I looked at a number of options for authentication. Some people recommend next-auth, others like Supabase Auth. In the end, I went with Clerk. The integration was super simple, and I was able to get login working within a matter of minutes, not hours or days. It's a very low-code solution (at least it can be), with just a few default UI components, route handlers, and edge middleware. I also have a couple webhook handlers that can react to Clerk's user events. For example, on user creation I add 5 free credits to the user's account.
Clerk's pre-built UI is good enough that I didn't need to spend time building one myself
I had to re-learn a bit about creating OAuth apps with Github and Google Cloud. It's been a while since I worked on building auth flows! I also underestimated the amount of work it would be to cut over from Clerk development mode to production, and spent a lot of time getting everything to work again once I moved to production mode.
I had my middleware set up wrong at first, which led to some hard to diagnose issues where login would fail sometimes. I ended up running with the following middleware configuration:
import { authMiddleware } from '@clerk/nextjs';

export default authMiddleware({
  publicRoutes: ['/', '/api/(.*)'],
});

export const config = {
  matcher: ['/((?!.*\\..*|_next).*)', '/'],
};
typescript
The / route and /api routes are public. This means that I handle checking auth on my API endpoints manually
instead of the middleware blocking access by default. This allows me to have some endpoints that work without auth,
for future features that may not require a user to be logged in - such as publicly sharing a cocktail.
Hosting Infrastructure
The application runs on Vercel. I already had a pro team for keegan.codes, so I didn't have any additional cost associated with the project. I'm mostly running on serverless functions, which is a bit different from my blog, which runs on edge functions. Overall I haven't noticed too many issues with cold starts, although it's definitely more noticeable compared to the things I run on the edge.

The whole application builds and deploys in about a minute, which was great for rapidly iterating on the app as it came together, all while I had people using it
After an image is generated by DALL·E, the download link is only valid for a short period. So, immediately after generation, my application downloads the image and uploads it to Cloudflare R2. They have no egress fee for bandwidth, so it's ideal for hosting assets like these. I also use Next.js image optimization which reduces how many requests are made to the source file in R2.
Key Takeaways
This was a really fun project to build, and I hope you've had a chance to try it out and find it useful too! I set out to build the app so I could practice with server components, and keep my full-stack skills sharp. Building an entire application in a matter of days made me miss my time participating in hackathons, but I also won't be pulling another weekend like that for a while. I'll be following a more sustainable development pace going forward.
It's somewhat rare that I have the time and motivation to follow through with a side project to completion, so I'm happy this project made it all the way to launch. I have a few other projects I've been wanting to build that I may focus on next, given some more free time.
Here's what I learned in summary while working on this project:
- Prompt engineering is an art! I read a lot of advice and had to iterate a lot when prompting GPT-4 in order to get reliable results I was happy with. Same goes for DALL·E 3.
- Writing data fetching and mutation logic directly in React components is odd at first, but I quickly got the hang of it. Good composition of code was important to make sure things didn't get too confusing.
- Cost optimization is difficult when working with large models. The app is still more expensive to run than I would like, but I am working to improve on that.
- I like hand-building most of the features of my projects, but leaning on solid third party solutions really sped up the development. I did still try to focus on keeping things loosely coupled, so I can swap out any component down the road if needs change.
Thanks for reading to the end! This has been my longest post to date, and I had a lot of fun reflecting on how I built Thirsty Bot! I'll probably keep writing posts like this about projects I build, since it gave me a good opportunity to look back on what I built, and the areas I could improve the app!
If you haven't tried it yet and this post got you interested, you can sign up for free at thirsty.bot! Don't forget to use the code
KEEGANCODES10for 10 free credits, in addition to the 5 credits you get just for signing up.