

How to Build a Calendar Component in React
Recently, I had to implement a calendar view for some complex data, but didn't want to rely on a third-party calendar library that was bloated with features I didn't need, and I really wanted to stay away from moment.js for performance reasons, which a lot of the existing libraries use.
I haven't built a calendar application from scratch since my senior project in college, so I enjoyed the opportunity to write something new, now that I have a lot more experience between now and my last attempt. The underlying data structure is something I've used for calendar applications in the past and has worked really well.
You can find a live demo of what I built here on my website.
This is a full tutorial, the first one I'll be publishing on my new blog. If you'd like a quick summary instead, you can skip to the tldr at the bottom. Otherwise, read on!
Designing the Data Structure
A physical calendar is essentially a 7x6 matrix, with certain cells hidden or shown based on what day of the week the month starts on. With that in mind, let's start by representing the calendar as such a matrix:
const calendar: (null | number)[][] = [
  [null, null, null, null, null, null, null],
  [null, null, null, null, null, null, null],
  [null, null, null, null, null, null, null],
  [null, null, null, null, null, null, null],
  [null, null, null, null, null, null, null],
  [null, null, null, null, null, null, null],
];
javascript
For a given month, we need to fill this matrix with the dates, starting on the day of the week the month starts on. In each row of the matrix, we'll take index 0 to be Sunday, 1 to be Monday, and so on. As an example, let's take November 2021:
const calendar: (null | number)[][] = [
  [null, 1, 2, 3, 4, 5, 6],
  [7, 8, 9, 10, 11, 12, 13],
  [14, 15, 16, 17, 18, 19, 20],
  [21, 22, 23, 24, 25, 26, 27],
  [28, 29, 30, null, null, null, null],
  [null, null, null, null, null, null, null],
];
javascript
Now, it becomes clearer what we need to do. We need to decide at which index the first day of the month is, and decide how many days that month has.
Filling the Matrix
We know what the end result will be for November 2021, as seen above. Let's take that knowledge and write some code to dynamically fill the matrix for whatever month is selected.
We'll use Luxon for our localization. This could of course be done with vanilla Javascript, but when it comes to working with varying locales, I prefer to fall back on a tried and true solution. We'll select the current month for starters:
const [monthOffset, setMonthOffset] = useState(0);

const date = useMemo(
  () => DateTime.local().startOf('month').minus({ months: monthOffset }),
  [monthOffset],
);
javascript
In the example above, we'll use monthOffset to move forward and backward through the months. Now, we have date which is a Luxon date object representing the first day of the month. We can use this to get the information we need to fill the matrix with data:
const days = [31, 29, 31, 30, 31, 30, 31, 31, 30, 31, 30, 31];

const monthIndex = date.month - 1;
const startingIndex = date.weekday === 7 ? 0 : date.weekday;
const daysInMonth = days[monthIndex];
javascript
We now have monthIndex to represent the months, numbered 0-11. We also calculate startingIndex. Weekday starts with 1, representing Monday, but for this example I wanted the calendar to start with Sunday, we we need to adjust the value slightly. Finally, we get the number of days in the month from a simple array mapping.
But wait! February's day count changes in leap years!
For this simple example, I always include 29 days in February. This is fine for my use case, since once the month turns over to March it will still start on the correct day. You can of course detect if it's a leap year or not and adjust accordingly. (This is probably a good idea, but alas, I didn't want to spend the time.)
Now, we just need to do some fancy looping to fill the matrix with our days. No other information is needed!
let usedDaysThisWeek = startingIndex;
let weeksUsed = 0;
let day = 1;
while (day <= daysInMonth) {
  calendar[weeksUsed][usedDaysThisWeek] = day;
  day += 1;
  if (usedDaysThisWeek === 6) {
    usedDaysThisWeek = 0;
    weeksUsed += 1;
  } else {
    usedDaysThisWeek += 1;
  }
}
javascript
Let's go ahead and memoize our entire calendar, so we have an object that updates automatically whenever the month changes:
const month = useMemo(() => {
  const monthIndex = date.month - 1;
  const startingIndex = date.weekday === 7 ? 0 : date.weekday;
  const daysInMonth = days[monthIndex];

  const res: (null | number)[][] = [
    [null, null, null, null, null, null, null],
    [null, null, null, null, null, null, null],
    [null, null, null, null, null, null, null],
    [null, null, null, null, null, null, null],
    [null, null, null, null, null, null, null],
    [null, null, null, null, null, null, null],
  ];

  let usedDaysThisWeek = startingIndex;
  let weeksUsed = 0;
  let day = 1;
  while (day <= daysInMonth) {
    res[weeksUsed][usedDaysThisWeek] = day;
    day += 1;
    if (usedDaysThisWeek === 6) {
      usedDaysThisWeek = 0;
      weeksUsed += 1;
    } else {
      usedDaysThisWeek += 1;
    }
  }

  return res;
}, [date]);
javascript
That wasn't too bad! Now we have a matrix that represents a calendar, and all that's left is the fun part - designing the UI so it renders correctly!
Designing the Interface
I'm using Tailwind in this section to describe all the styling. I love Tailwind for its descriptive classNames that show exactly what's going on. It's particularly nice in tutorials like this as I don't need to show CSS alongside my React markup. The same effect can of course be achieved using standard CSS.
We're going to need to know what the current day is, so we can render it differently! Let's use Luxon again, since we already have it and it makes this so simple:
const today = useMemo(() => DateTime.local().startOf('day'), []);
javascript
Let's write some jsx! A 2-dimensional matrix tells me we're going to need a double loop; the outer loop will handle the rows, and the inner loop will handle the days.
<div className="mb-12 flex min-h-[700px] flex-grow flex-col">
  {month.map((week, weekIndex) => {
    return week.every((x) => x === null) ? (
      <Fragment key={JSON.stringify(week)} />
    ) : (
      <div key={JSON.stringify(week)} className="flex flex-grow">
        {week.map((day, dayIndex) => {
          const isToday =
            day === today.day &&
            date.month === today.month &&
            date.year === today.year;
          return (
            <div
              key={`${JSON.stringify(week)}-${day}-${dayIndex}`}
              className={`min-h-[100px] min-w-[200px] ${
                day ? 'bg-gray-100' : ''
              } ${isToday ? 'bg-blue-200' : ''} ${
                weekIndex === 0 ? 'border-t' : ''
              } flex w-full flex-col border-b border-r border-solid border-gray-200 ${
                dayIndex === 0 ? 'border-l' : ''
              }`}
            >
              <div className="relative h-4">
                <div className="absolute left-1 top-1 text-xs text-gray-500">
                  {day}
                </div>
              </div>
              {/* Render Content Here */}
            </div>
          );
        })}
      </div>
    );
  })}
</div>
javascript
That's about 30 lines of code to render our matrix; let's unpack it a little.
You may have noticed that our matrix has 6 rows, but we don't often need all of them (if you're looking for a case where we do, look at January, May, or October of 2021, to name a few). The first thing we do in the outer loop, is return an empty <Fragment /> if the entire row is empty. Other than that, we're good to go and render out each row.
Inside each row, we loop again over the days. Since our matrix is filled with either null or a number, it's easy to detect if the square we are in is a real day of the month or not. This is also where we determine if the current square represents today or not. If it does, we want it to be a different color - blue in this case.
What we end up with here is a basic calendar grid with the numbered days on it:
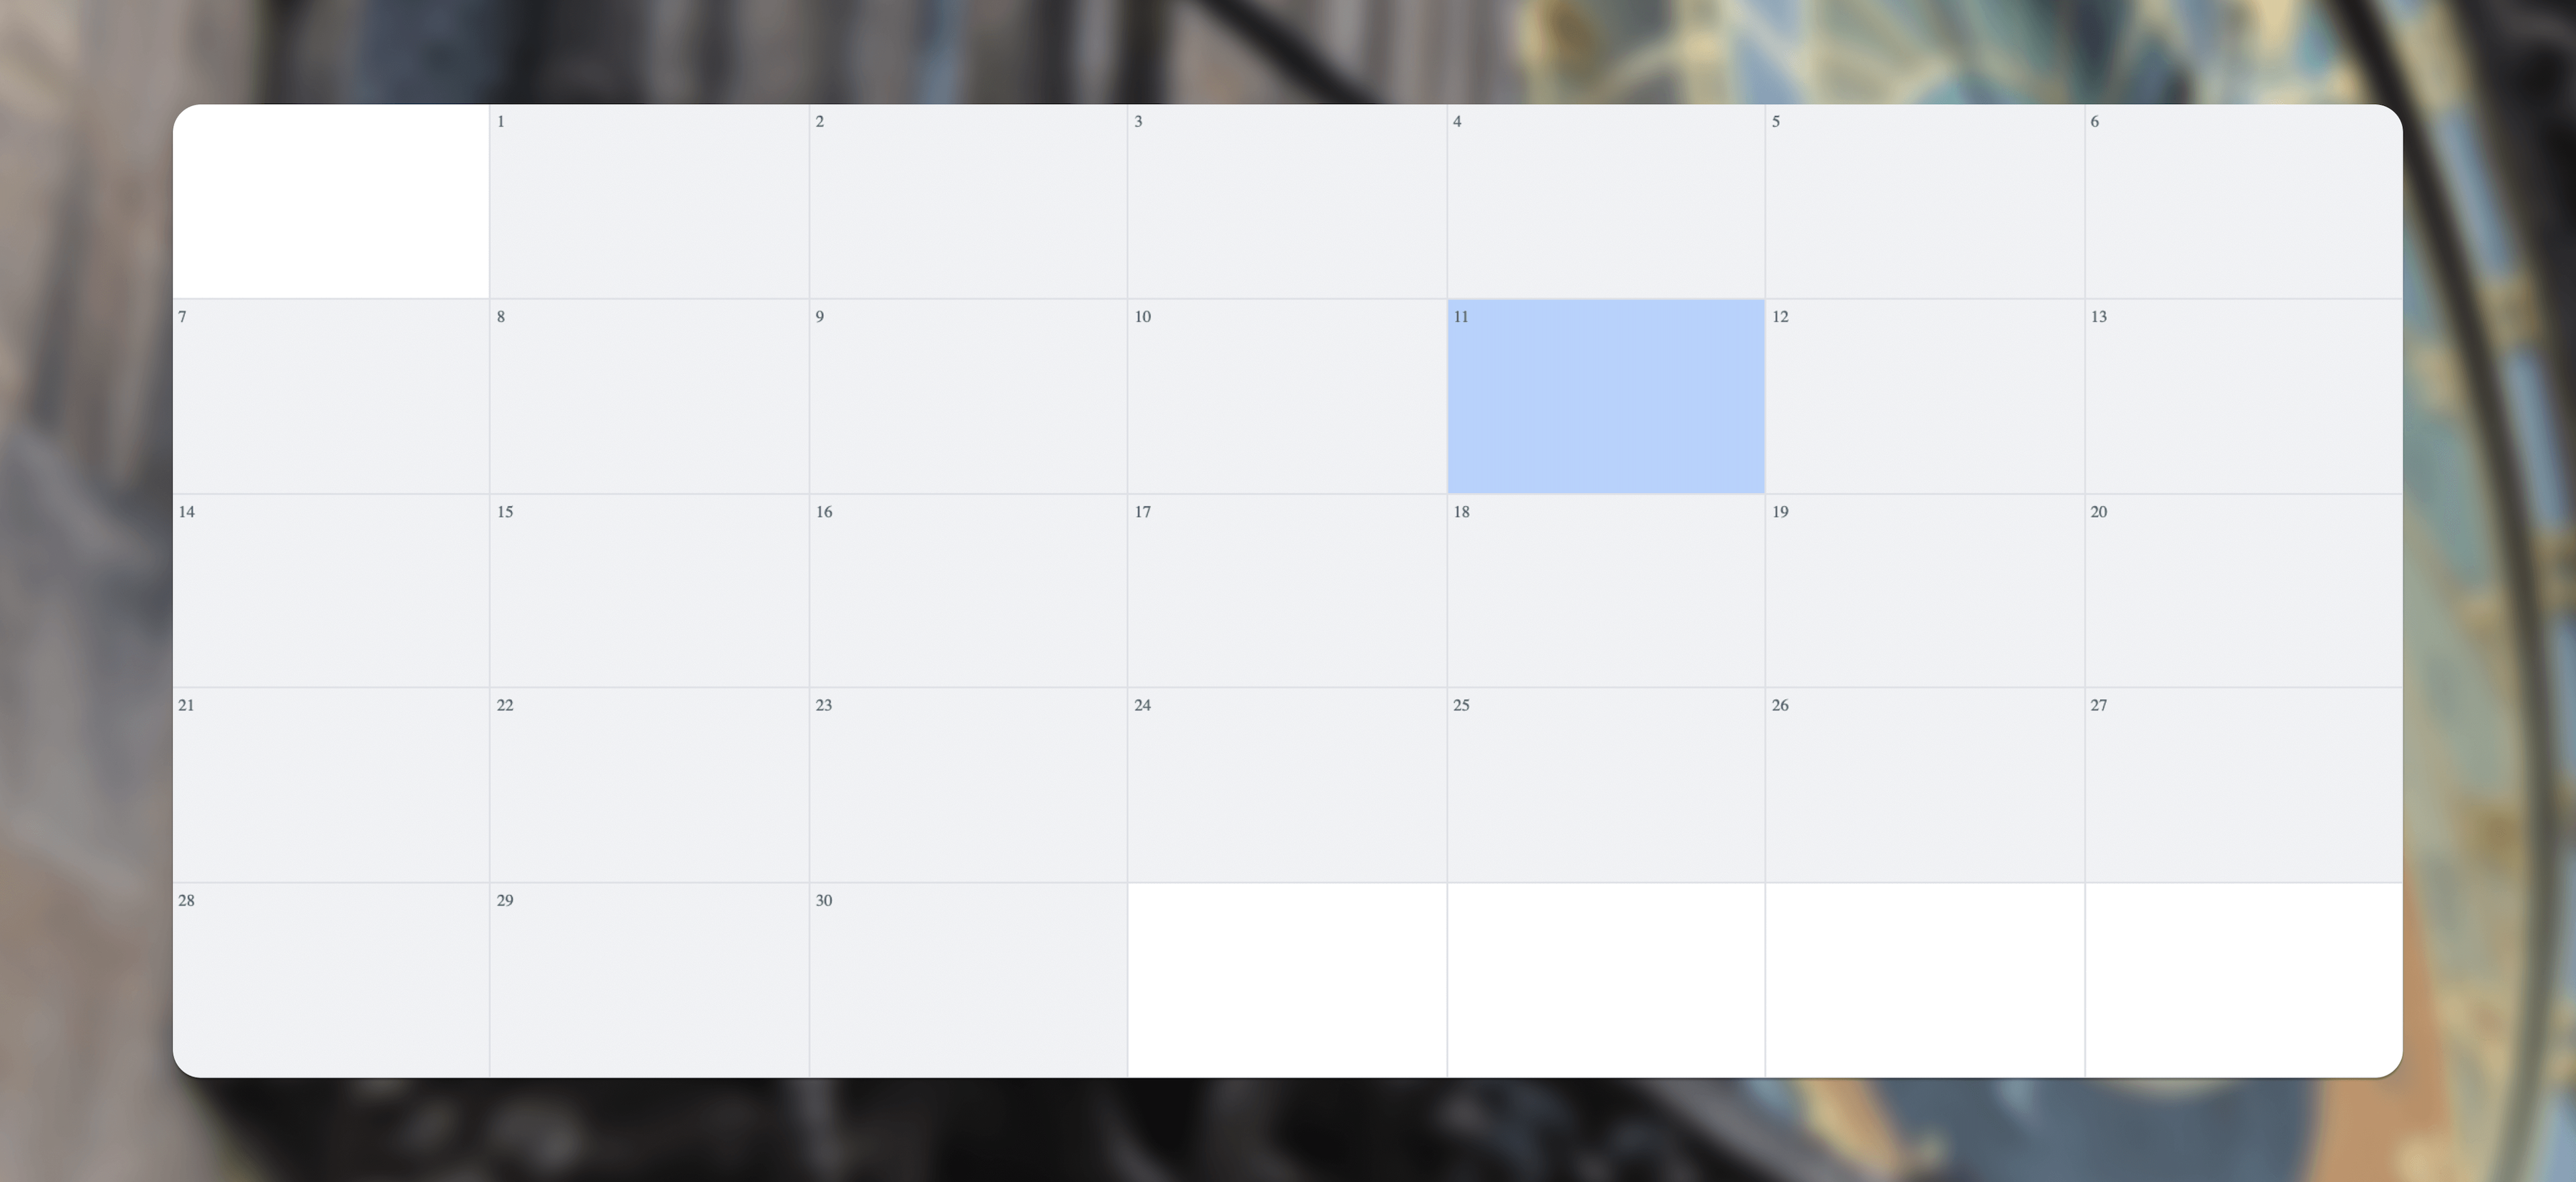
Looking good! At this point there are only two main things left - displaying the days of the week, and building the header for the calendar, which will display the month, year, and arrows to change months.
Let's do the month header first, along with arrows for cycling through the months:
<div className="mb-4 text-center text-lg">
  <FontAwesomeIcon
    icon={faChevronLeft}
    className="mr-4 cursor-pointer text-gray-400 hover:text-black"
    onClick={() => setMonthOffset((m) => m + 1)}
  />
  <span className="font-semibold">
    {names[date.month - 1]} {date.year}
  </span>
  <FontAwesomeIcon
    icon={faChevronRight}
    className="ml-4 cursor-pointer text-gray-400 hover:text-black"
    onClick={() => setMonthOffset((m) => m - 1)}
  />
</div>
javascript
For the weekday headers, we can simply iterate over an array with the days the week, like such:
const weekDays = [
'Sunday',
'Monday',
'Tuesday',
'Wednesday',
'Thursday',
'Friday',
'Saturday',
];
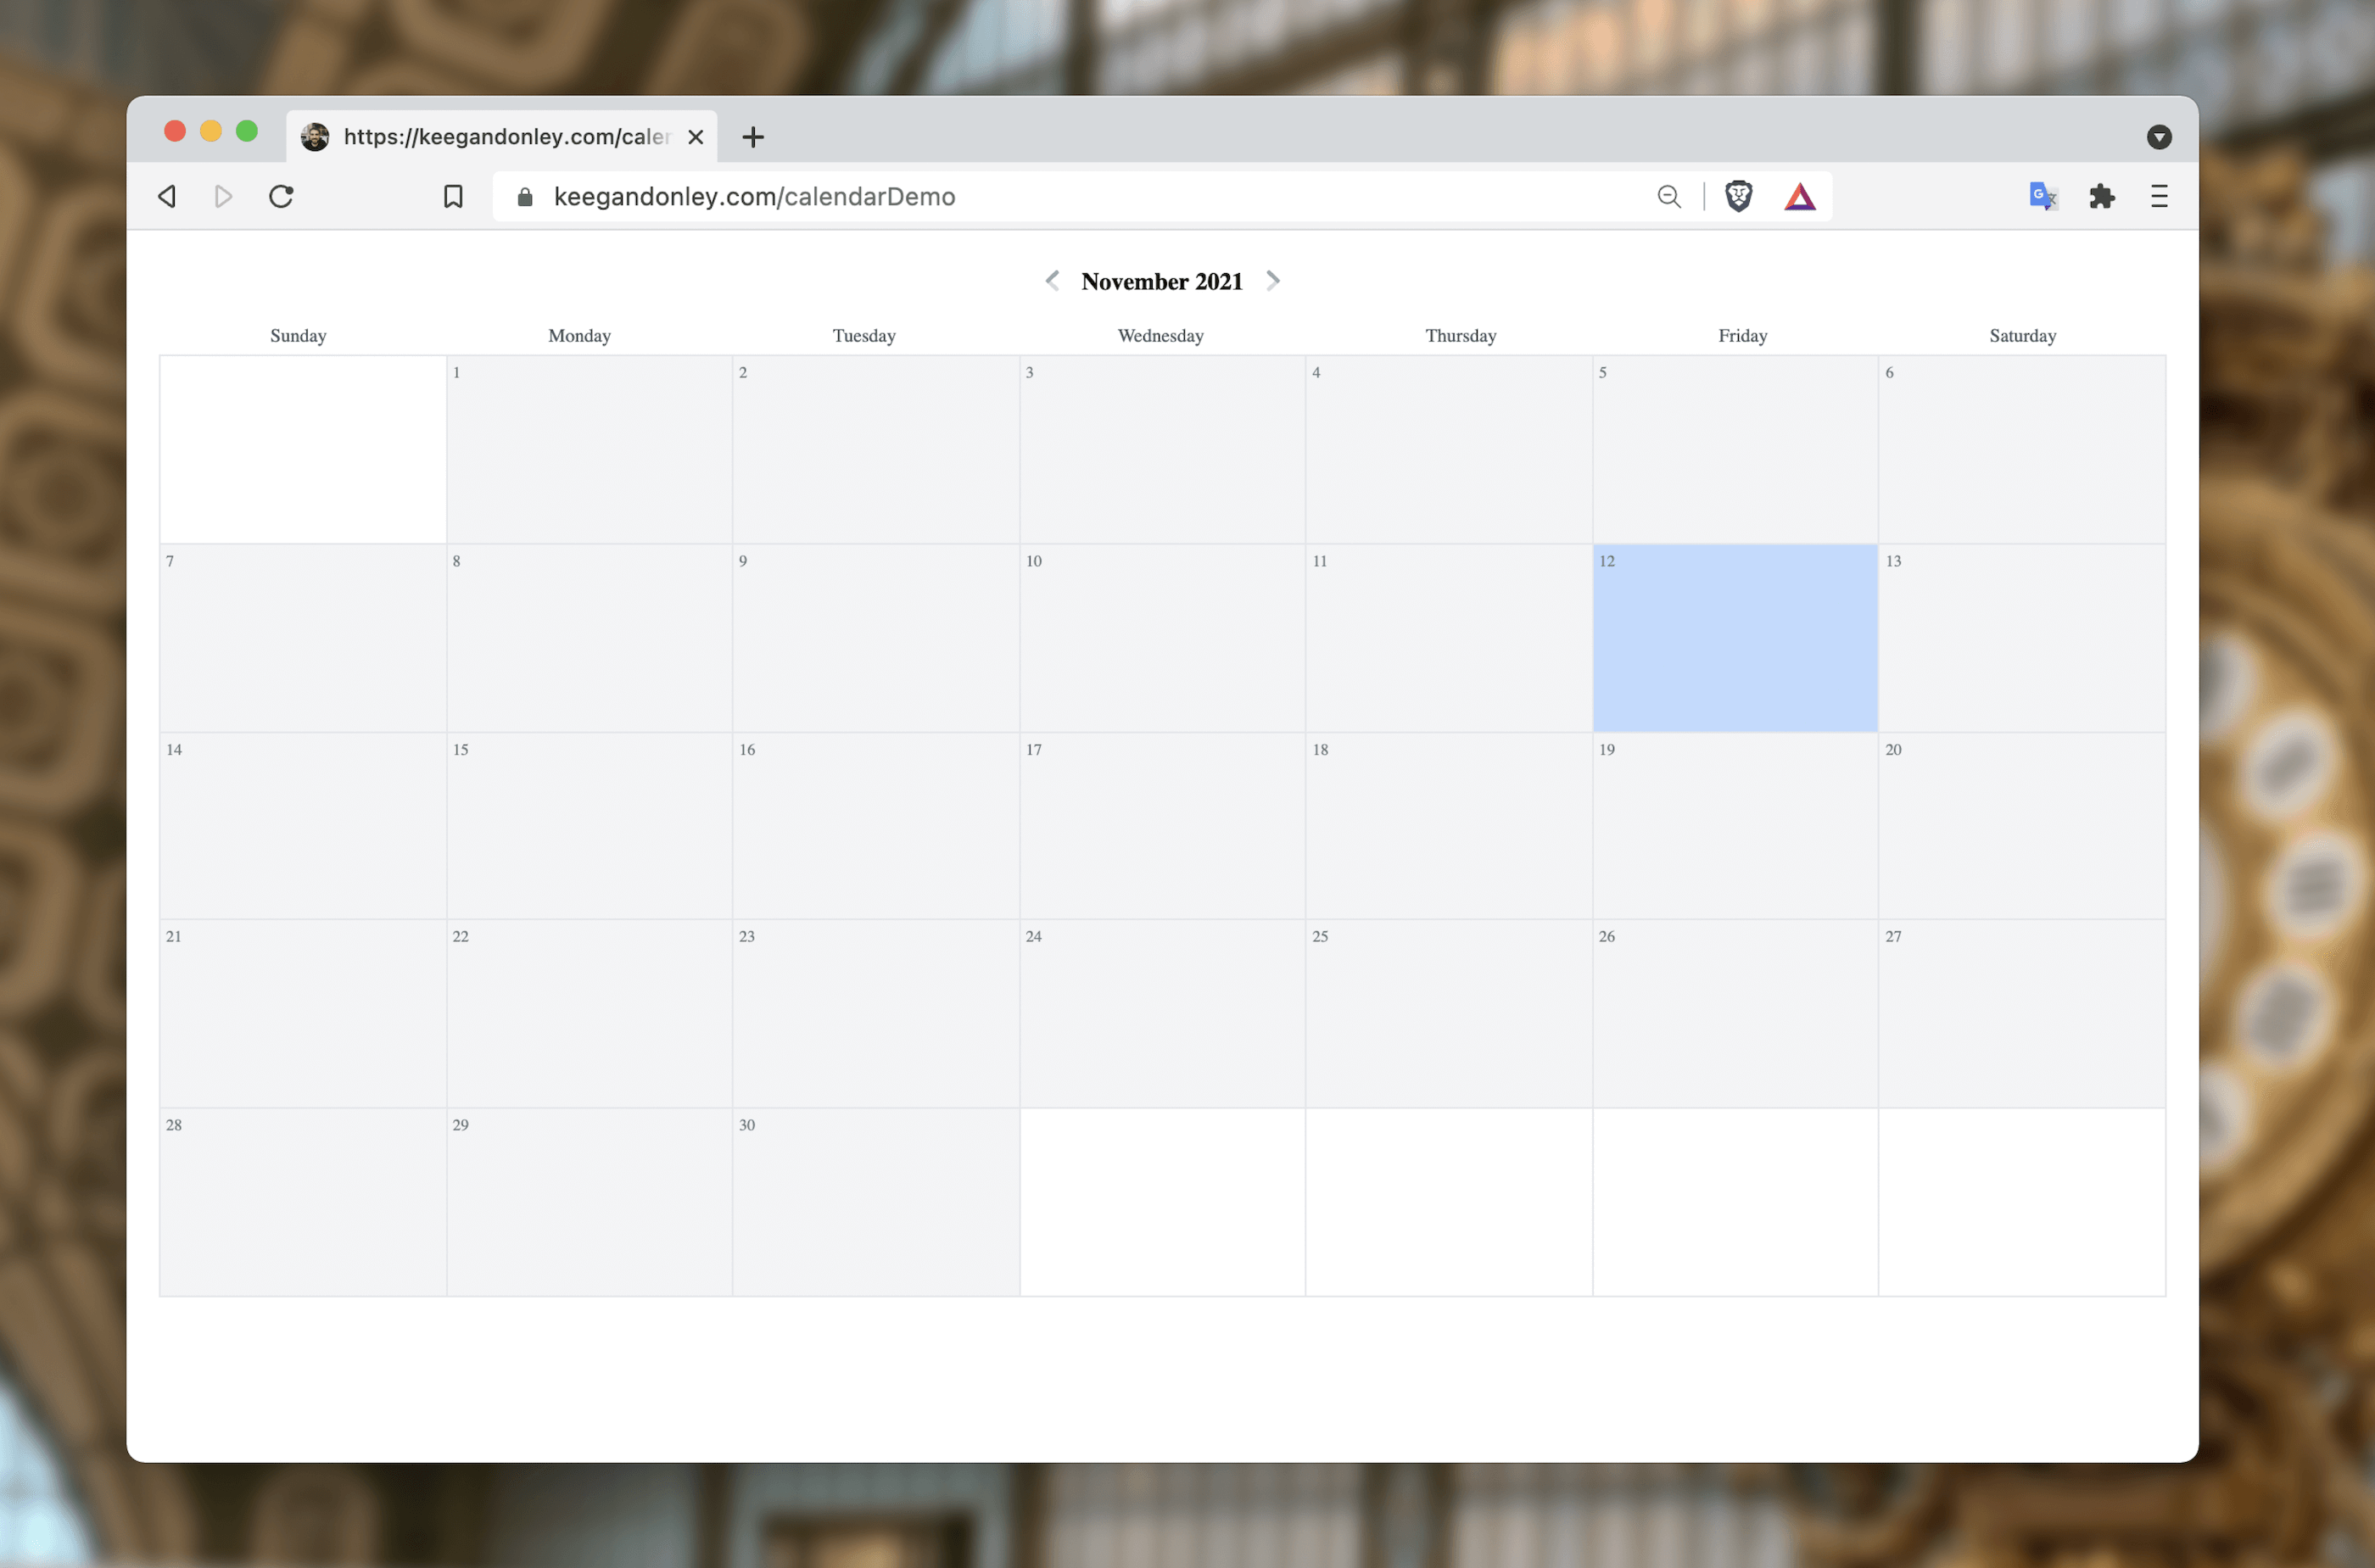
javascriptSummary (or, tldr)
In a few minutes we've built a calendar UI that can be a viable replacement for bulky third party calendars. You can find a demo of exactly what this tutorial resulted in here on my website. If you'd like to see the completed code, you can find it in a gist on my Github.
Next Steps
Once the calendar is built, it's easy to add any data you like, whether you're showing cards for events, or streaks for an activity tracking app. In the future, I'd like to add a drag-and-drop backend to this, so that items added could be rearranged. This wouldn't be too difficult with something like react-beautiful-dnd.
I implemented something based on this approach in my work for Pinpoint, albeit much more complicated and feature-rich. This is a great starting point, though!
At the end of the day, this was a pretty quick implementation. I was happy to be able to avoid using a large third party library, and this can be expanded with a lot more features! Let me know what you think over on Twitter!
Fun fact: I took the cover photo for this blog post at the Musée d'Orsay, which is one of my favorite museums in Paris. If I only had time to visit one museum in the city, it would be this one every time.