Creating Large-Format Digital Art with DALL·E 2
DALL·E 2 is a fantastic text-to-image generation tool, but it is constrained by how small the images are - they're all squares of 1024x1024 pixels. However, thanks to the inpainting feature, it is possible to generate much larger, more detailed images. In this post, I'll detail my process for creating medium-sized images for my blog covers, and also really large images that would be suitable for printing, phone wallpapers, and whatever else you can imagine!
If you're not familiar with DALL·E 2, I recommend checking out my first blog post about the system before proceeding.
This is a tutorial for how my process works - if you just want to see the results, feel free to skip to the end (but you'll be missing out!)
Overview - Inpainting
Before we get started, it will be helpful to have a basic understanding of inpainting. Inpainting is a feature of DALL·E 2 that allows you to replace only a portion of the image with a new or similar prompt, without changing the other parts of the image. This is useful for adding detail to a photo, removing elements, or, in our case, creating an image larger than what the system outputs.
Here's a fun example - I took a photo of myself and erased everything but my face and hair, and gave the prompt "A man in various Halloween costumes."

Pretty powerful stuff, even for a silly use case! Keep in mind that OpenAI's terms prohibit using a photo of a person without their permission, so don't go uploading random photos. I've always experimented by using only photos of myself.
The Basics - Using Inpainting to Expand an Image Horizontally
The process is fairly straightforward and you'll just need a simple editing tool - I use Figma to do all the graphics for this blog so I used that for the image compositing as well. It has some features that are especially useful, like grid-snapping and masking, but something more powerful like Photoshop would of course be fine too.
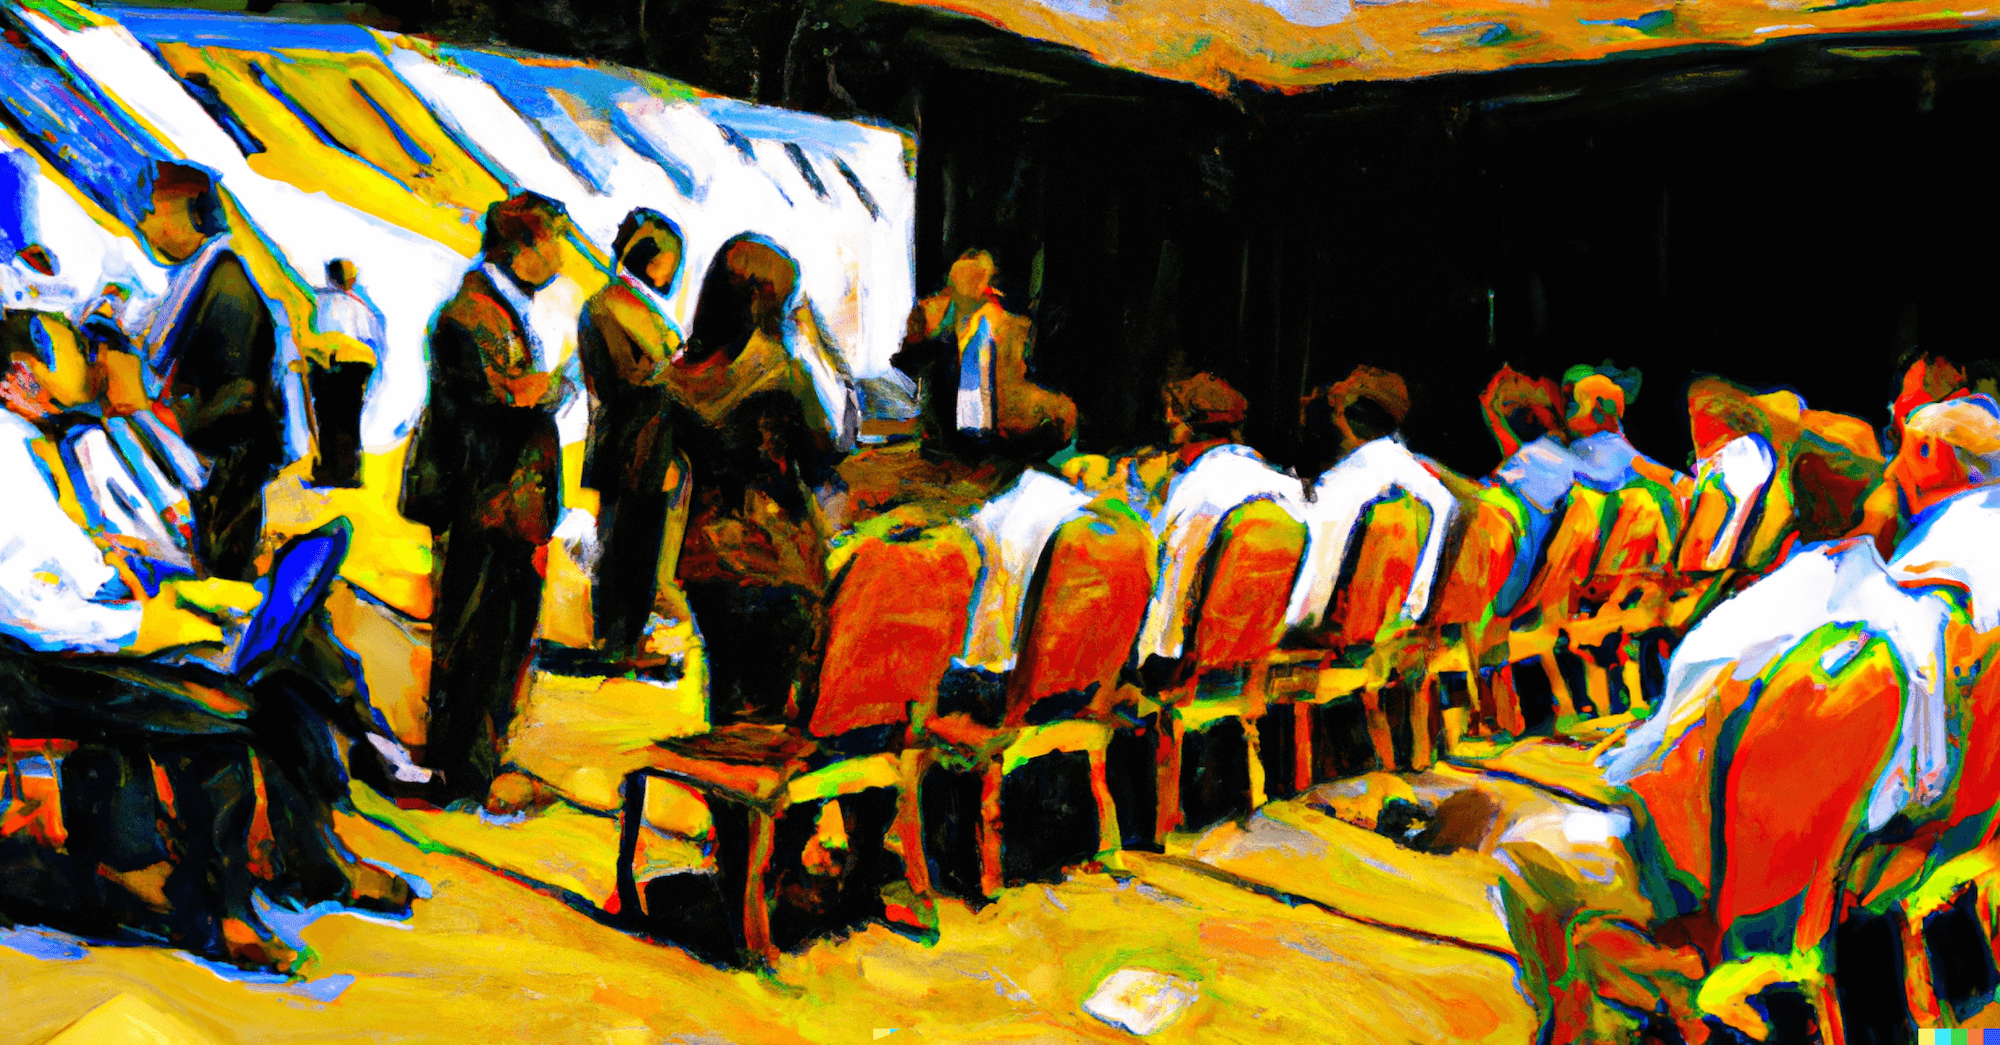
The first half of the post will follow how I make the cover images for my blog - it only takes 3 runs on DALL·E 2 so it's pretty simple. The prompt for this post was "an engineering blueprint of an AI combining a series of photos into one large piece of art." Here's how I made the cover image.
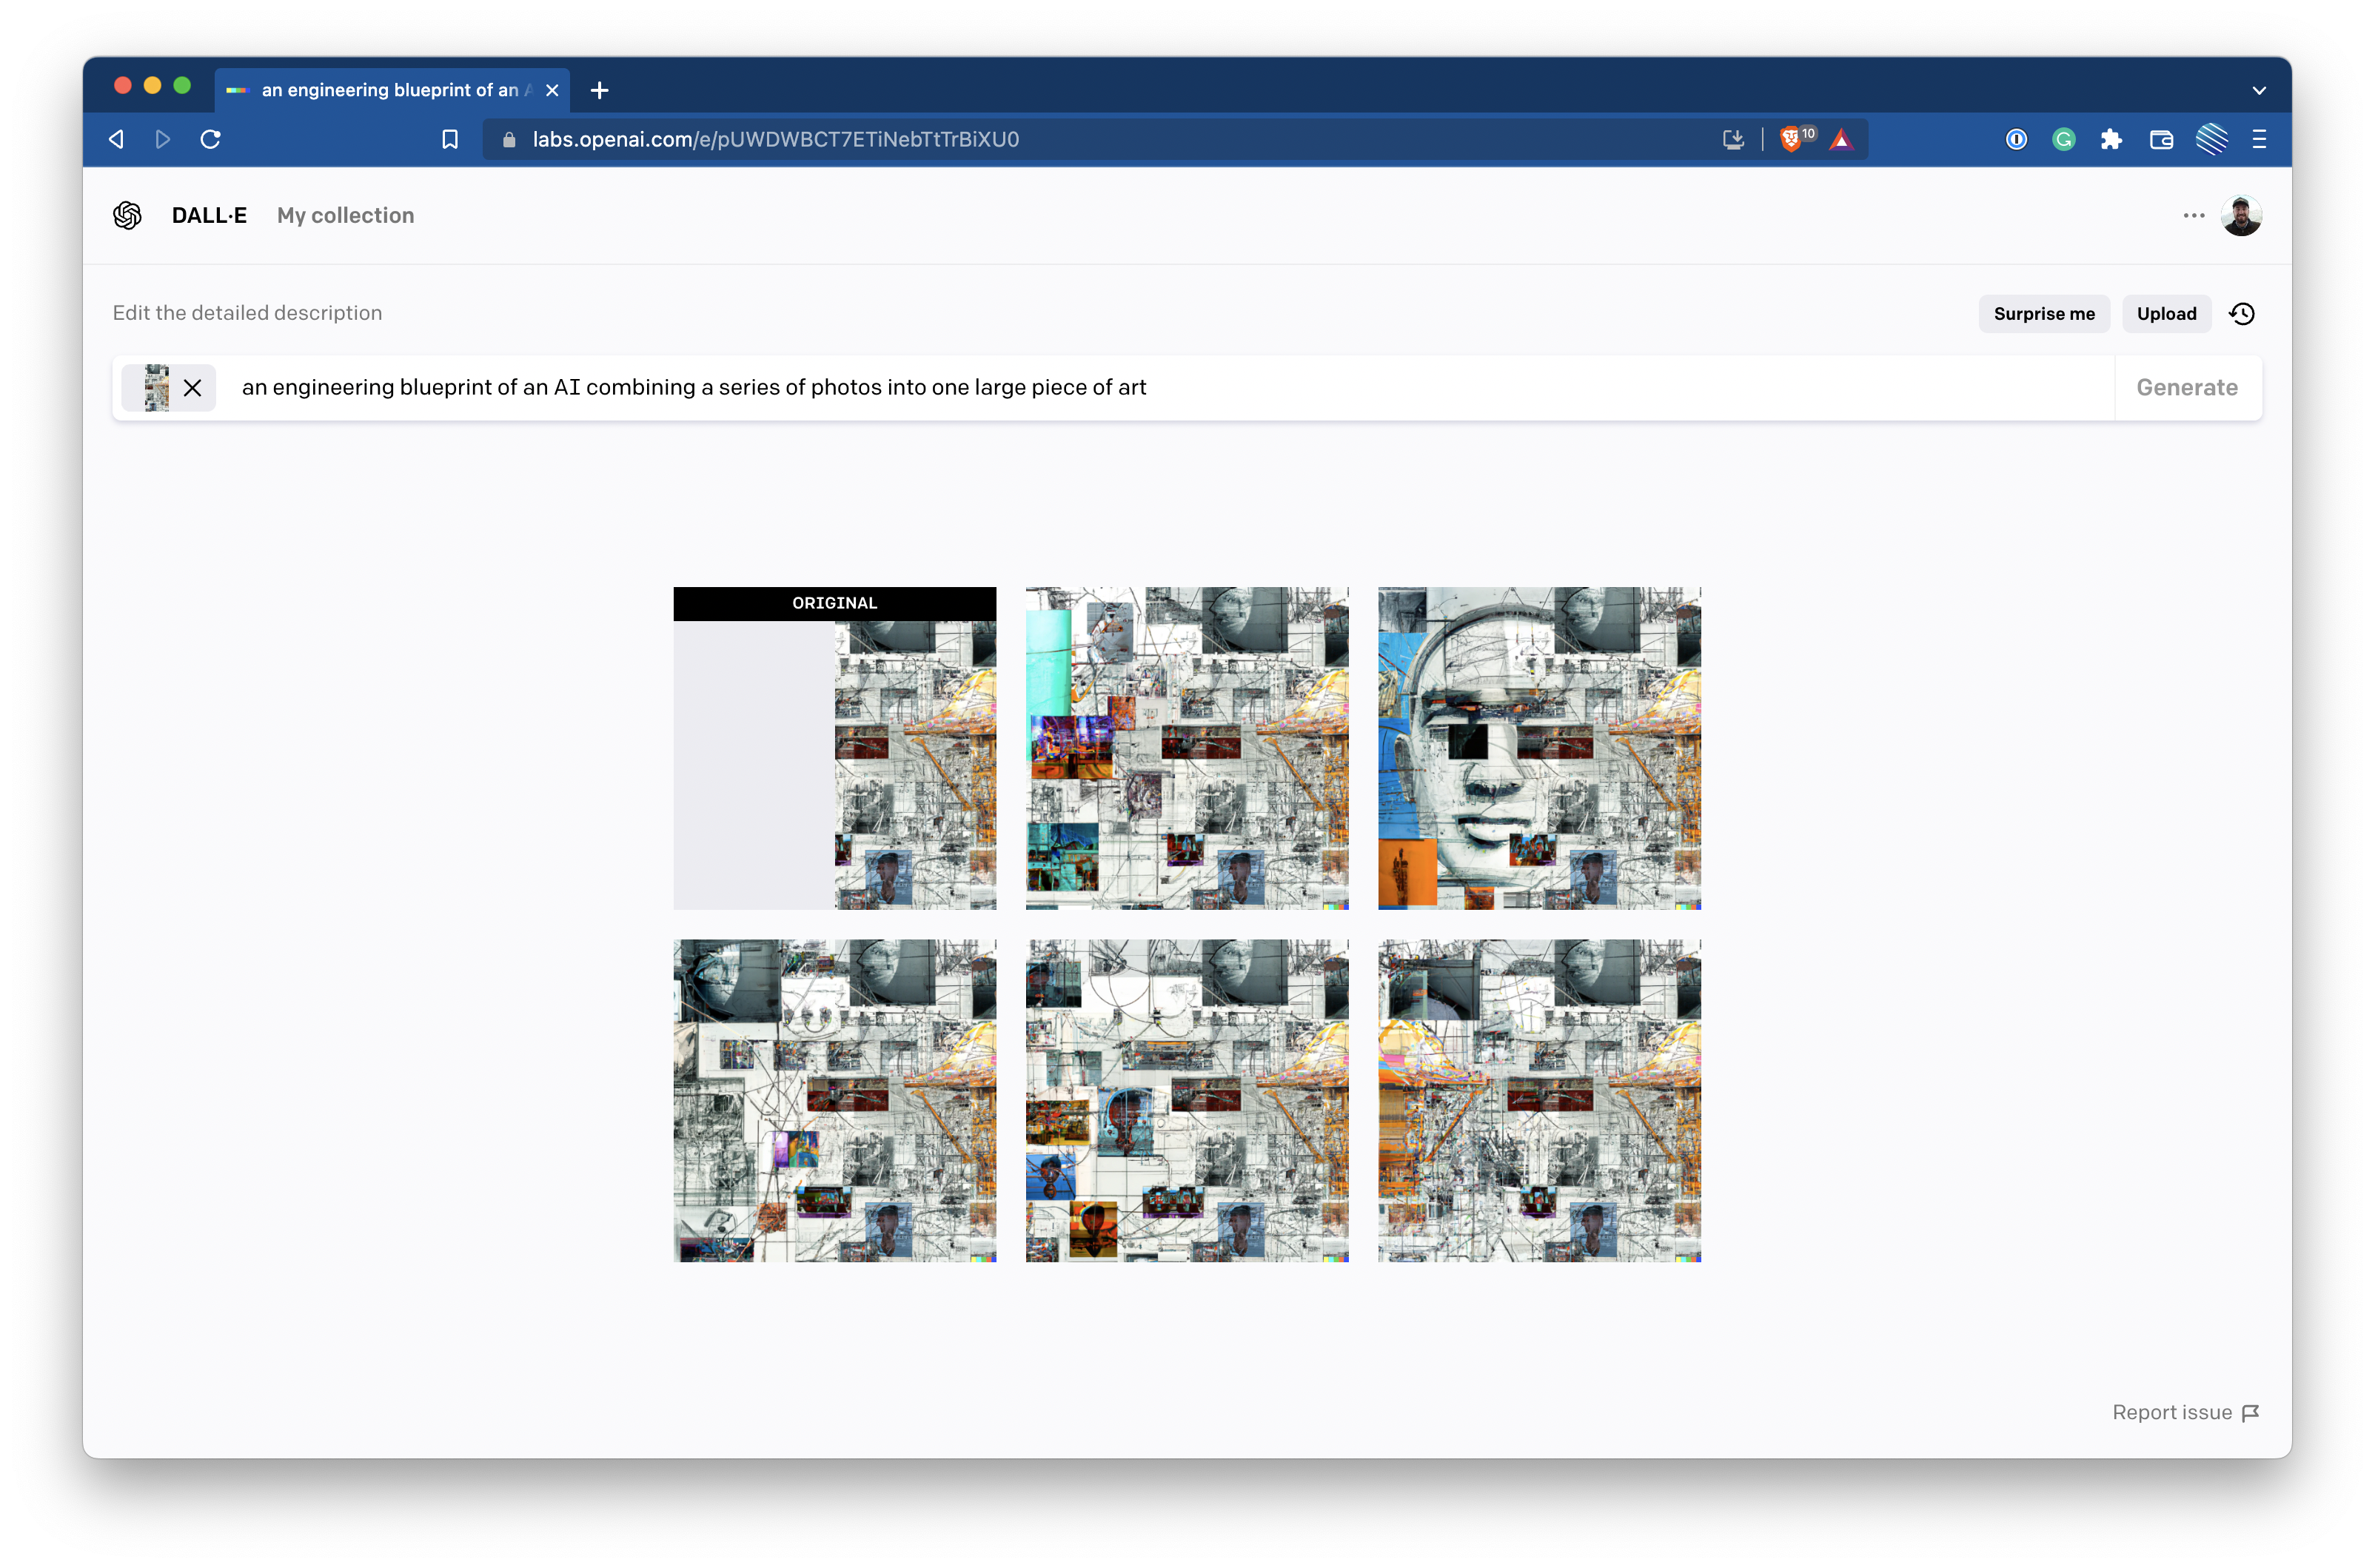
Step 1 - Create the initial prompt
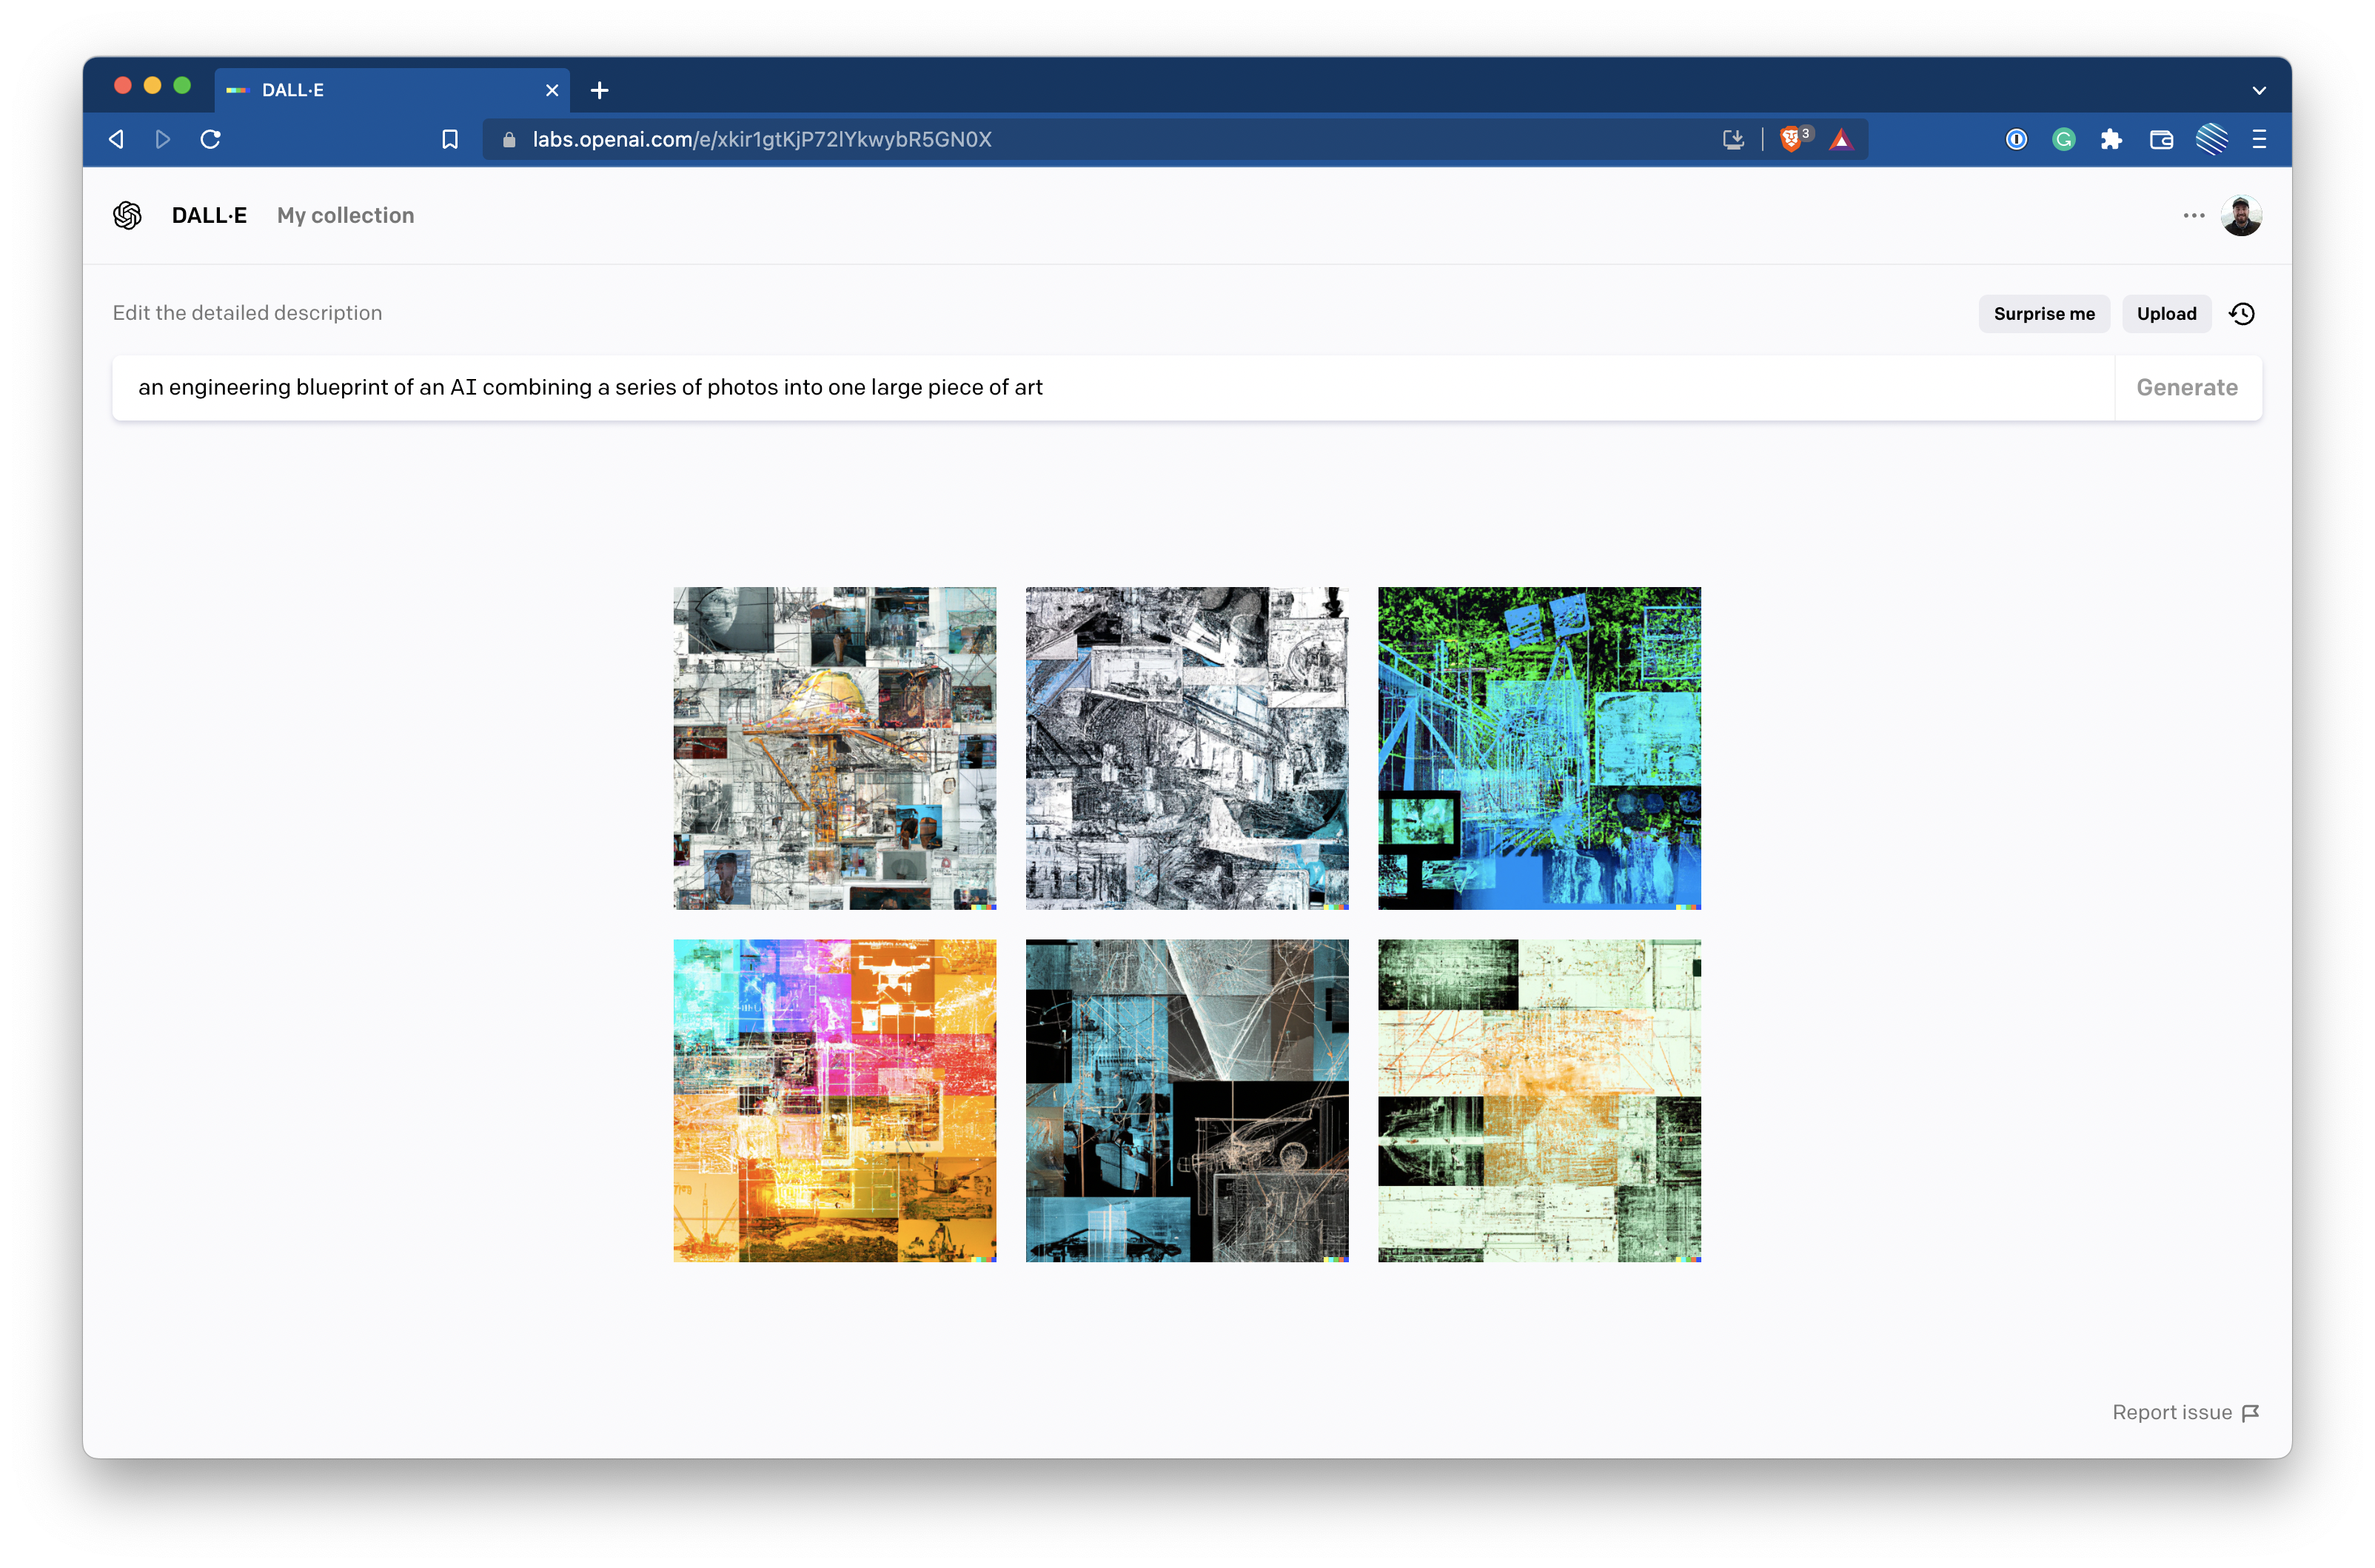
Nothing new here - you just need to run your prompt through and get the first set of outputs.
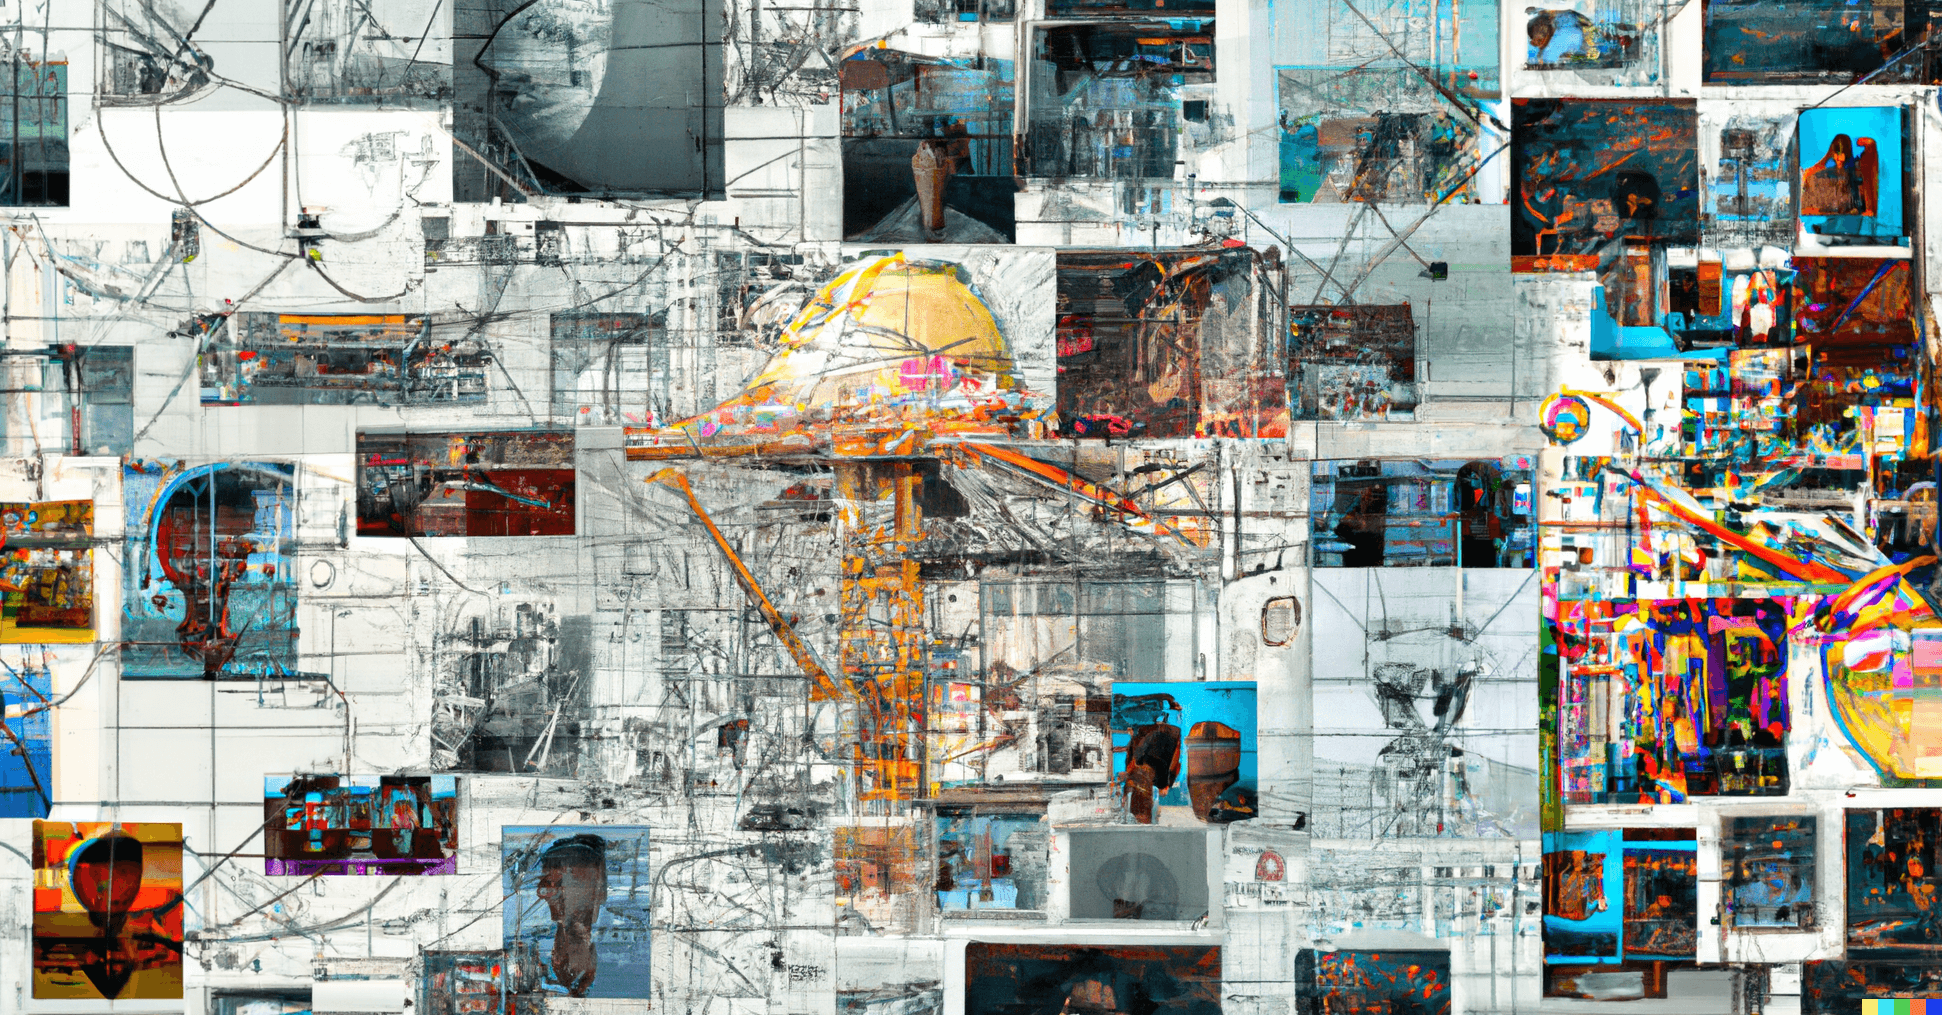
Step 2 - Choose an option and download it
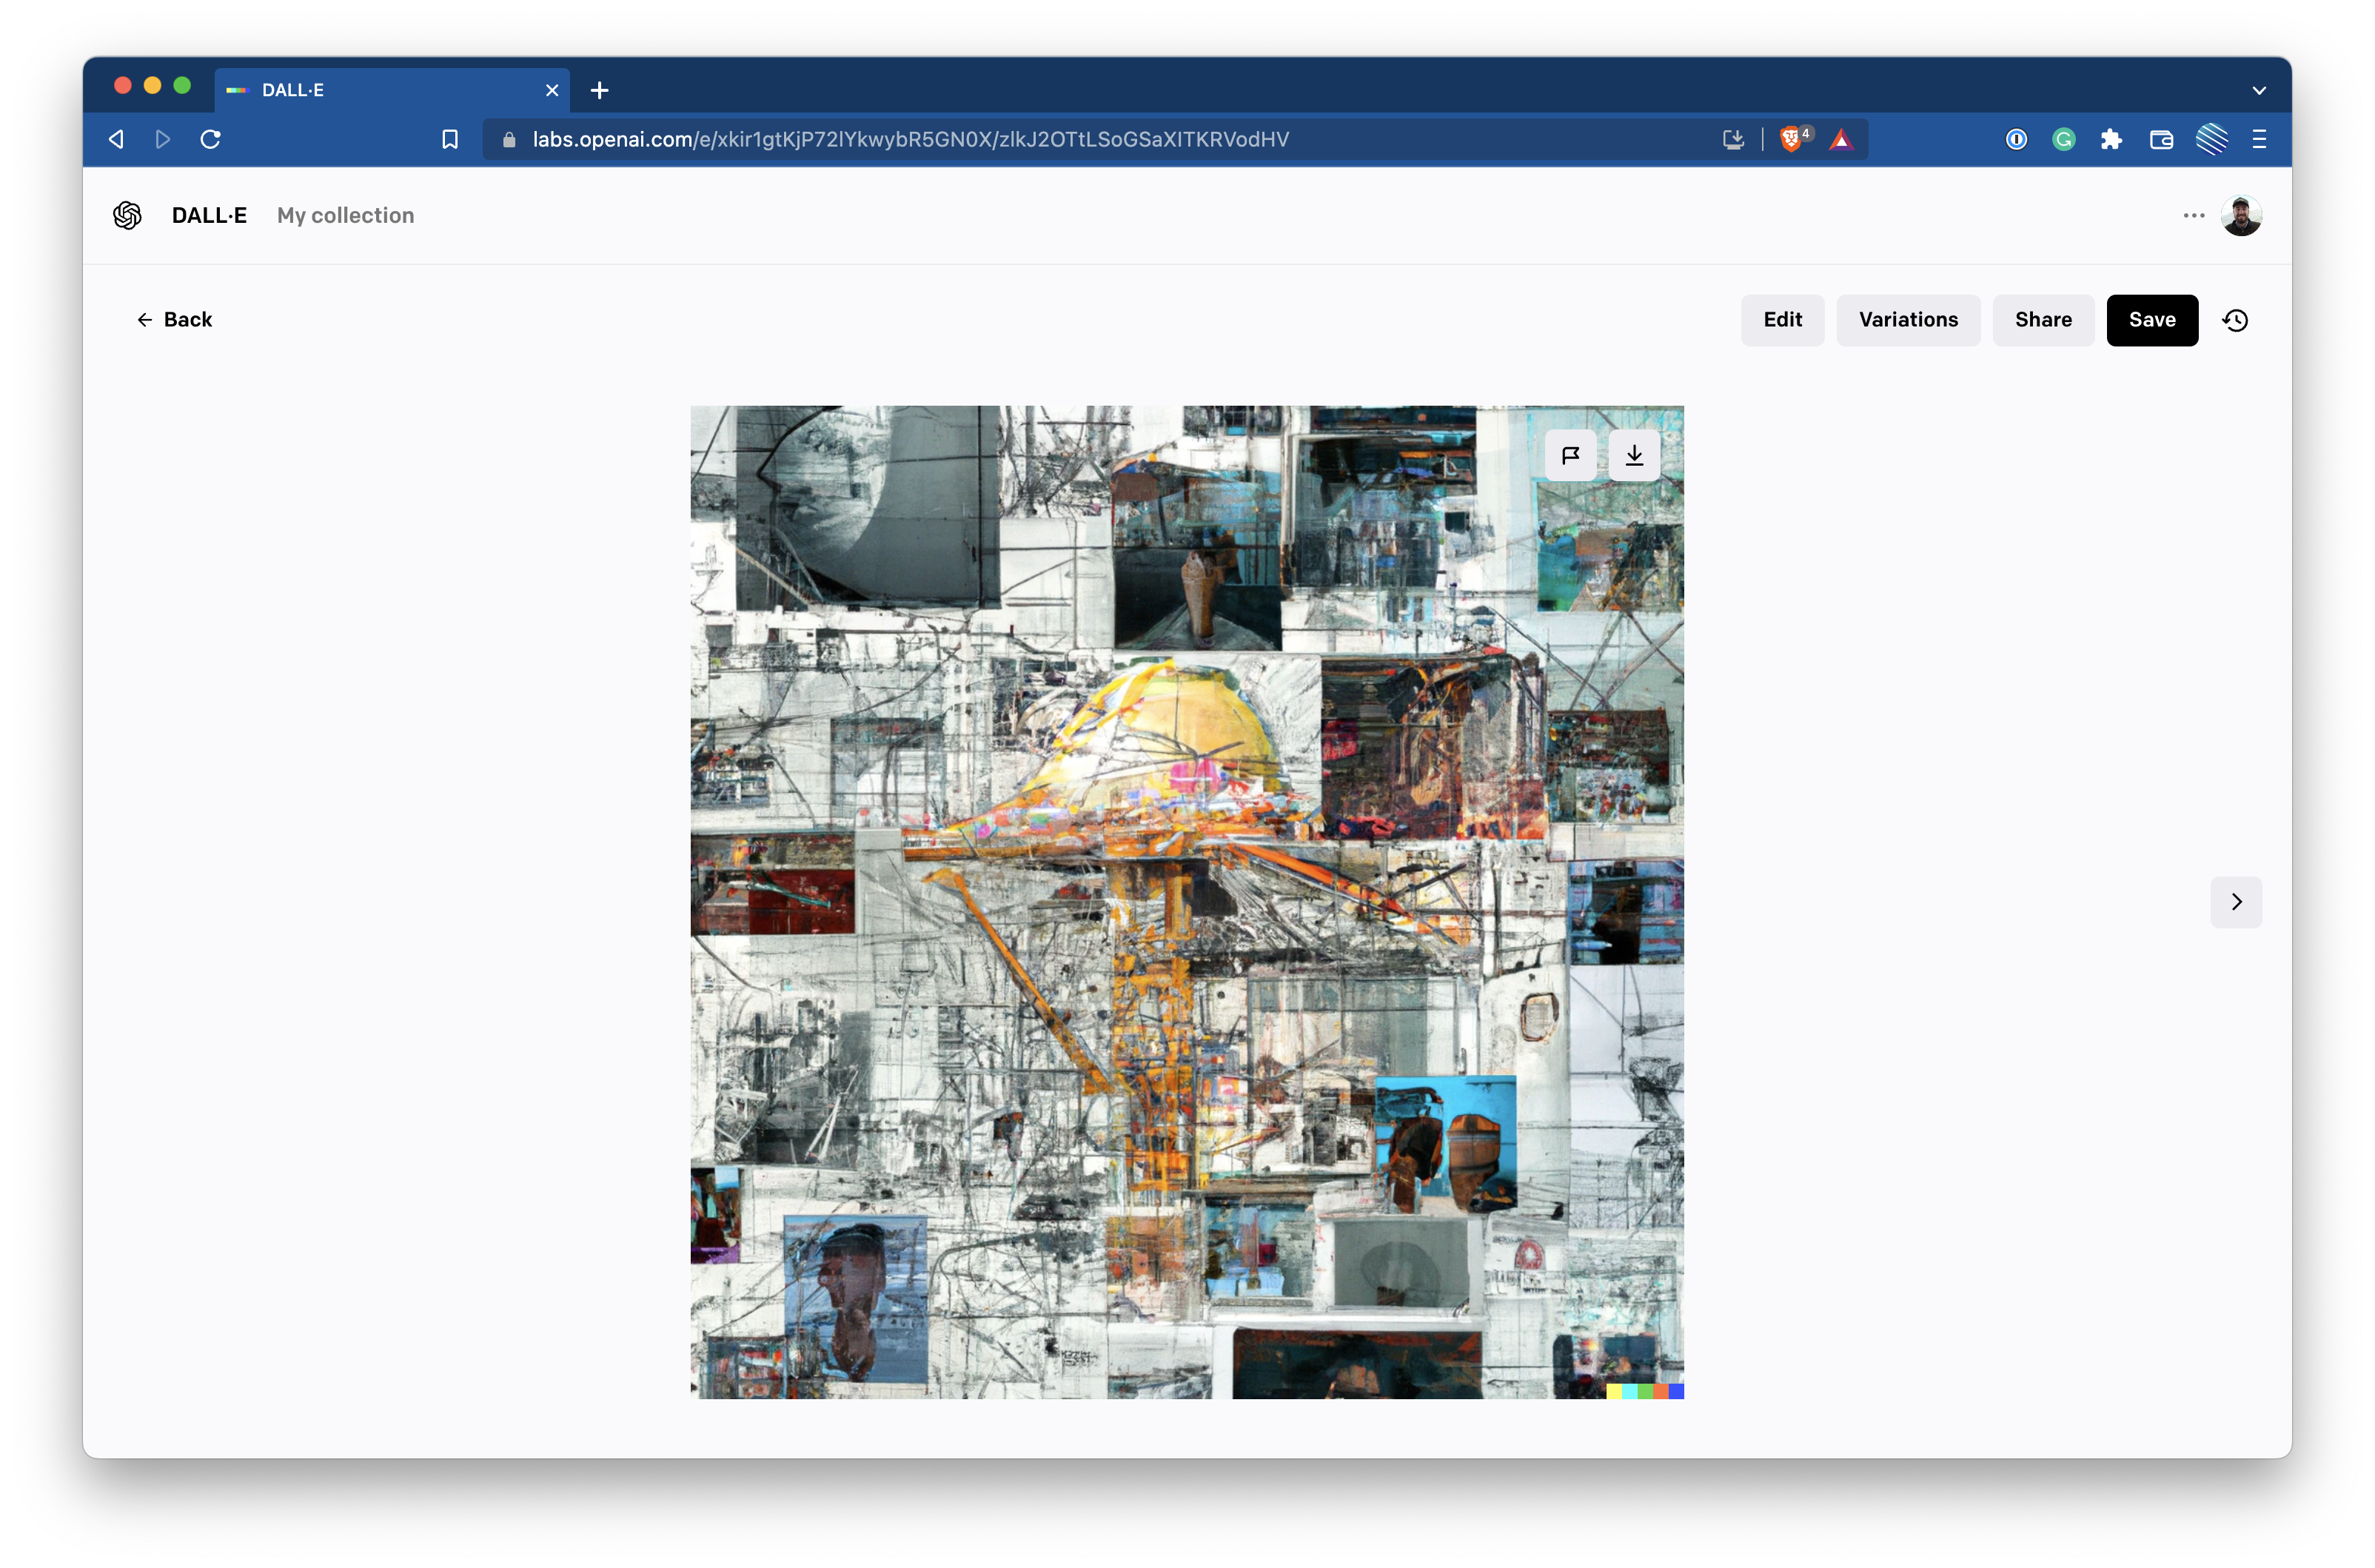
This image will be the launching point of the process. I typically use this as the center image and work outward. In choosing a variation to use, I look for space to expand around the edges. If one edge of the image is empty space, expanding out won't work as well as one with lots of detail, like the above image.
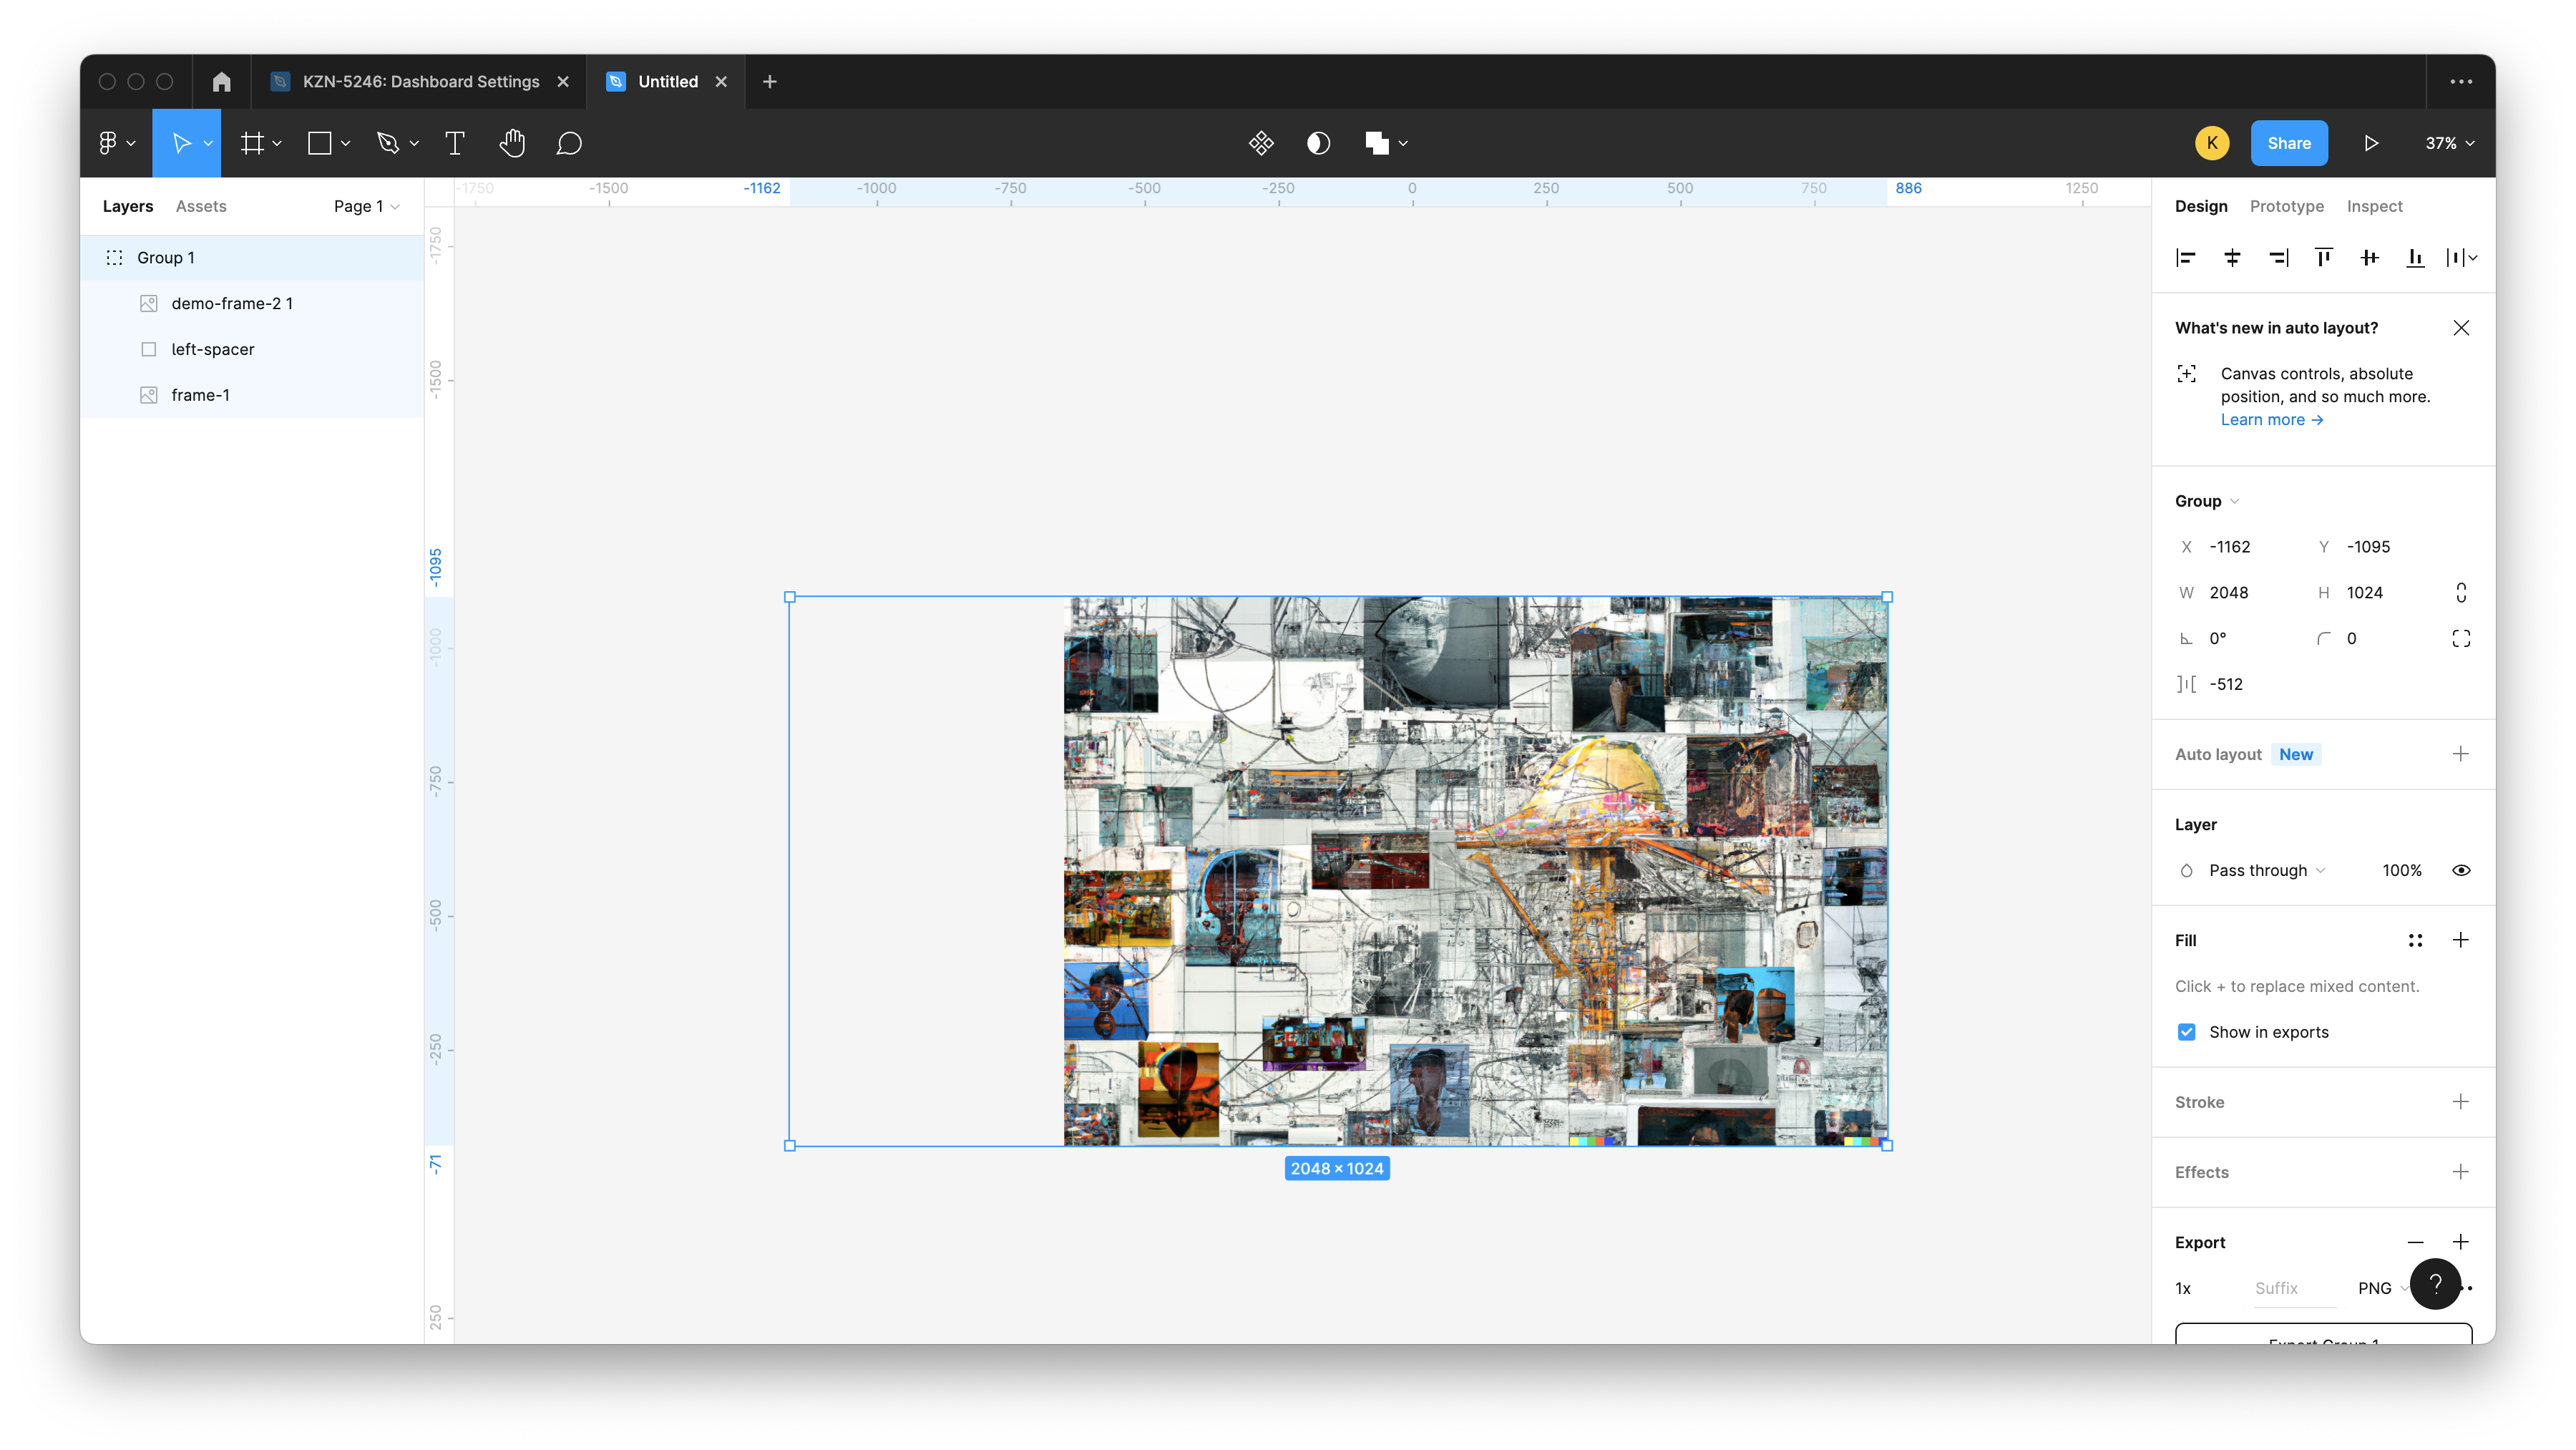
Step 3 - Widen the image by 100%
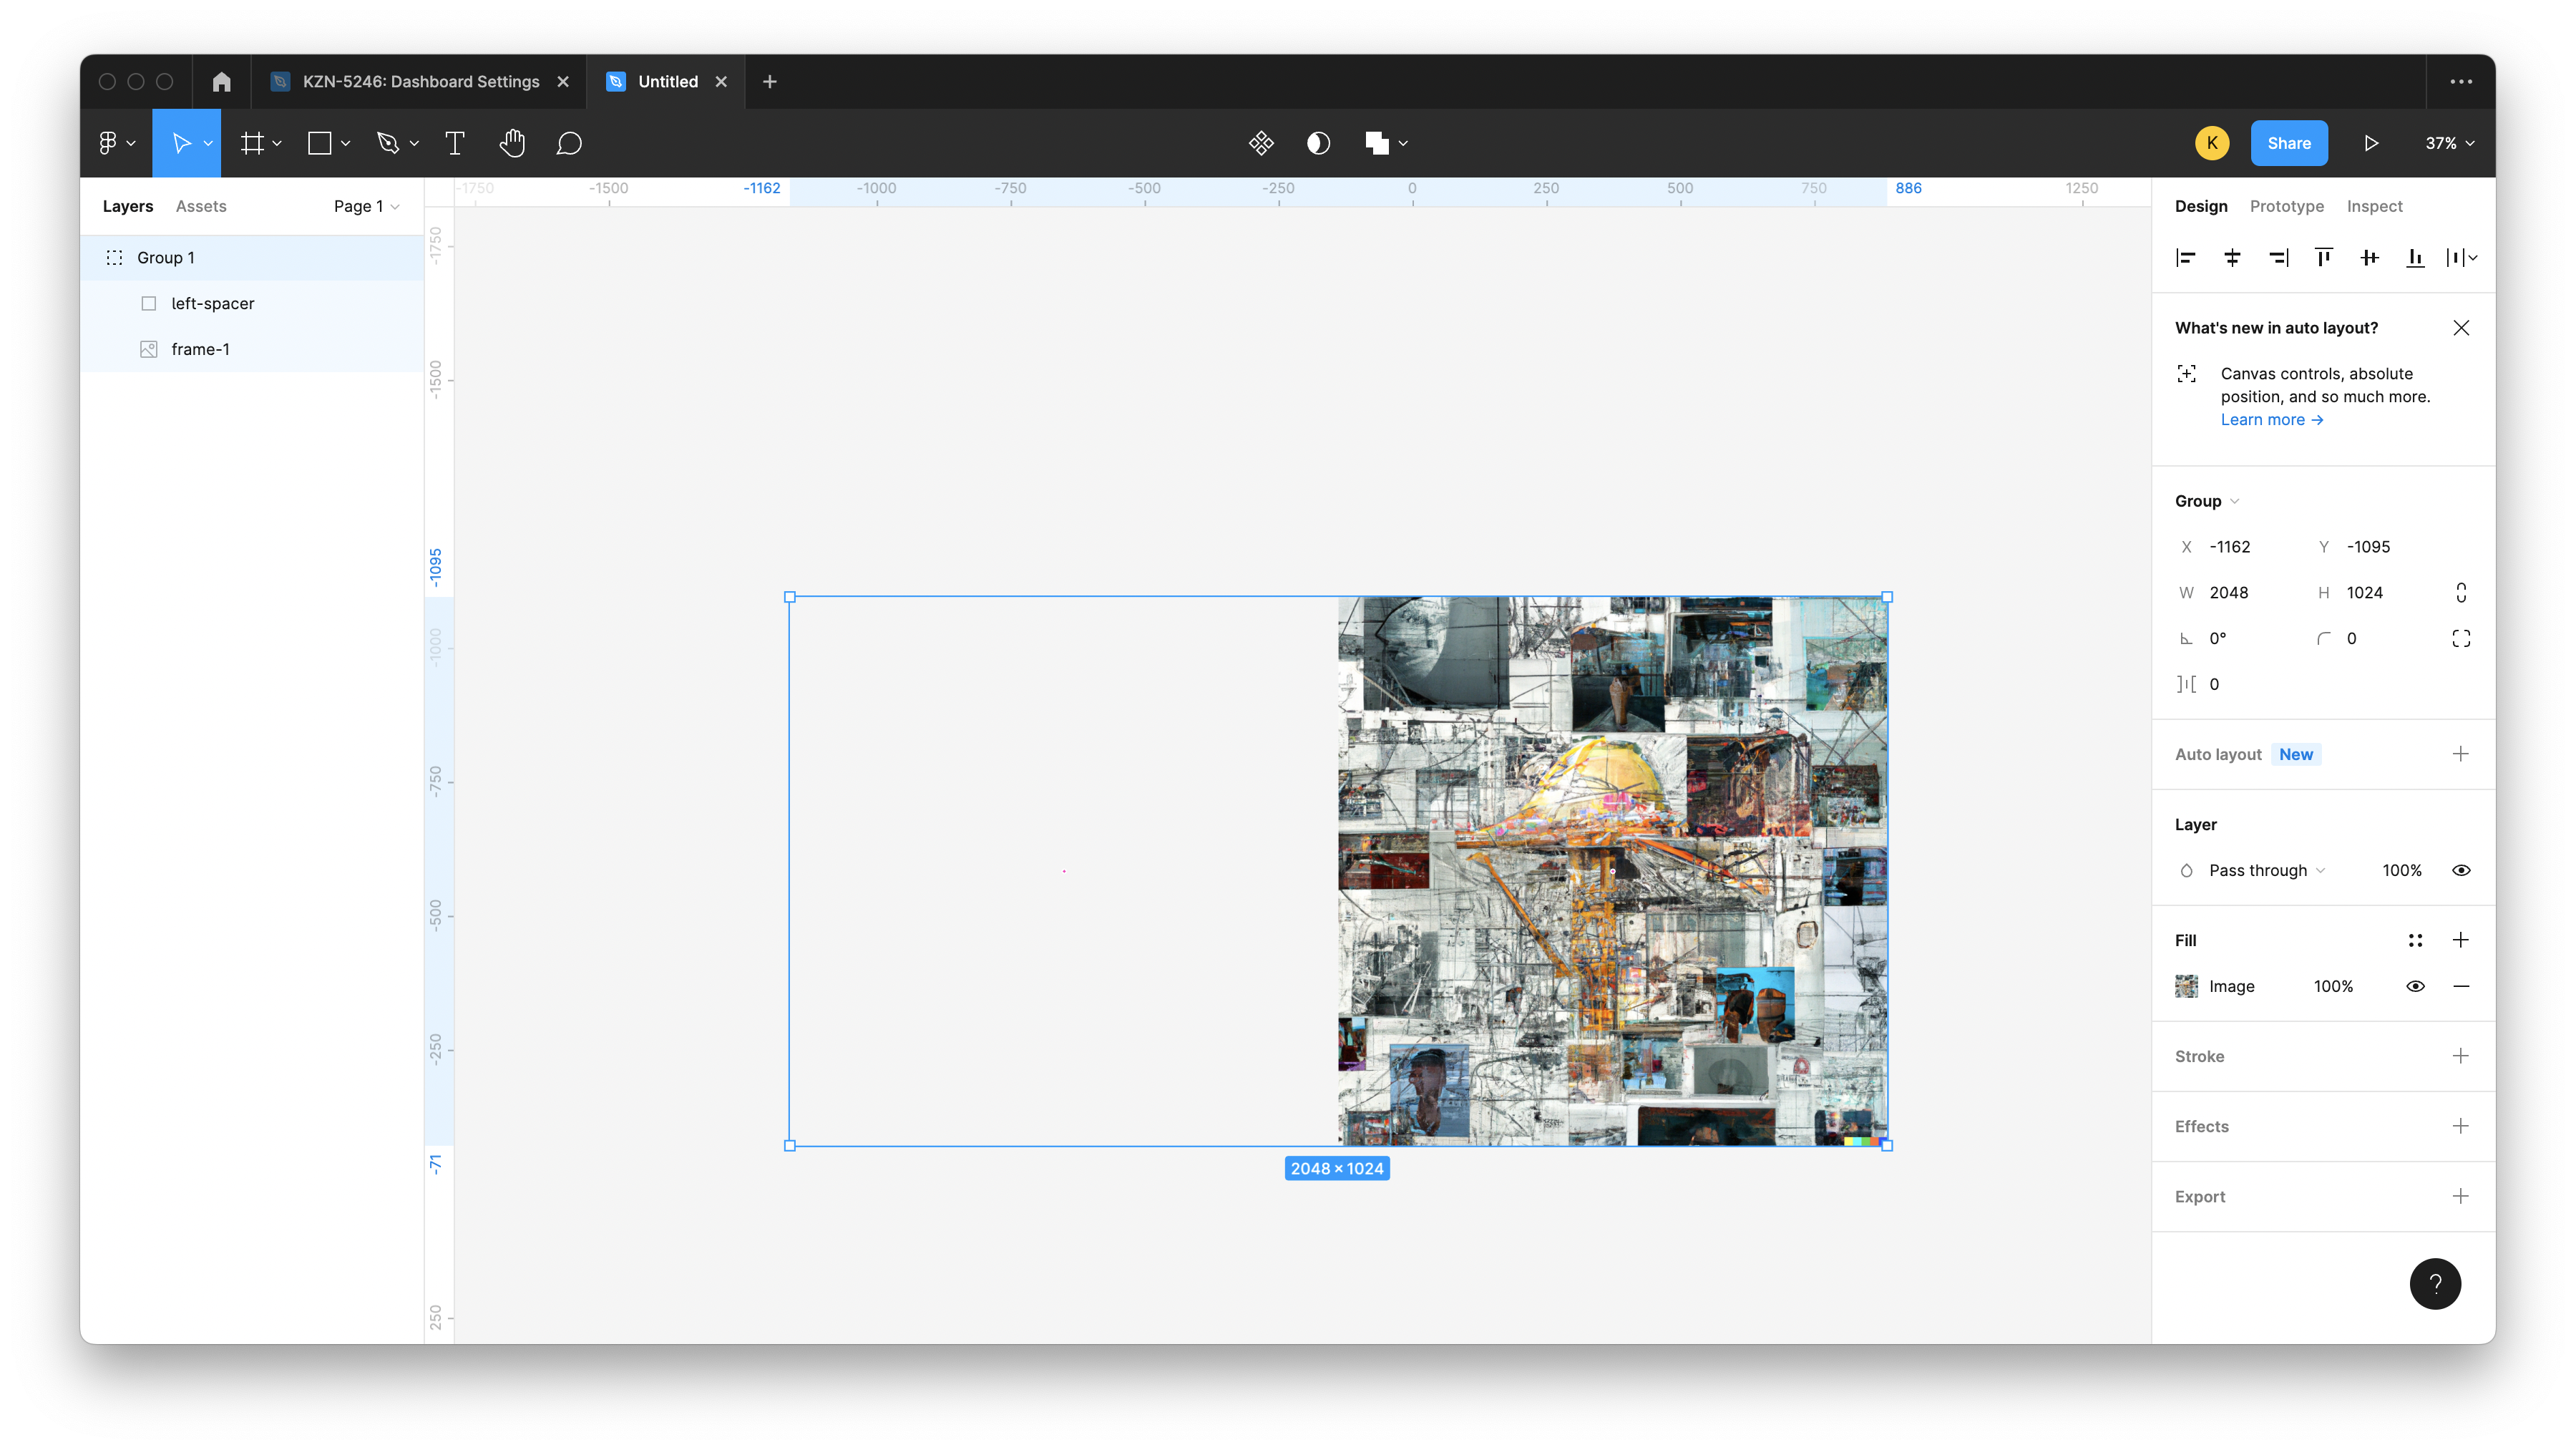
There are many ways to do this, but the end result needs to be an image that's transparent on one half and is exactly twice as wide as the original image. This will make cropping and aligning easier down the road.
Export the image to get ready for the next step, and make sure the transparent portion was included in what you exported. If you're following along in Figma, one way to do this is with groups as you can see in the sidebar of my screenshot.
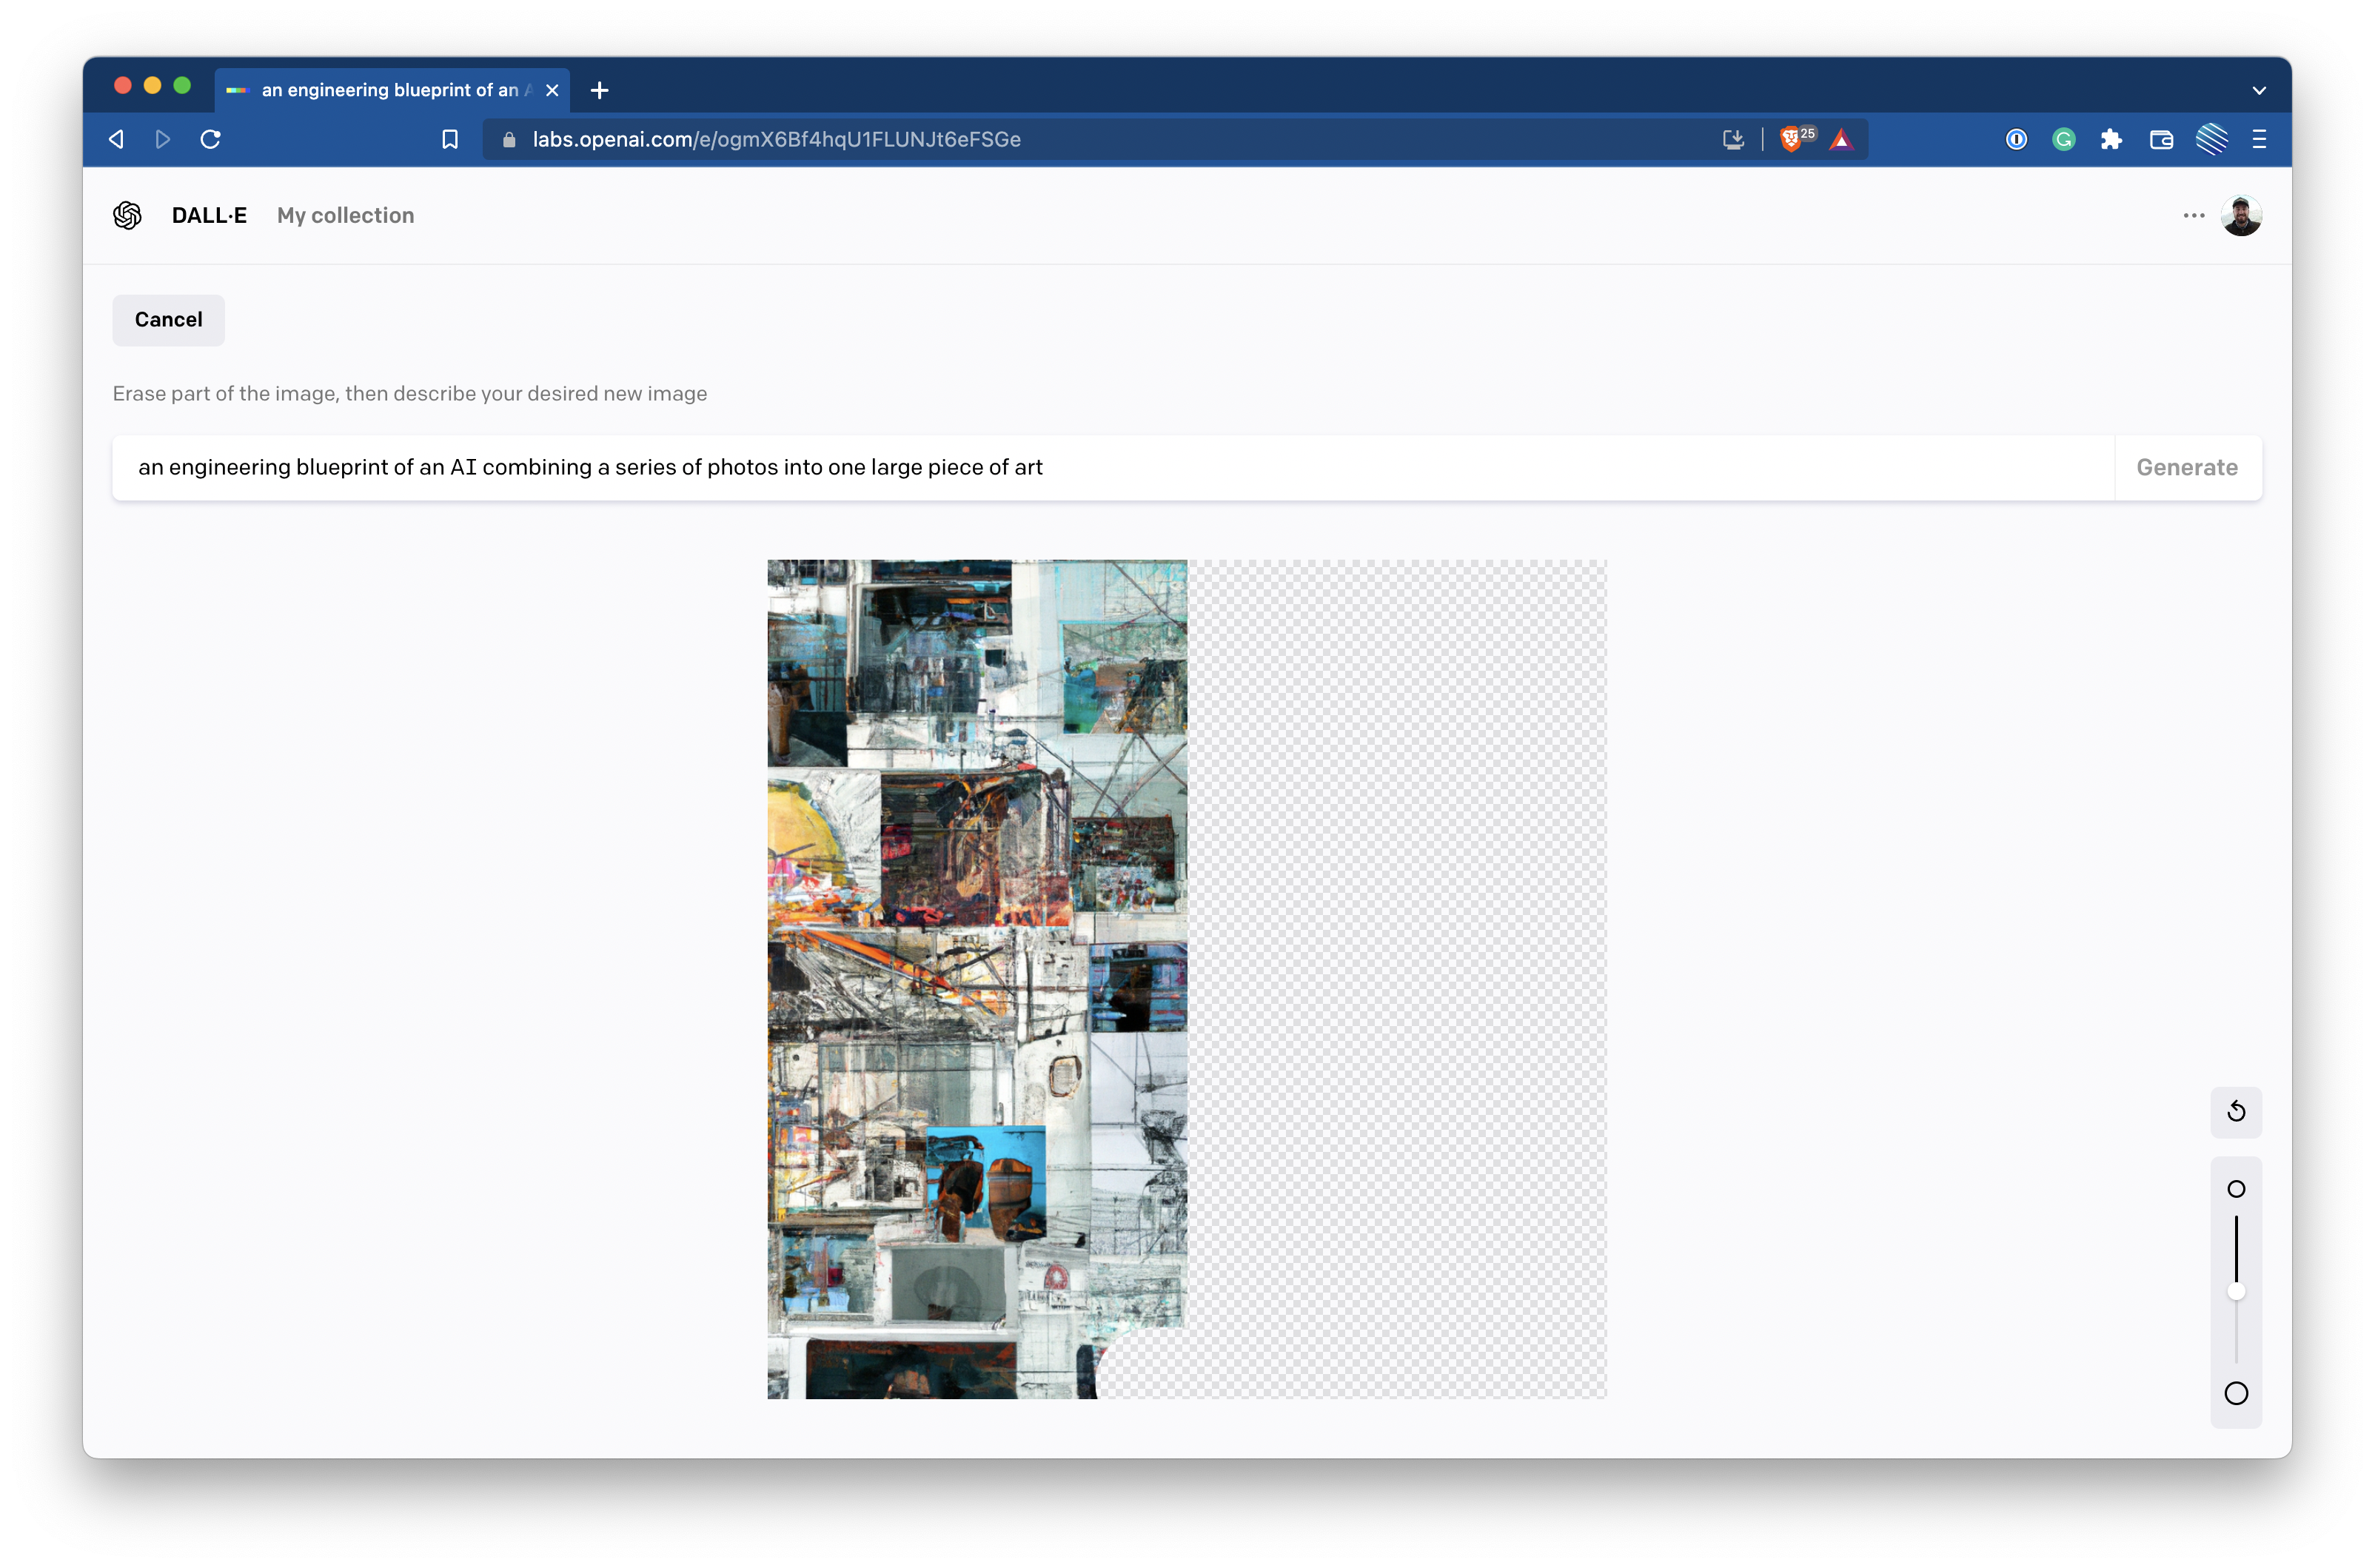
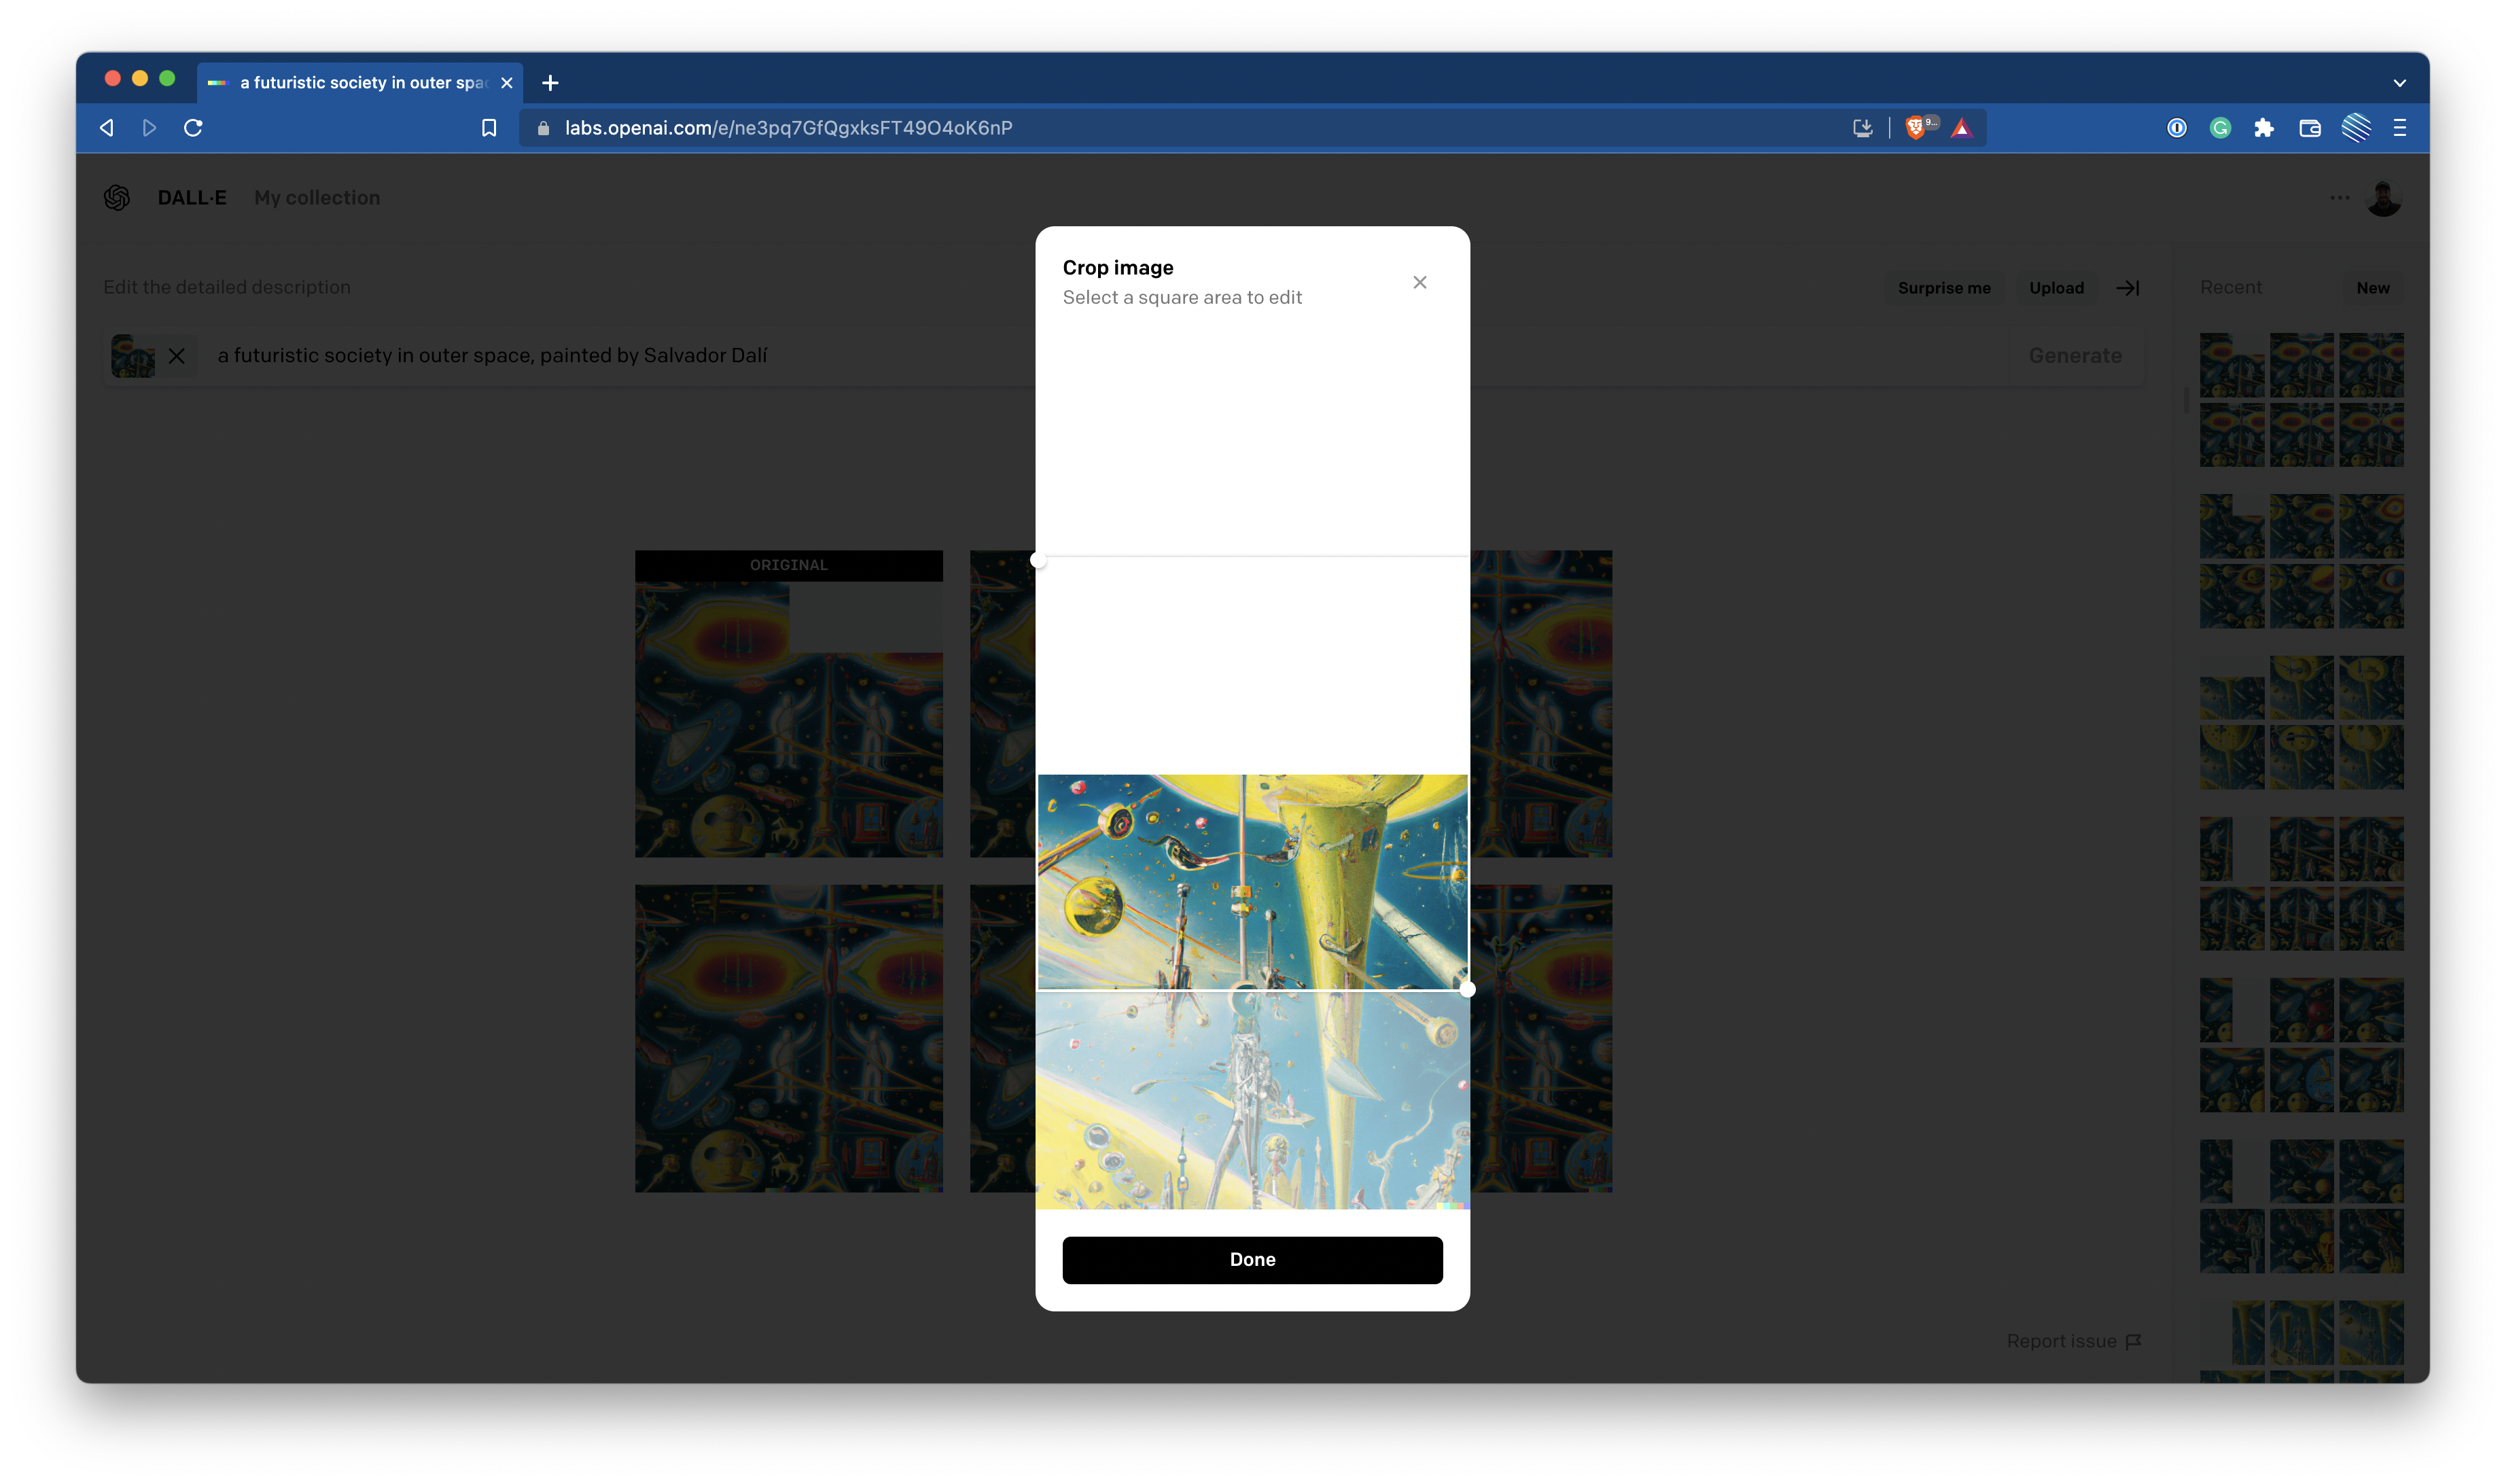
Step 4 - Re-upload the widened image
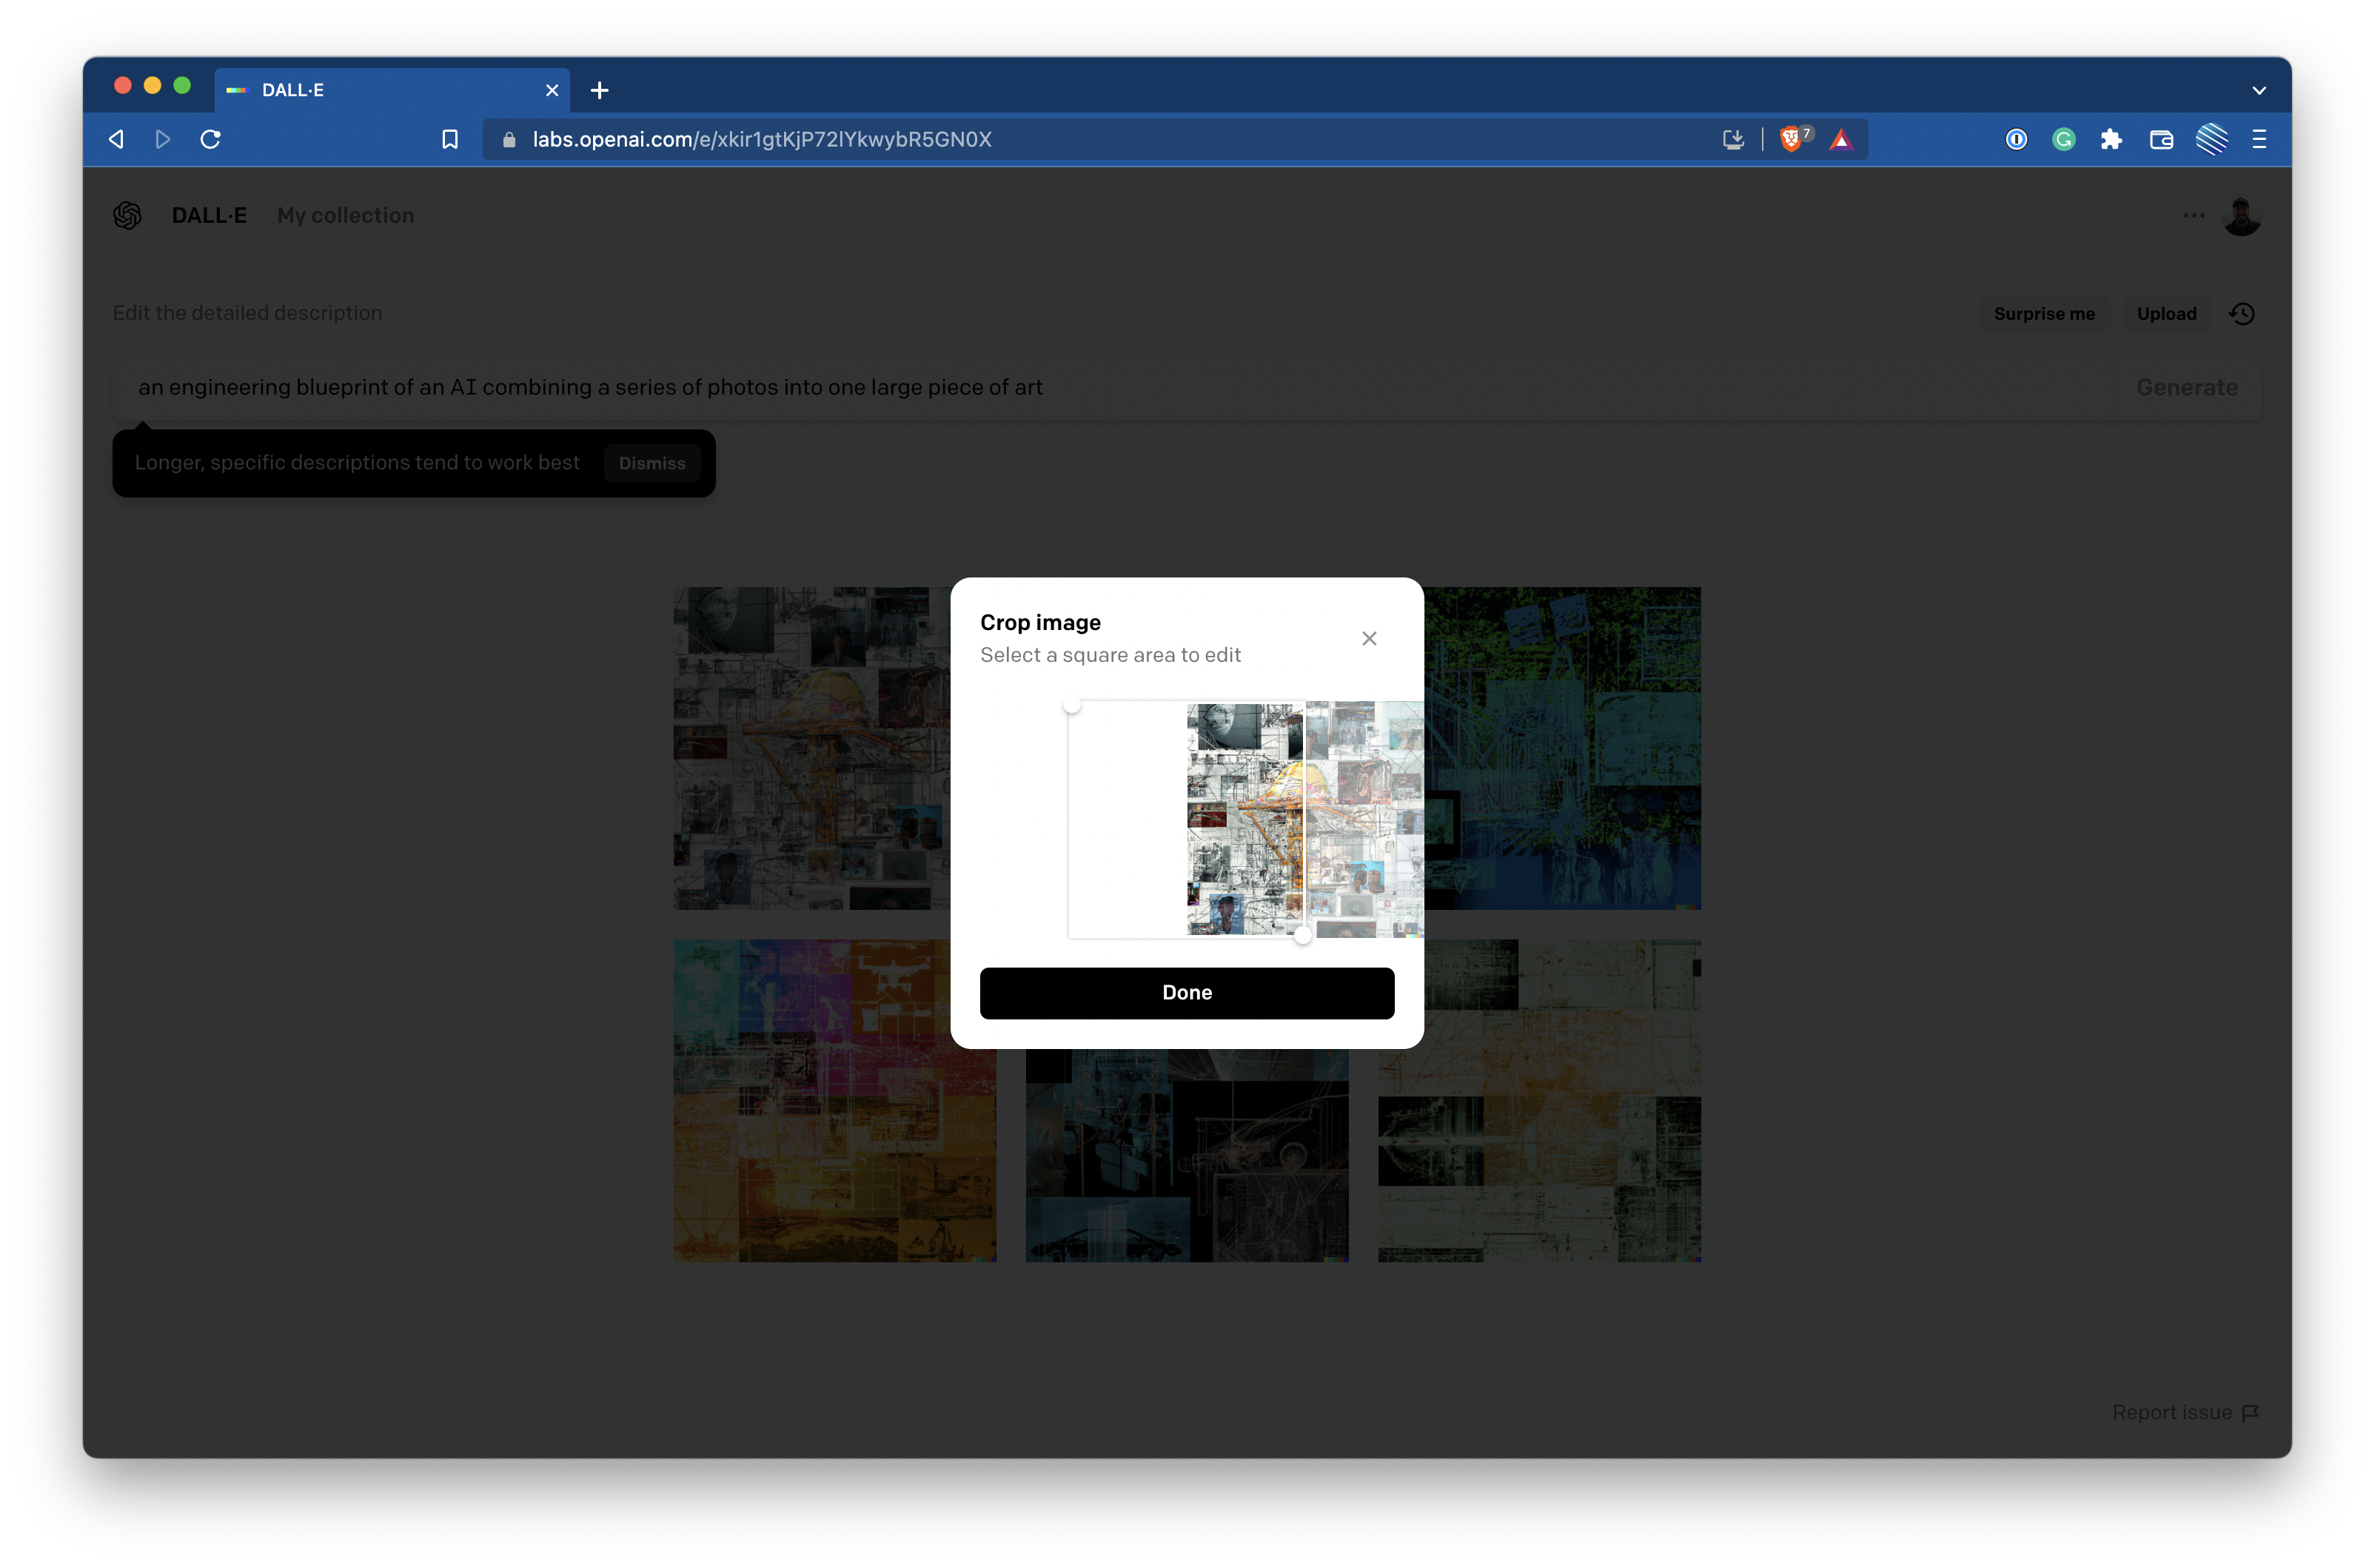
After uploading the image, DALL·E 2 will automatically suggest a cropping region in the center. This is why it's important to get the dimensions correct on the uploaded image. If everything went well, you should be able to just leave the crop area as-is in the middle and click Done.
Step 5 - Run the prompt again
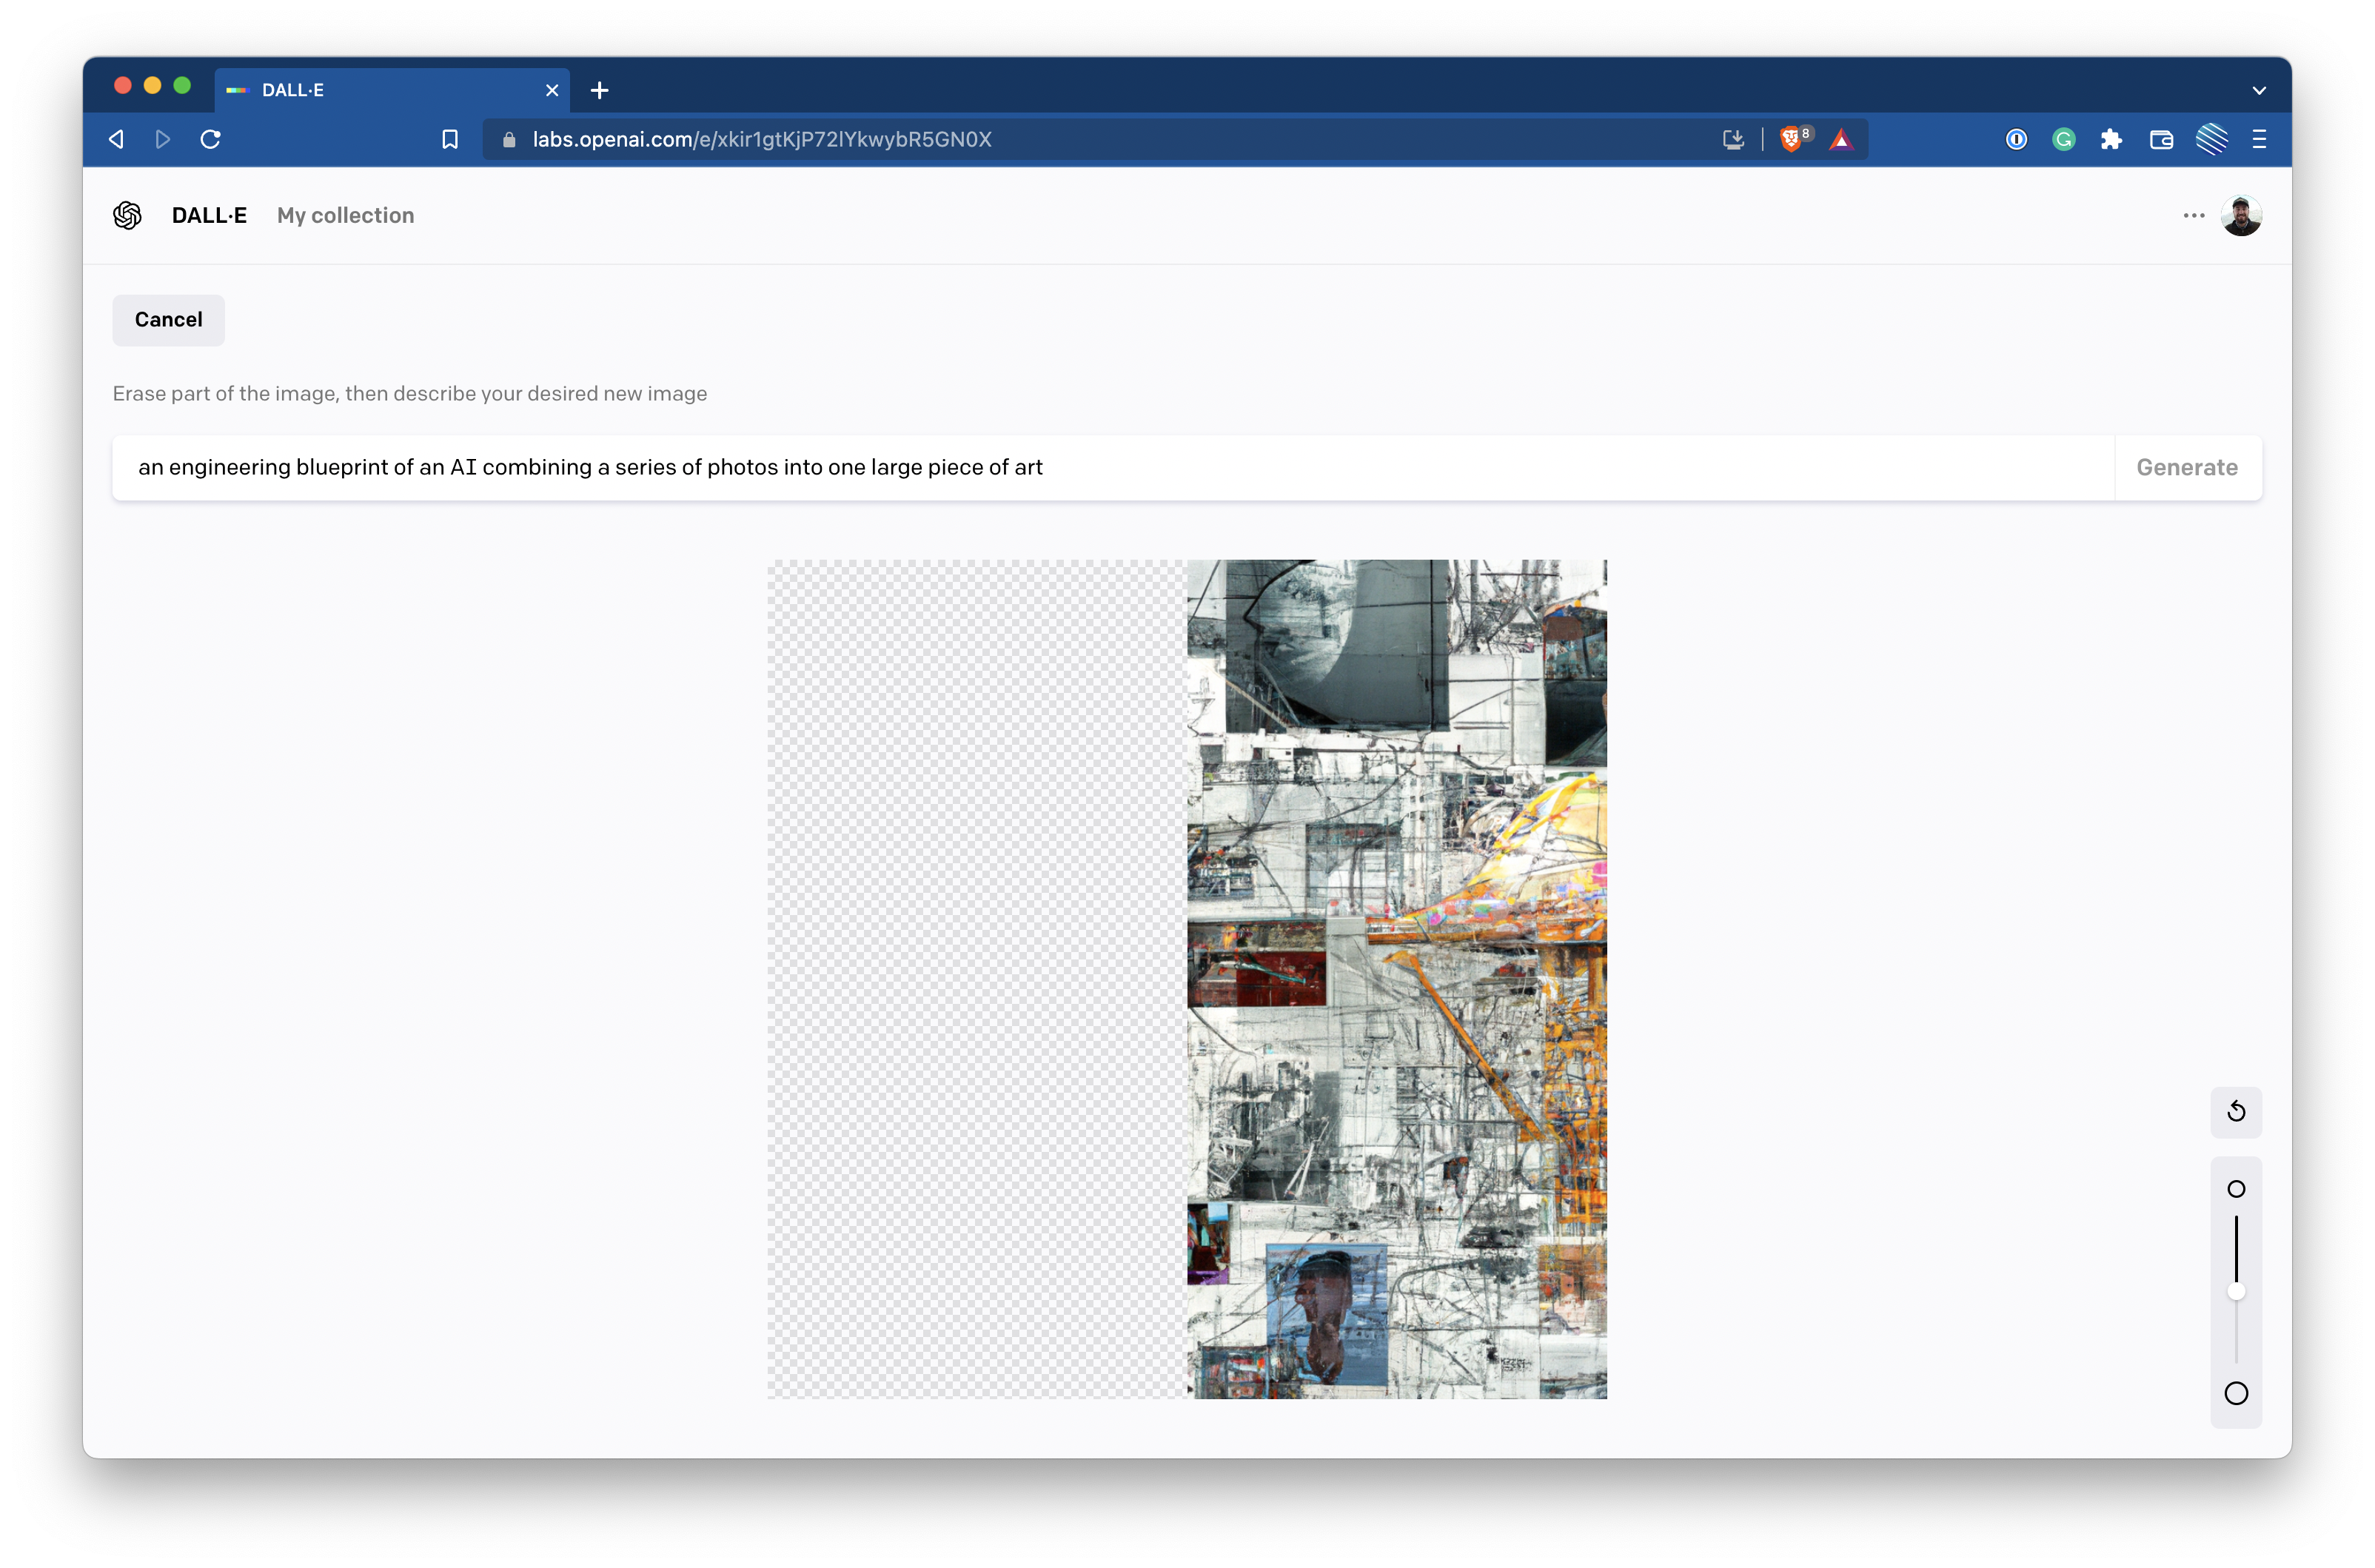
DALL·E 2 treats transparent areas as the portions to replace, which is why we leave the additional space transparent. You still may need to click once in the transparent space to convince the system you've made a change, but you shouldn't need to do any actual erasing at this point. You need to run the exact same prompt every time if you want a uniform image, but you could totally experiment with changing the prompt for each tile to get an even more dynamic result. This is something I haven't tried much yet as I've been focused on large, single-prompt images.
Step 6 - Choose a result you like
DALL·E 2 will present you with 5 additional options. Pick one, keeping in mind the direction you intend to expand the canvas, and where the detail is.
Step 7 - Align the new tile with the original one
Now, it's time to align the two images. If the dimensions were all done properly, you should be able to snap the image to the grid at exactly 50% of the width of the original item. That leaves a transparent area that's 50% of the width of the original tile. You can either export the whole thing and re-upload it to get that last piece or move the spacer.
Step 8 - Adjust the spacer if necessary
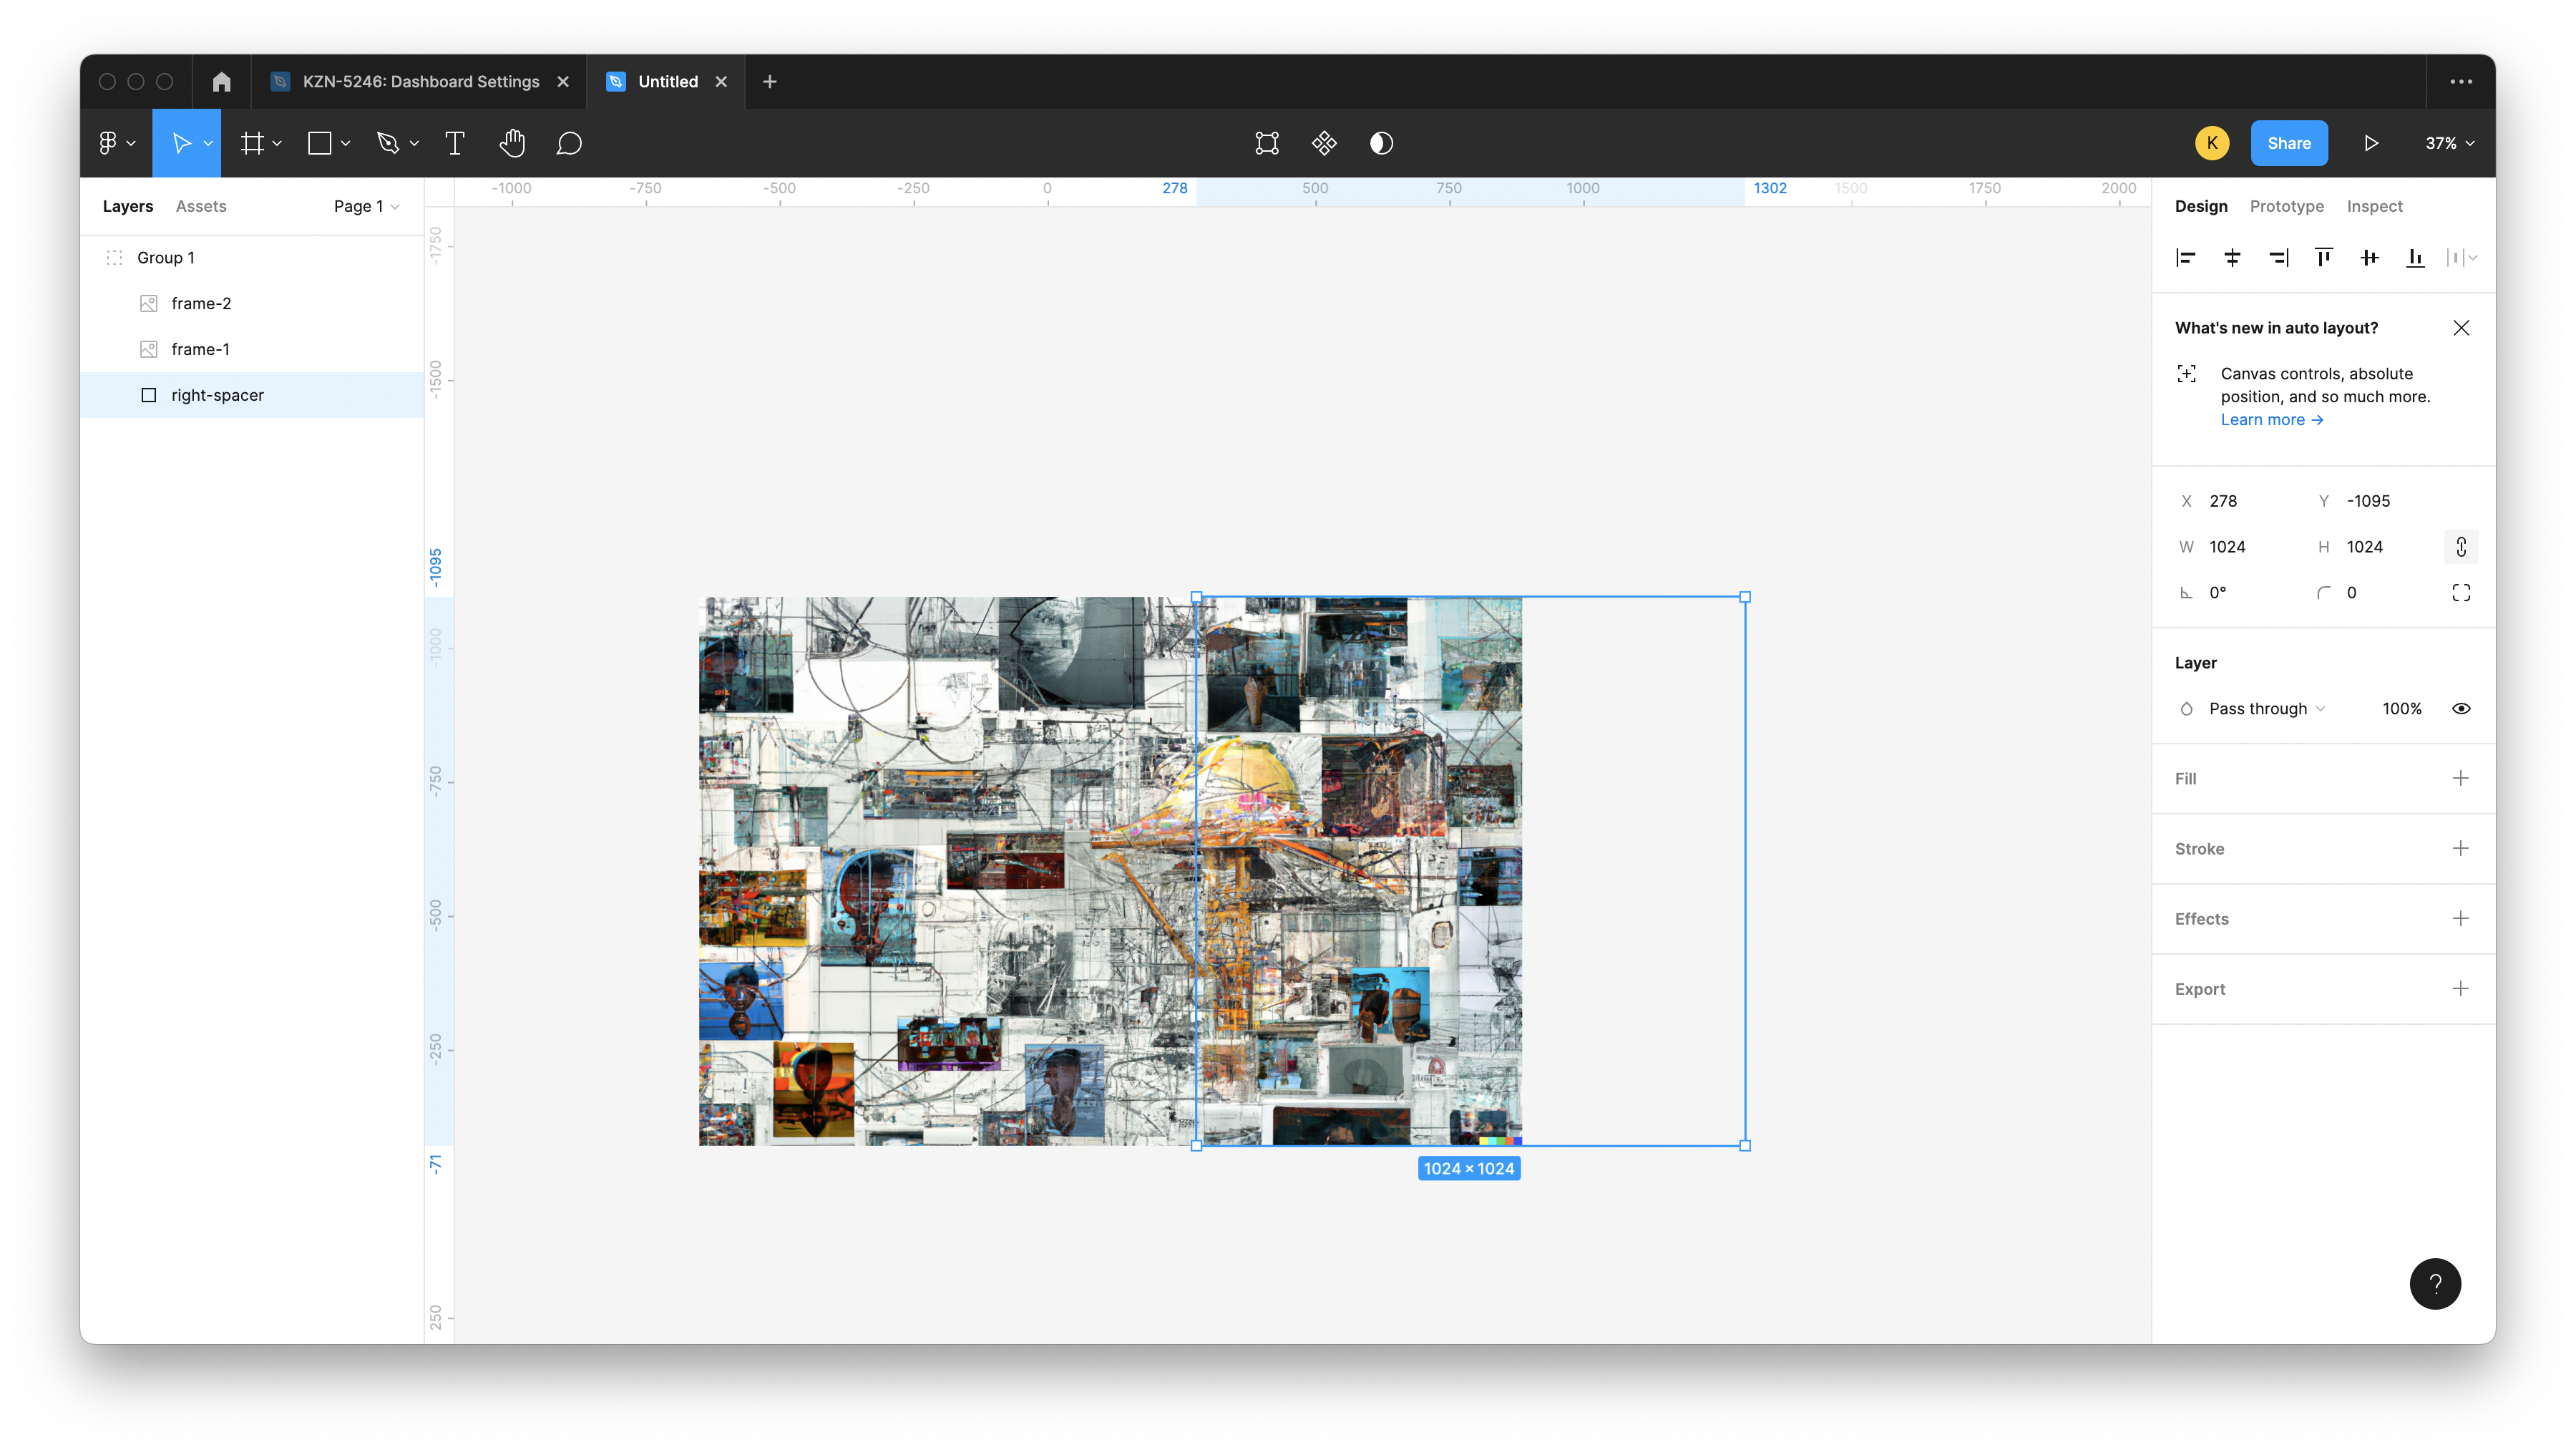
Now, the spacer can be moved to generate the next partial tile for DALL·E 2. Remember, the overlap amount needs to always be 50% of the previous tile if you want it to be super easy to align the tiles after.
Step 9 - Re-upload again, and fill in the missing space

Now, the space to be filled in via inpainting is at the end. You can simply drag the crop area to the side as far as possible, and you should get perfect alignment with the previously downloaded images.
Step 10 - Repeat as necessary, creating spacers and re-uploading to fill in holes
If you upload an image with the DALL·E 2 color banding (see the disclaimer at the top of this post for an example), erase it first before generating the next tile. With this method, you'll always have the required indicator in the bottom right corner, but not scattered throughout your image. You will still need to adjust the final result by cropping the tiles to cover up the extraneous indicators, however, you don't want to upload an image that includes it because the system will try to use those colors and patterns in generating the next piece.
Advanced - Expanding Horizontally and Vertically
Expanding on one direction is easy, but adding a second introduces some complexities. If you're trying to make, say, a large square, it can be tricky to get all the edges to line up. You'll need to do some clever masking and cropping to generate the correct image to upload, otherwise, the result may be the wrong resolution and lead to a less than ideal output.
Step 1 - Crop the First Vertical Section
To obtain this uploaded image, I took the left-most square of a row and added a spacer above it. You can also do the same for the other side of the image, but joining them in the middle is the part that requires some masking and clever cropping.
Repeat this process until there are no more tiles you can place that don't share an edge with more than one completed tile.
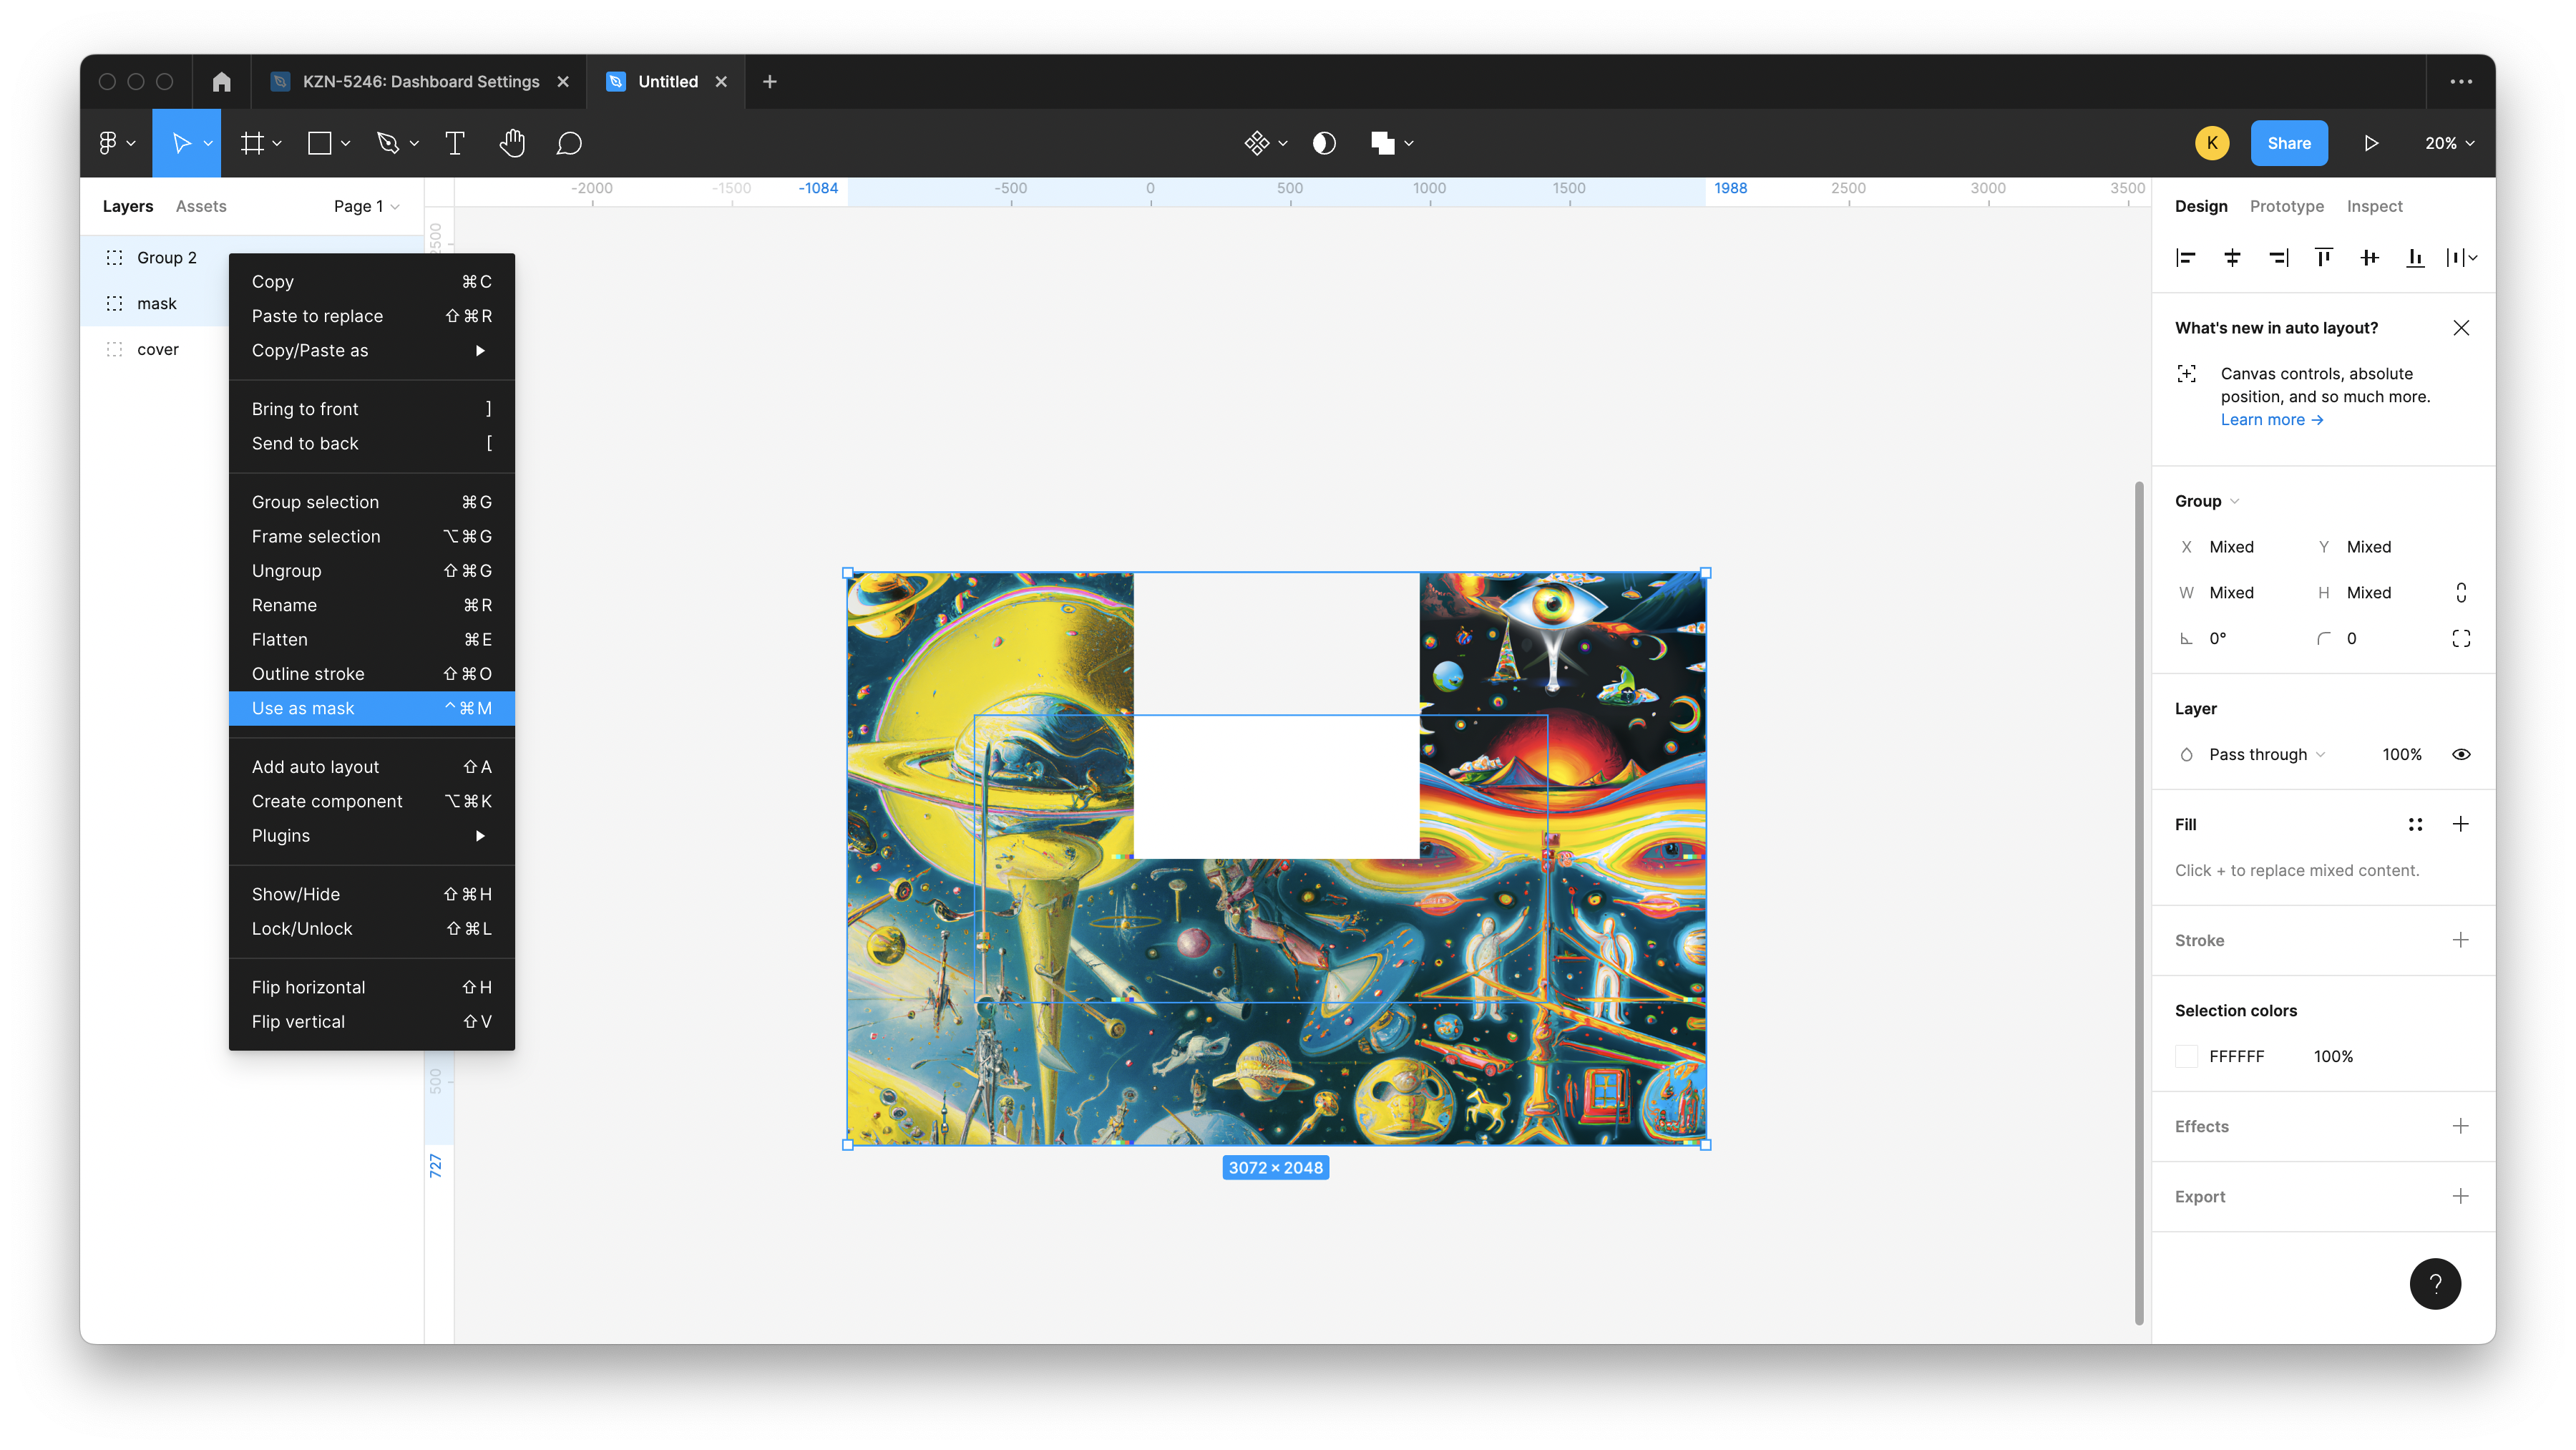
Step 2 - Create a Mask of The Necessary Areas
Now, for the tricky part. We need to process an image where the output depends on three different edges - one to the left, the bottom, and the right. To do this, we create a mask that's offset by 50%, in order to have a space that DALL·E 2 can fill.
Your mask should be 2048x1024 pixels - one output square high, and two squares wide. This will allow the next output to be the expected resolution. At this step, we are only generating 1/4 of a tile in each run, rather than 1/2.
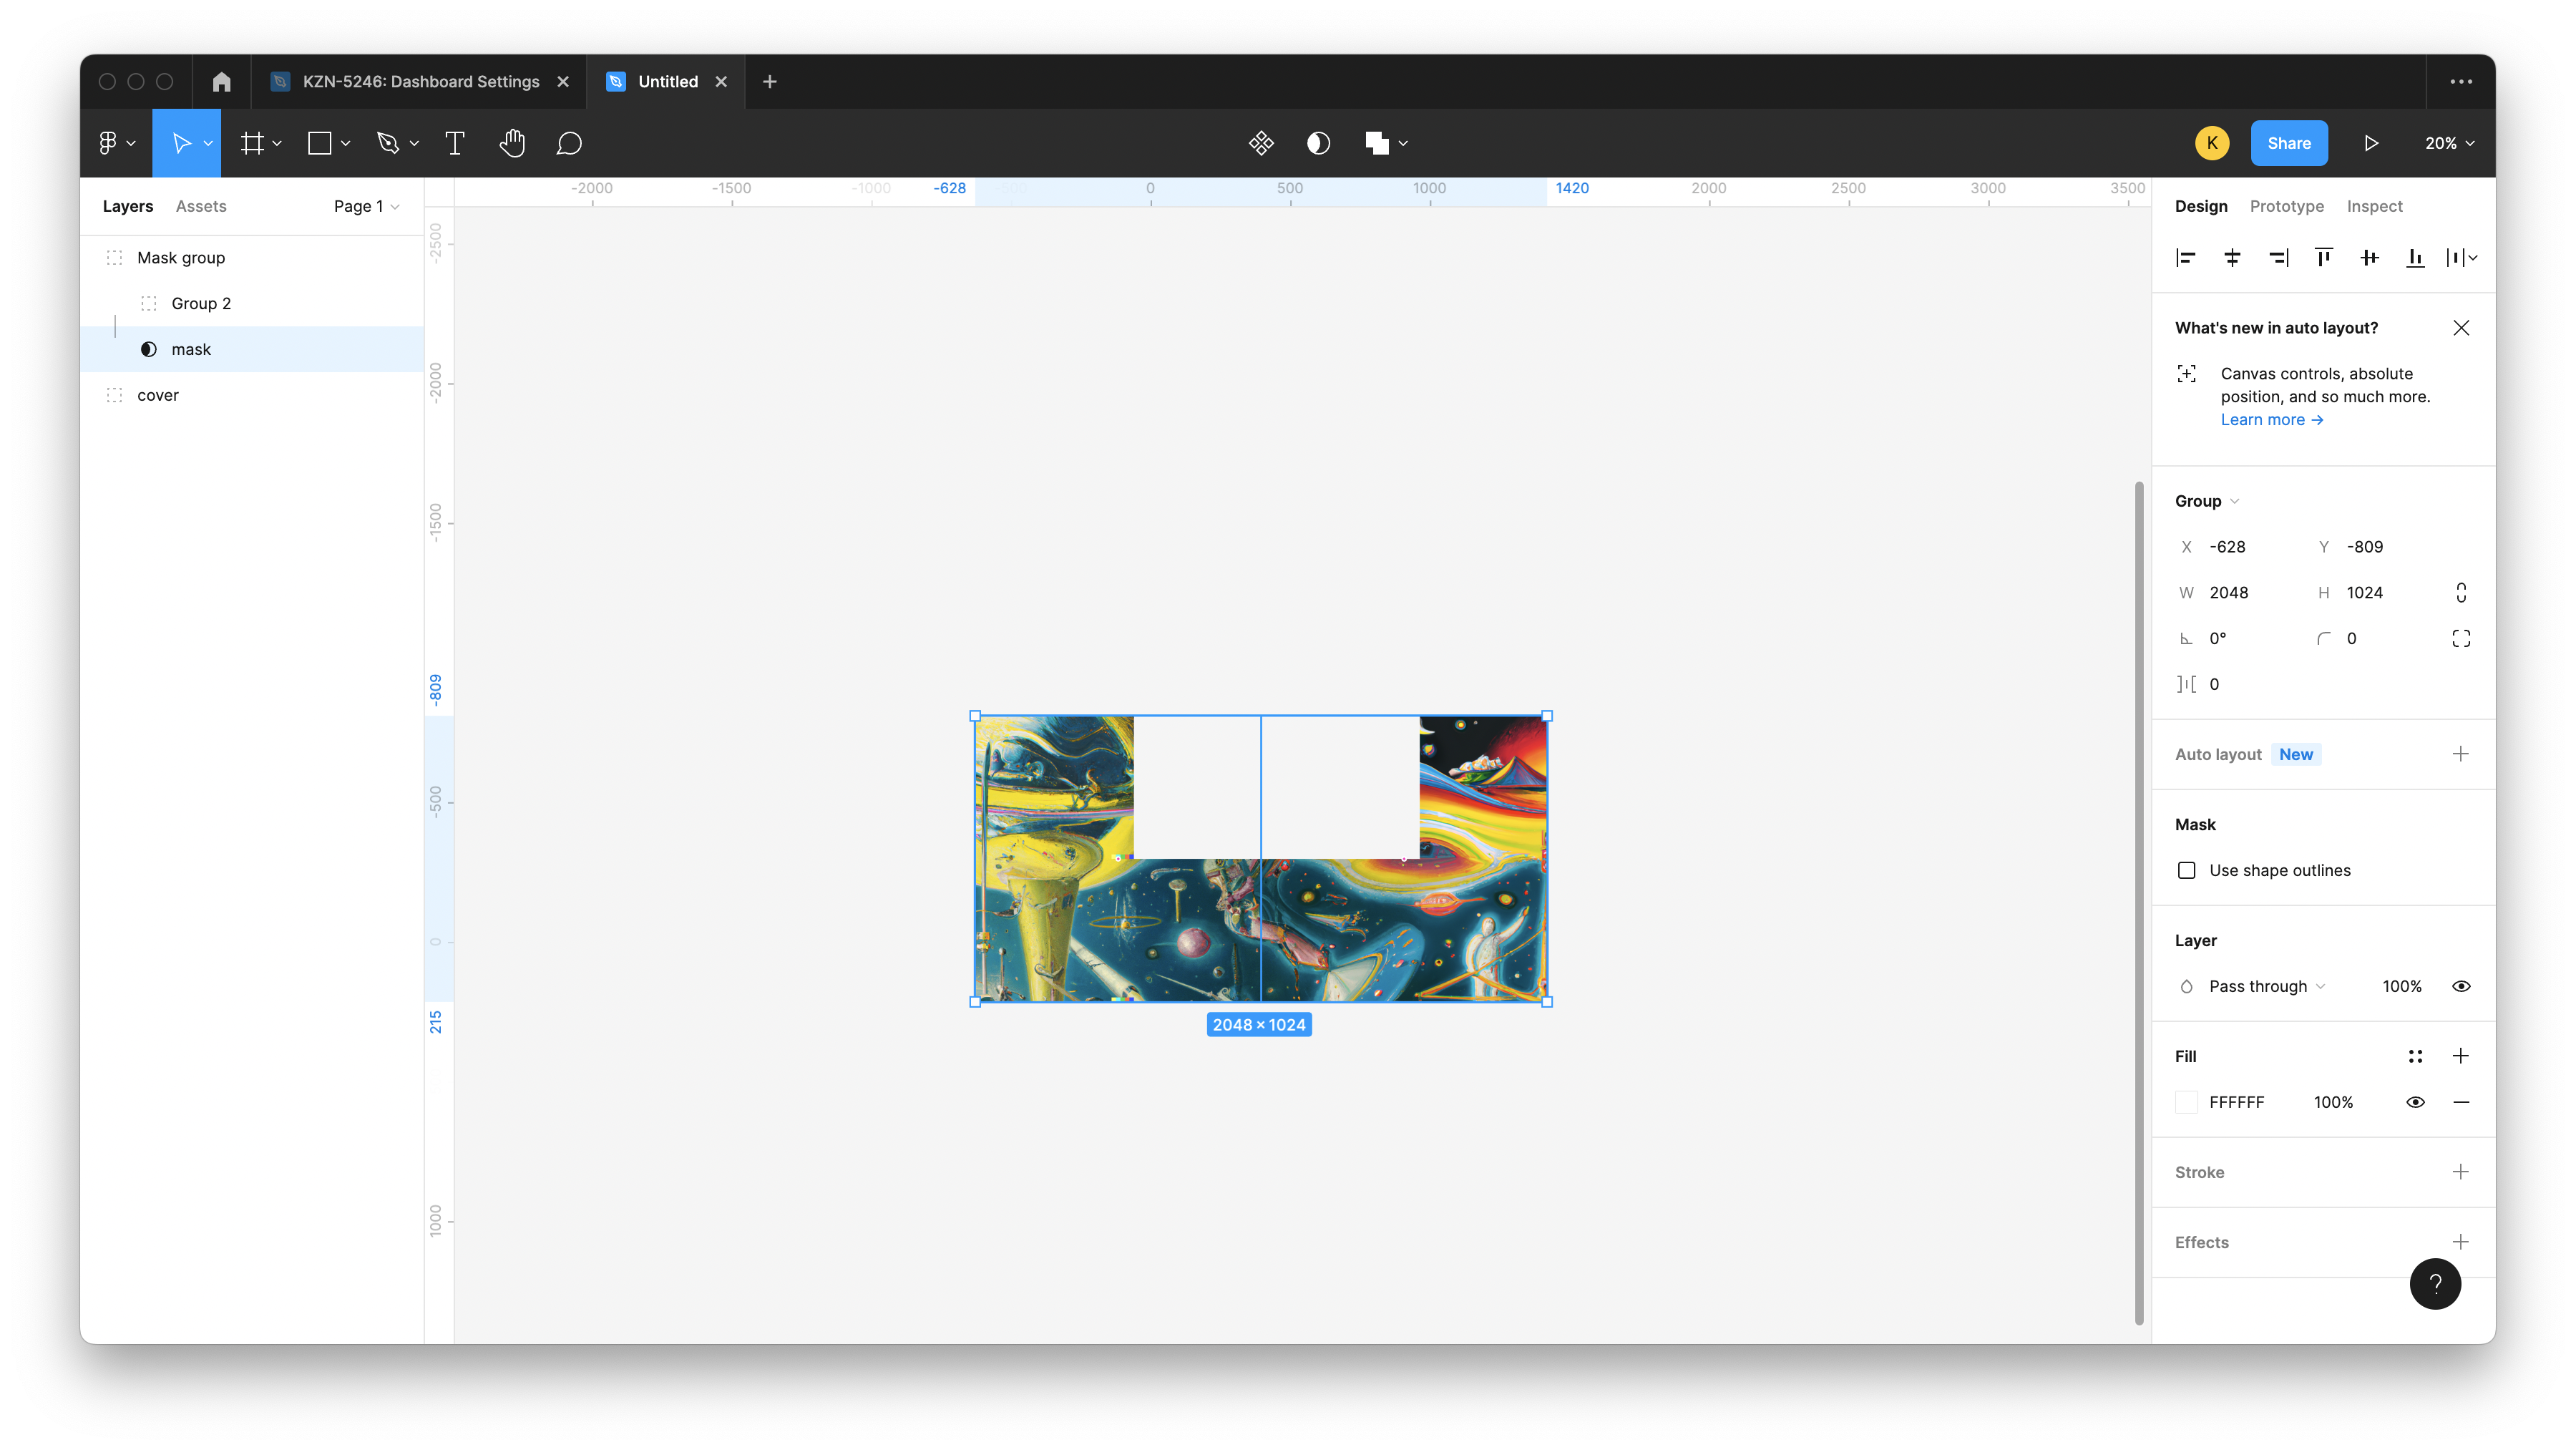
Depending on how you go through this process, you may end up with a varying number of "tricky" tiles like this, and they may be in different places. The technique of masking and filling in 1/4 of a tile at a time still applies.
Step 3 - Use the Editor to Generate the Missing Piece
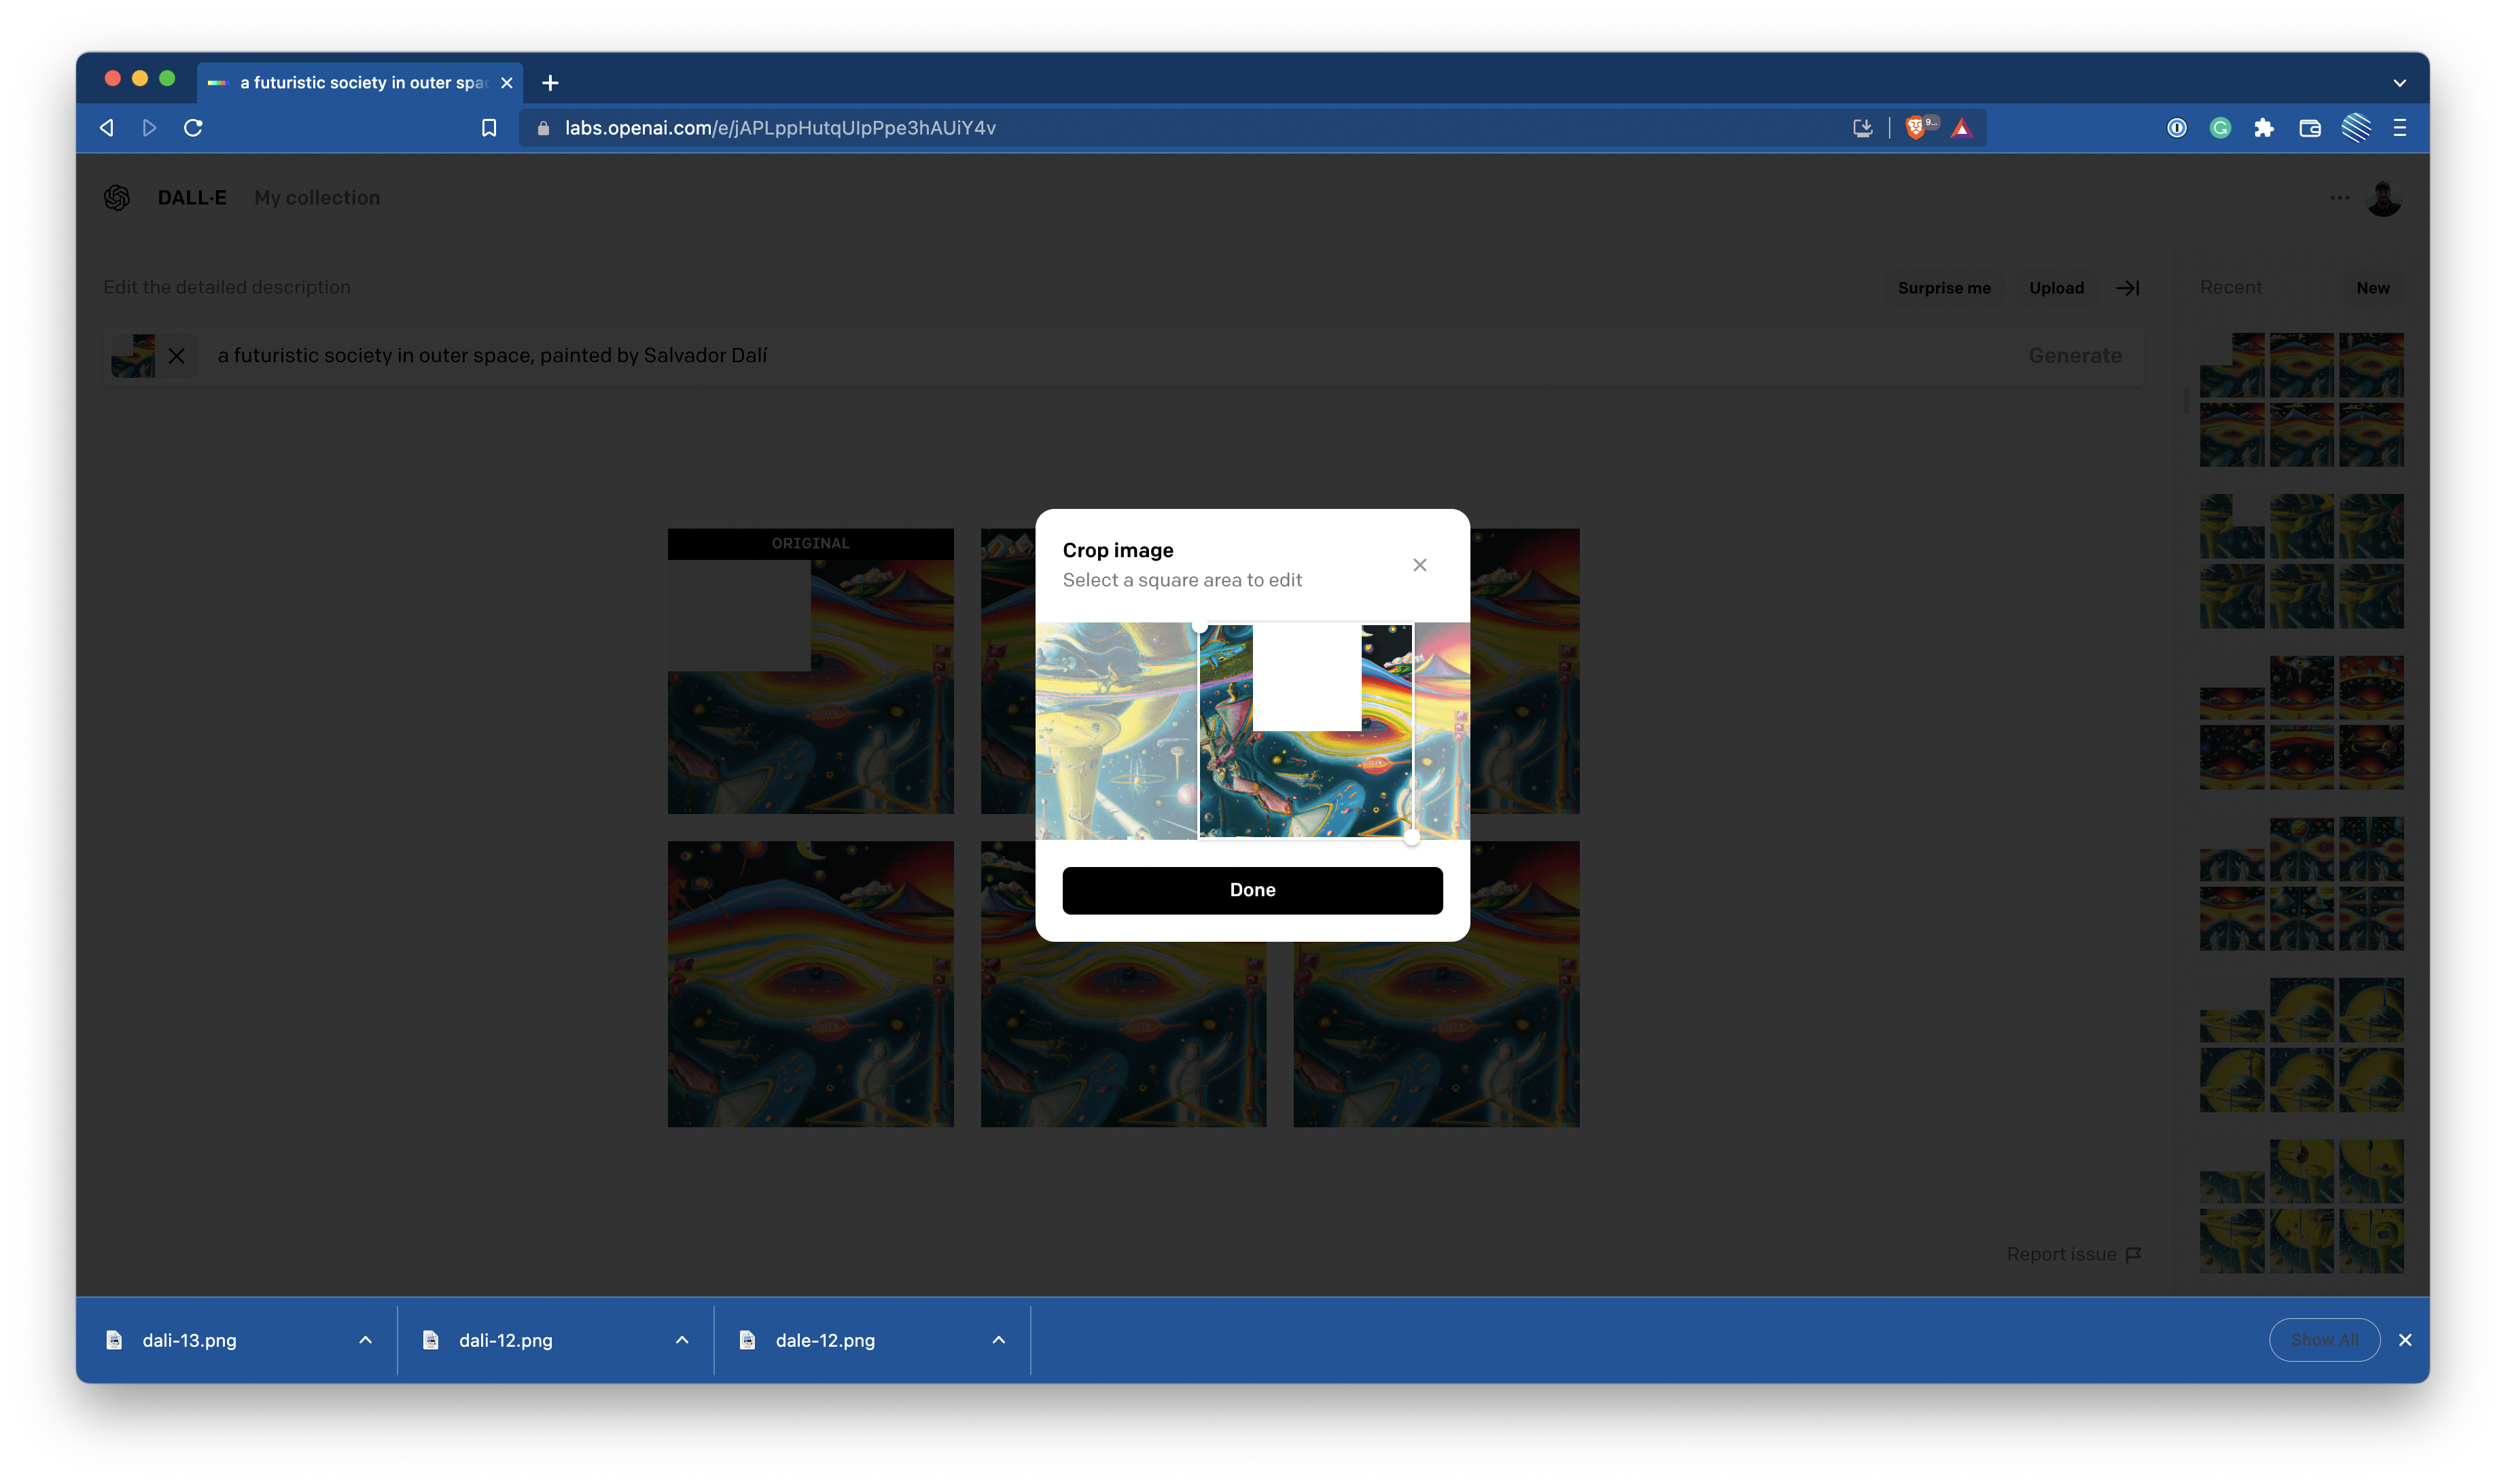
As before, you can now export and upload the image, then adjust the cropping to generate the last missing piece. If you worked from left to right, everything will line up easily. However, if you moved in from both edges simultaneously, there will likely be one tile you have to manually align because it doesn't use an even offset from the previous tiles.
An Example
The cover image for this post is a good example of a simple horizontal expansion, but expanding in both directions (vertically and horizontally) can yield even more impressive results. Here's one I worked on, and it took 23 different runs stitched together to generate. There is much more detail here, and much like a real Salvador Dalí painting, there is a lot to discover.
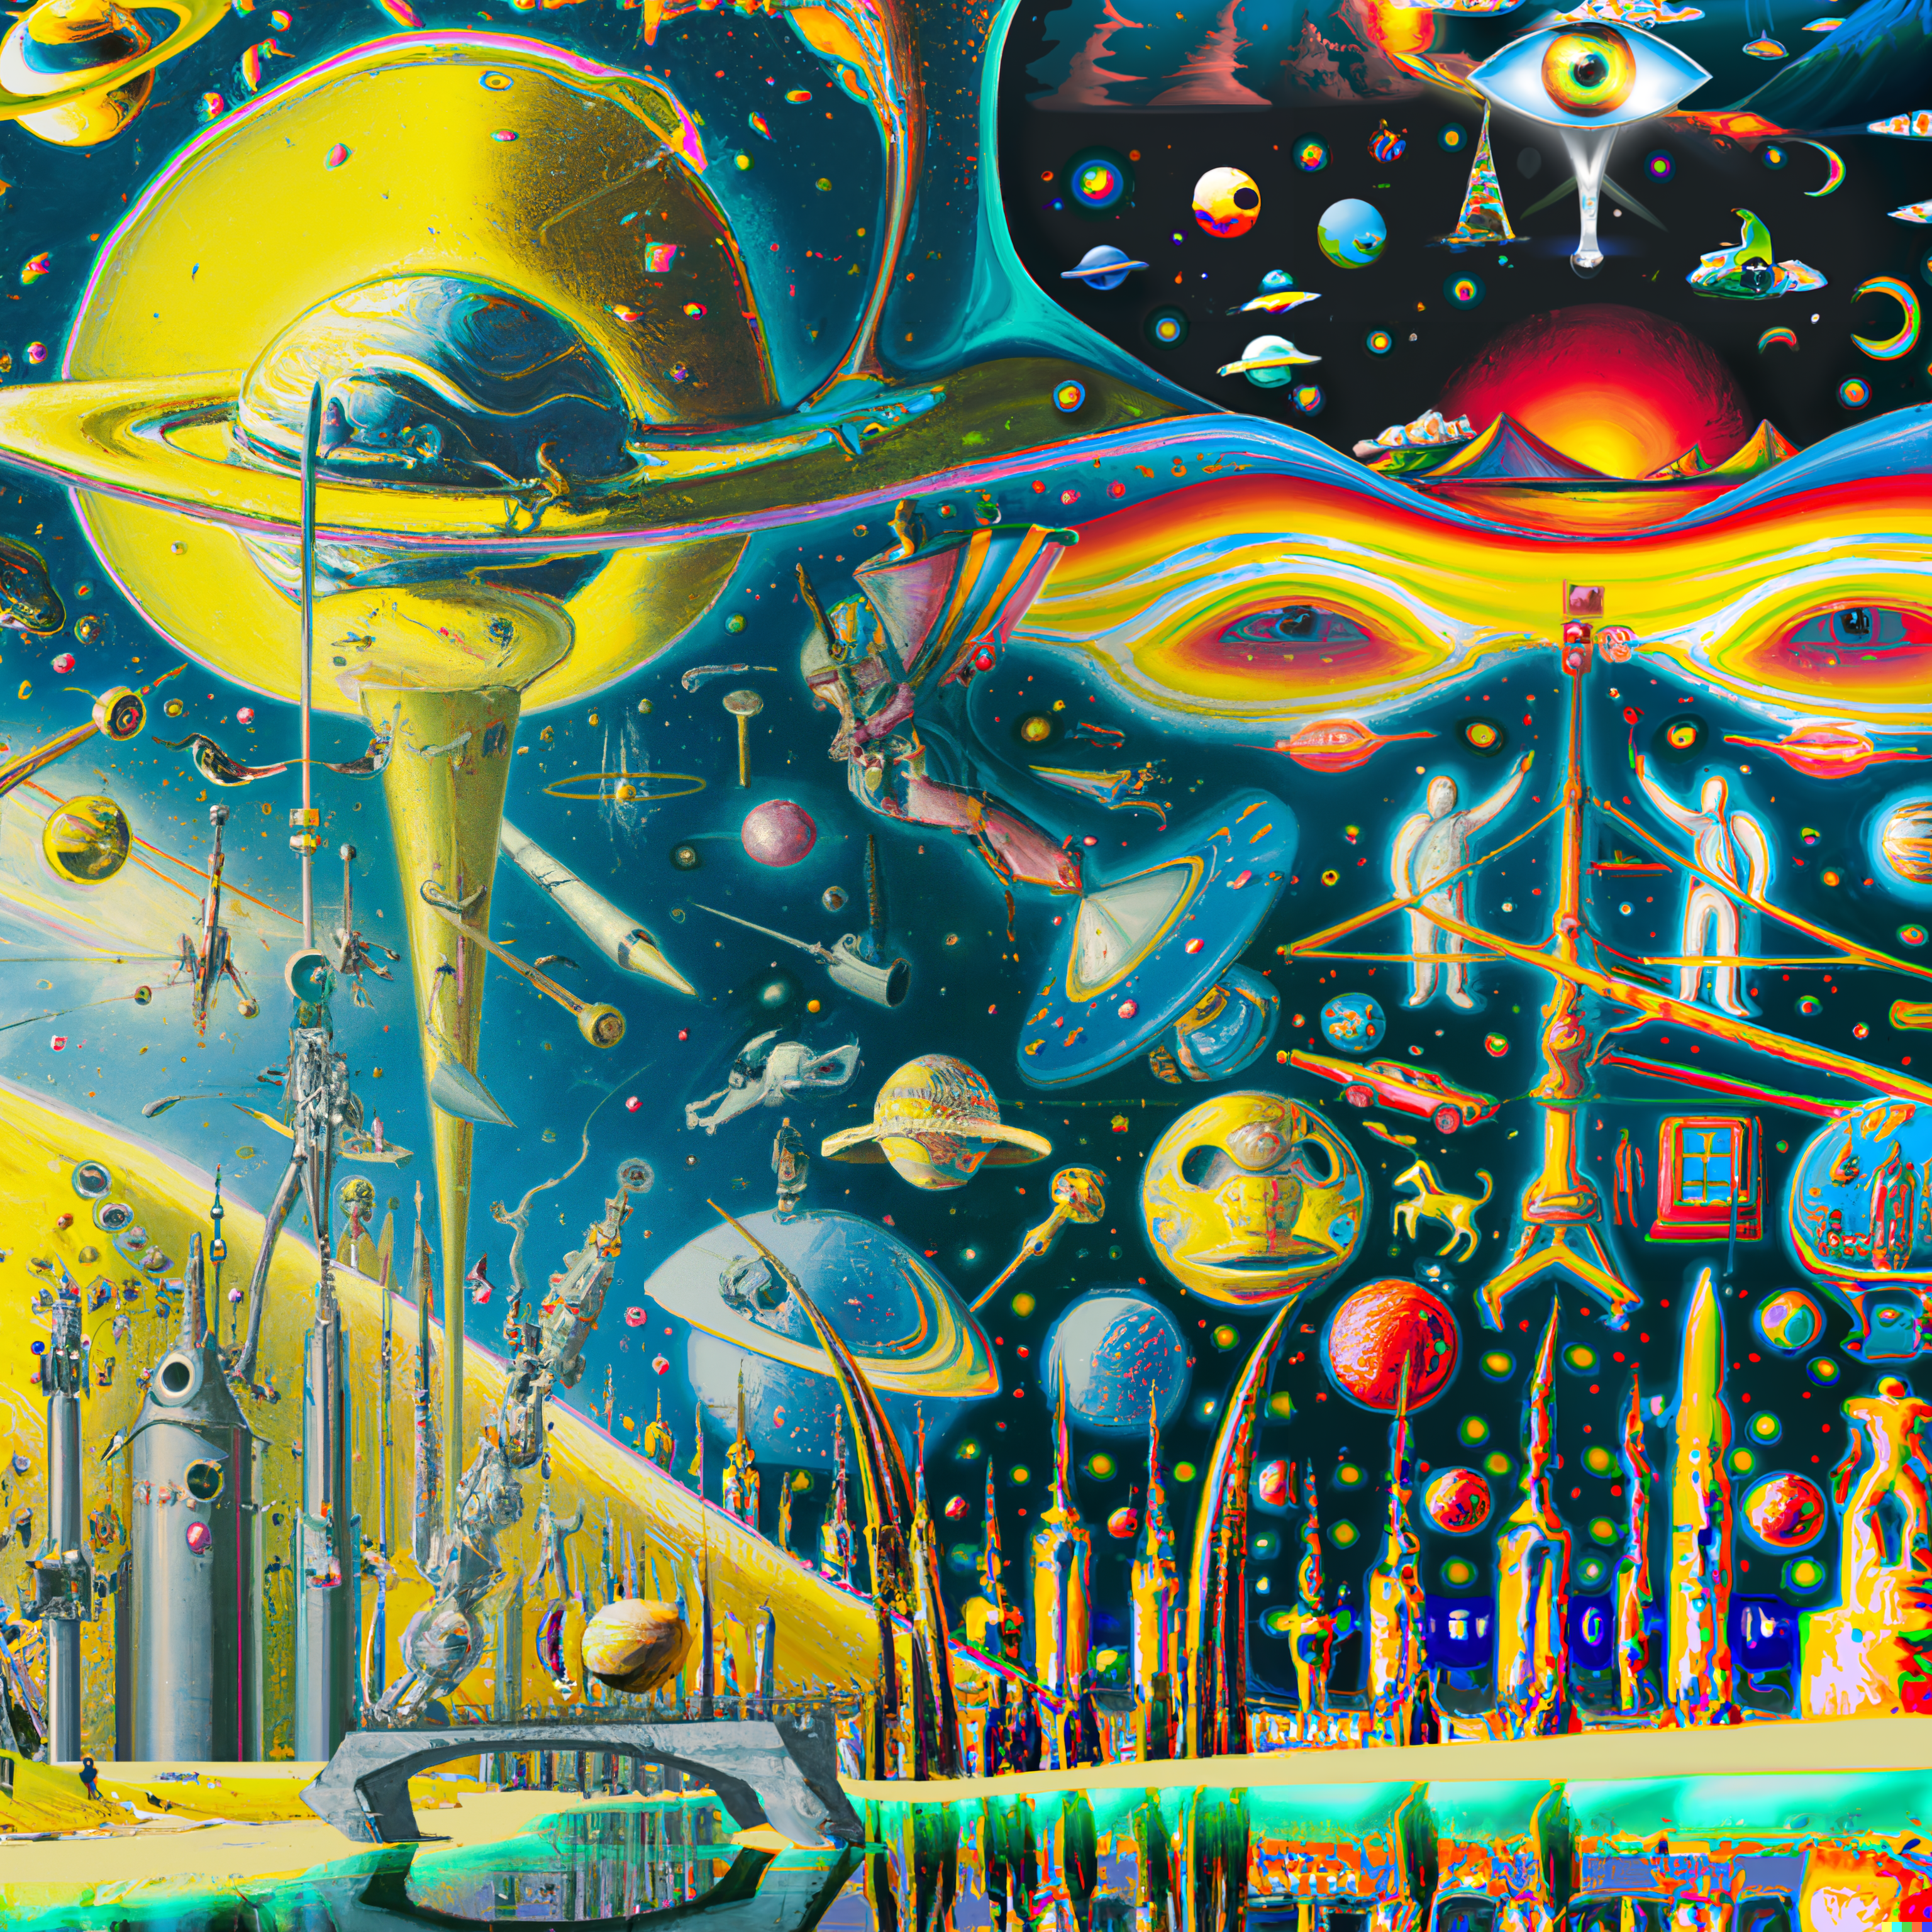
The prompt here was "a futuristic society in outer space, painted by Salvador Dalí"
One important note is that order matters when deciding which tile to generate next. You can see the GIF below of the order in which I generated these tiles. This order was specific to preserve certain details. For example, if I'd worked down starting from the top right, the city wouldn't have extended all the way across the bottom, because the planets and dark sky would have taken over the entire right-hand portion.

It takes time to get the hang of what the system might do given specific inputs, so don't be afraid to employ a lot of trial and error! Since this image took 23 iterations, I'd be able to generate two images of this size per day (before hitting the 50 runs daily limit) with space for 4 "mistakes" or re-runs. I'd recommend at the start attempting to only make one of these composites in a day because that gives plenty of buffer for experimentation.
This has been a really powerful technique to allow me to expand how I use DALL·E 2. If you have access to the system, I'd love to see some of the large-format creations you generate! Either way, I love to talk about DALL·E 2 and all things software and technology over on Twitter, so come say hello!